3.6
Line Programming
By using line configuration, you can program the parameters for individual lines. The programming
decisions you make for a particular line will only be true for that line and not for the entire telephone
system. You should make a record in Chapter 4 of all programming decisions that you make—it will help
you keep track of what you have done and will help you troubleshoot any problem that might arise later.
NOTE:
A lighted LED next to the programming button for the selection indicates the current
configuration. When a single button provides a toggle (on/off) action, the lighted LED
indicates the active feature.
The first step in any programming sequence is to enter the base level. Once in this mode, you can dial the
feature code for any desired configuration. Enter the base level with the following procedure: press
INTERCOM then dial
✳
# 7 4 6
✳
. The last step is to press the SPEAKER button to end the
programming procedure and return the system to normal operation.
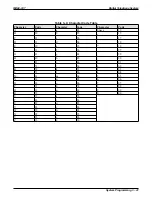
To make a line port selection, press a programming button or dial a selection number on the keypad as
detailed in the following chart.
Table 3–3: Line Port Codes
LINE
PROG. BUTTONS
KEYPAD BUTTONS
1–14
A1–A14
01–14
15, 16
B1, B2
15, 16
17–24
HOLD plus A1–A8
17–24
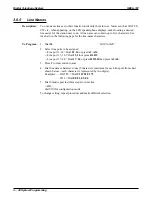
3.6.1
Abandoned Hold Release
Description:
When a distant party abandons a hold condition and disconnects from a line (hangs up),
the central office will send a forward disconnect signal to the digital telephone system.
This signal can be either 50 ms. or 350 ms. in length. Find out from the telephone
company what the signal length is, and program the all of the central office line ports to
match it using this programming procedure.
To Program:
1. Dial 38.
“HOLD RELEASE 50 ”
2. Select hold release time for line ports (LED On = 50 msec).
—Line port 1–14 = Dial 01–14 or press A1–A14
—Line port 15, 16 = Dial 15, 16 or press B1, B2
—Line port 17–24 = Dial 17– 24 or press HOLD then press A1–A8.
3. Dial
✳
for configuration mode.
To change setting, repeat procedure and make different selection.
IMI66–107
Digital Telephone System
System Programming 3 – 37
Содержание Air Impact DSU
Страница 2: ...Printed in U S A GCA47 157 ...
Страница 30: ......
Страница 85: ...Figure 2 26 Installing The Batteries batt1 cdr IMI66 107 Digital Telephone System Installing The DSU 2 55 ...
Страница 91: ...Figure 2 28 Detailing The ATI D Dimensions IMI66 107 Digital Telephone System Installing The DSU 2 61 ...
Страница 112: ......
Страница 192: ...Digital Telephone System IMI66 107 3 80 System Programming ...
Страница 283: ......
Страница 284: ......
Страница 285: ......
Страница 286: ......
Страница 287: ......
Страница 288: ......
Страница 289: ......
Страница 290: ......
Страница 291: ......
Страница 292: ......
Страница 293: ......
Страница 294: ......
Страница 295: ......
Страница 296: ......
Страница 297: ......
Страница 298: ......
Страница 299: ......
Страница 300: ......
Страница 301: ......
Страница 302: ......
Страница 303: ......
Страница 304: ......
Страница 305: ......
Страница 306: ......
Страница 307: ......
Страница 308: ......
Страница 309: ......
Страница 310: ......
Страница 311: ......
Страница 312: ......
Страница 313: ......
Страница 314: ......
Страница 315: ......
Страница 316: ......
Страница 317: ......
Страница 318: ......
Страница 319: ......
Страница 320: ......
Страница 321: ......
Страница 322: ......
Страница 323: ......
Страница 324: ......
Страница 325: ......
Страница 326: ......
Страница 327: ......
Страница 328: ......
Страница 329: ......
Страница 330: ......
Страница 331: ......
Страница 332: ......
Страница 333: ......
Страница 334: ......
Страница 335: ......
Страница 336: ......
Страница 337: ......
Страница 338: ......
Страница 339: ......
Страница 340: ......
Страница 431: ......
Страница 436: ......
Страница 437: ......
Страница 438: ......

