


180
These records allow anyone on the Internet to type either
“mydomain.com” or “www.mydomain.com” in order to access your
Web site. To set up these records, go to the Parameters section of the
DNS server in the Cobalt user interface (UI).
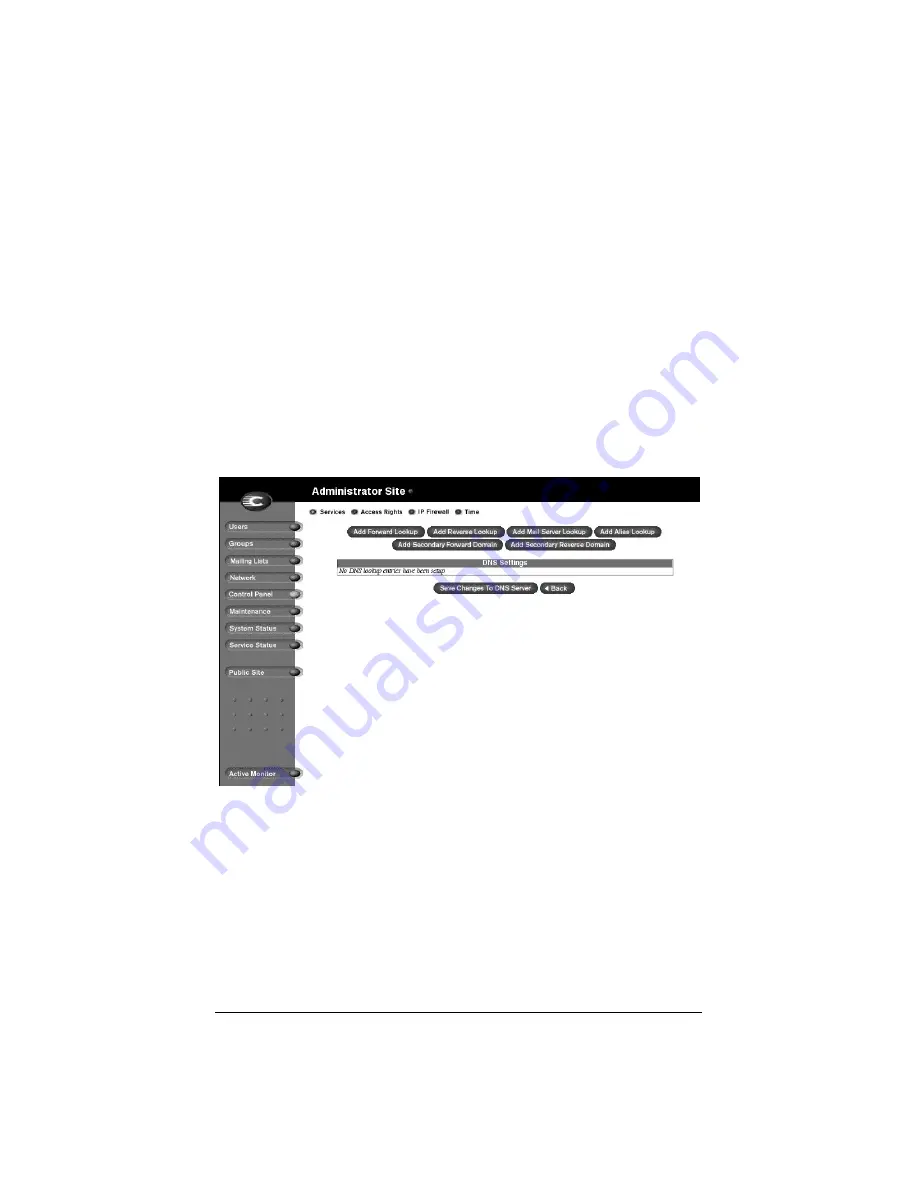
1.
On the
Administrator Site
screen, click
Control Panel
on the left.
The Service Settings table appears.
2.
Click the check box to enable Domain Name System (DNS)
service.
3.
Click
Save Changes
. The browser screen refreshes.
4.
Click
Parameters
next to the DNS service in the Service Settings
table.
The DNS Settings table appears, as in Figure 55.
Figure 55 DNS Settings table
Содержание Cobalt Qube 2
Страница 1: ...Cobalt QubeTM 2 User Manual...
Страница 6: ...vi...
Страница 20: ...Chapter 1 6 Figure 3 Administrator Site screen Figure 4 Public Site screen...
Страница 26: ...Chapter 1 12...
Страница 45: ...Setting up the Qube 2 31 Figure 15 shows the online registration page Figure 15 Online registration page...
Страница 46: ...Chapter 2 32 Figure 16 shows the Public Site screen on the Qube 2 Figure 16 Public site on the Qube 2...
Страница 68: ...Chapter 3 54...
Страница 70: ...Chapter 4 56 Figure 17 Administrator Site screen...
Страница 72: ...Chapter 4 58 Figure 18 shows the Administrator Settings table Figure 18 Administrator Settings table...
Страница 76: ...Chapter 4 62 Figure 19 shows the User Defaults table Figure 19 User Defaults table...
Страница 78: ...Chapter 4 64 Figure 20 shows the Add New User table Figure 20 Add New User table...
Страница 81: ...Administrator Site 67 Figure 21 shows the Email Settings table for a user Figure 21 Email Settings table...
Страница 87: ...Administrator Site 73 Figure 24 shows the Add New Group table Figure 24 Add New Group table...
Страница 184: ...Appendix B 170...
Страница 206: ...Appendix E 192...
Страница 218: ...Appendix F 204...


