


110
Removing an IP filtering rule
To remove an IP filtering rule:
1.
On the
Administrator Site
screen, click
Control Panel
on the left.
2.
Click
IP Firewall
at the top. The IP Filtering Rule List table
appears.
3.
In the list, locate the filtering rule that you want to remove.
4.
Click the brown trashcan
icon next to that rule. A confirmation
dialog box appears, asking if you want to delete the IP filtering rule.
5.
Click
OK
in the confirmation dialog box. The UI on the screen
refreshes and the IP filtering List table appears. The deleted rule has
been removed from the table.
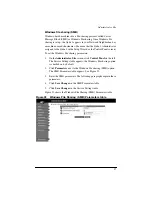
Time
The Qube 2 Administrator can configure the correct time and date and
the time zone for the Qube 2.
1.
On the
Administrator Site
screen, click
Control Panel
on the left.
The Service Settings table appears.
2.
Click
Time
at the top. The Time Settings table appears.
3.
Select the time and date with the pull-down menus.
4.
Select the correct time zone in the Time Zone pull-down menu.
5.
As an option, you can also specify the name of a Network Time
Protocol (NTP) server with which the Qube 2 will synchronize its
internal clock every night. Enter the host name or IP address of the
NTP server. Click Synchronize Now.
You can find a list of publicly available NTP servers at:
http://www.eecis.udel.edu/~mills/ntp/servers.html.
6.
Click
Save Changes
.
Содержание Cobalt Qube 2
Страница 1: ...Cobalt QubeTM 2 User Manual...
Страница 6: ...vi...
Страница 20: ...Chapter 1 6 Figure 3 Administrator Site screen Figure 4 Public Site screen...
Страница 26: ...Chapter 1 12...
Страница 45: ...Setting up the Qube 2 31 Figure 15 shows the online registration page Figure 15 Online registration page...
Страница 46: ...Chapter 2 32 Figure 16 shows the Public Site screen on the Qube 2 Figure 16 Public site on the Qube 2...
Страница 68: ...Chapter 3 54...
Страница 70: ...Chapter 4 56 Figure 17 Administrator Site screen...
Страница 72: ...Chapter 4 58 Figure 18 shows the Administrator Settings table Figure 18 Administrator Settings table...
Страница 76: ...Chapter 4 62 Figure 19 shows the User Defaults table Figure 19 User Defaults table...
Страница 78: ...Chapter 4 64 Figure 20 shows the Add New User table Figure 20 Add New User table...
Страница 81: ...Administrator Site 67 Figure 21 shows the Email Settings table for a user Figure 21 Email Settings table...
Страница 87: ...Administrator Site 73 Figure 24 shows the Add New Group table Figure 24 Add New Group table...
Страница 184: ...Appendix B 170...
Страница 206: ...Appendix E 192...
Страница 218: ...Appendix F 204...


