15
Clutches
GASOLINE ENGINE, MUFFLER, FUEL
SYSTEM, AND CLUTCHES
4.
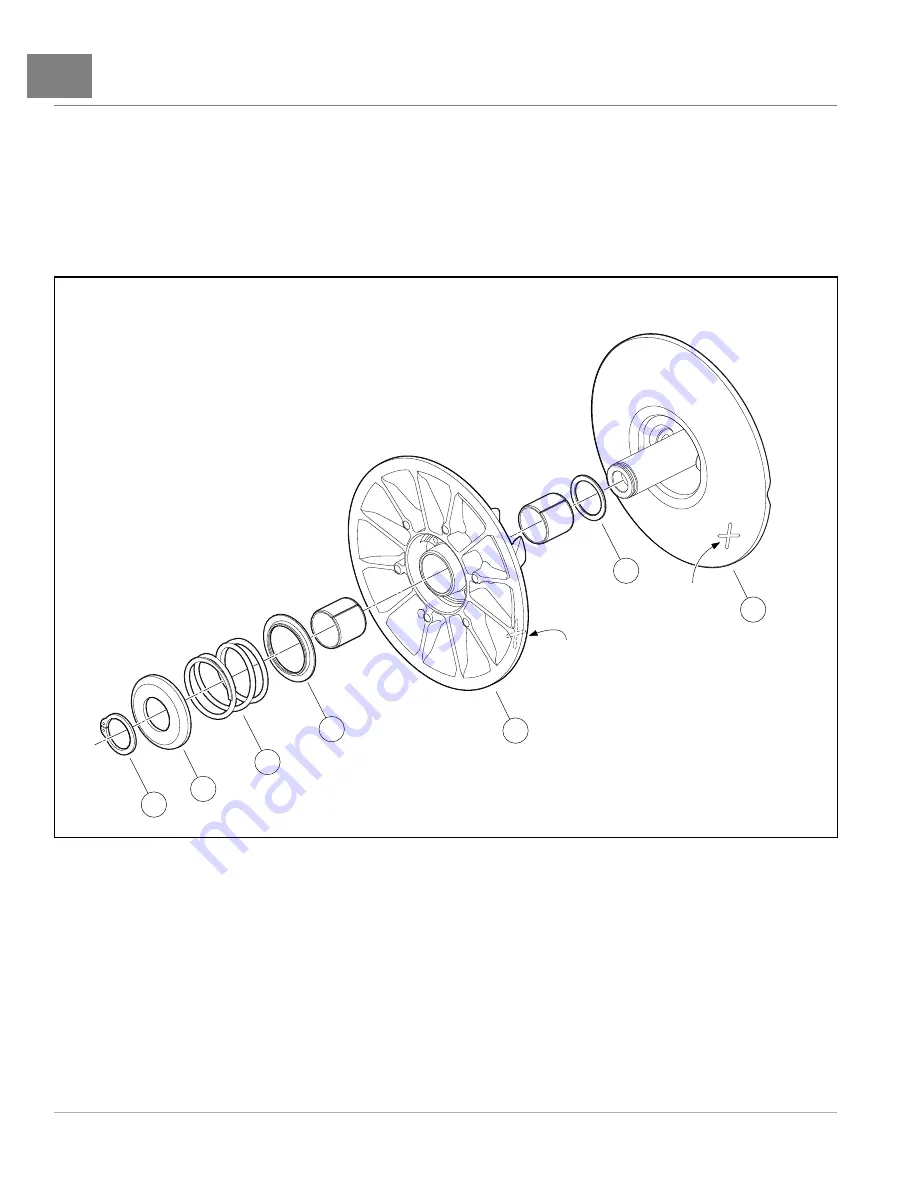
Use snap-ring pliers to remove the snap ring (1)
5.
Slowly remove the spring compression nut. The collar will then rise and release tension on the spring (3).
6.
Remove the cup (2) and spring (3).
7.
Remove the moveable sheave (4) from the fixed sheave (5).
See following NOTE.
NOTE:
Both the moveable and fixed sheaves have spacers (6). Be sure to retain the spacers for reassembly of
the driven clutch.
1
2
4
5
3
6
6
"X"
"X"
2175
Figure 15-30
Driven Clutch Assembly
Driven Clutch Assembly
1.
Place the fixed sheave (5) onto the spring compression base and note the location of the “X” so the “X” on the
moveable sheave (4) can be aligned correctly
2.
Place the moveable sheave (4) onto the fixed sheave (5) and align the “X’s” on both components.
3.
Place the spring (3), cup (2), and snap ring (1) onto the clutch.
4.
Place the spring compression collar onto the cup
5.
Tighten the spring compression nut just enough to enable the snap ring to be installed.
6.
Use snap ring pliers to install the snap ring.
Page 15-36
2016 Carryall 1500/1700 and XRT 1550 Maintenance and Service Manual
Содержание Carryall 1500 2016
Страница 2: ......
Страница 432: ...NOTES...
Страница 433: ...NOTES...
Страница 434: ...NOTES...
Страница 435: ......
Страница 436: ......


