Steps
To replace a fan tray, follow these steps:
Step 1
Attach the ESD-preventive wrist strap to your wrist and connect its leash to the ESD jack on the front side of the FCC
(see
Preventing Electrostatic Discharge, on page 11
). You can also connect the ESD-preventive wrist strap leash to any
bare metal surface on the FCC.
Step 2
Using the screwdriver, loosen the two captive screws on the fan tray faceplate. If necessary, use a step platform to reach
the upper fan tray comfortably.
Step 3
Pull firmly on the fan tray handle to pull it free; two people are required to remove the fan tray.
Because of the weight of the fan tray, approximately 30 lb (14 kg), two people are required to remove the
fan tray. Be especially careful while removing the fan tray from the FCC. To prevent injury, keep your back
straight and lift with your legs, not your back. Avoid sudden twists or lateral moves. It is safer to use two
people to remove the fan tray rather than a single person.
Caution
Step 4
Grasp the fan tray handle and pull it straight out to disconnect the fan tray from the connector mounted on the front of
the fan tray bay on the rear side of the FCC. Slide the fan tray halfway from the fan tray bay.
Step 5
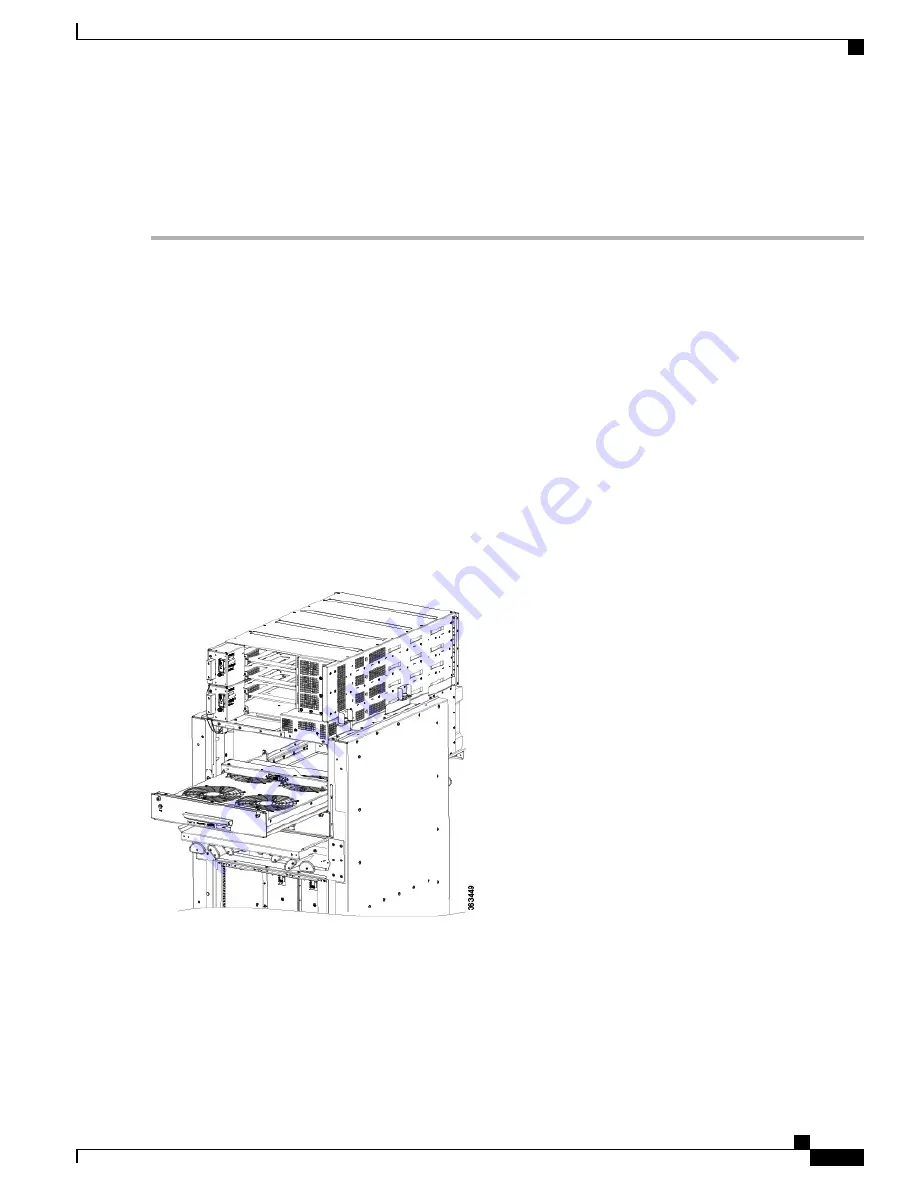
Use your free hands to support the fan tray, and then slide the fan tray completely from the fan tray bay.
Step 6
To install the replacement fan tray, use both hands to support and position the fan tray in front of the fan tray bay (the
labels are located on the bottom of the fan tray).
Figure 67: Replacing a Fan Tray
Step 7
Slide the fan tray into the fan tray bay. Stop when the fan tray makes contact with the FCC connector in the back of the
fan tray bay.
To prevent damage to the FCC connector, do not use excessive force when inserting a fan tray into its
bay.
Caution
Cisco Network Convergence System 6000 Fabric Card Chassis Hardware Installation Guide
113
Removing and Replacing Chassis Components
Replacing the Fan Tray


