16
3
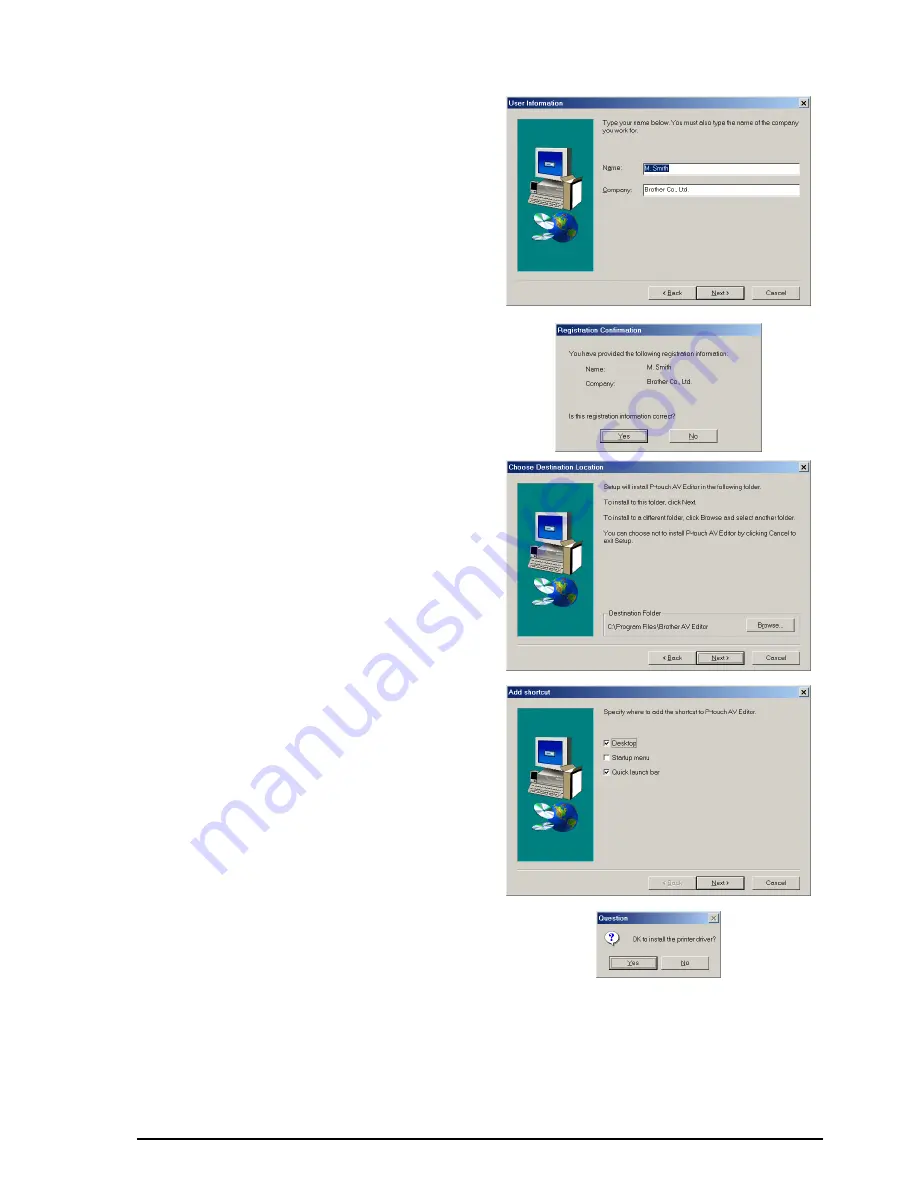
Carefully read the contents of the Welcome
dialog box, and then click the Next button to
continue. The User Information dialog box
appears.
4
Type the necessary information into the
appropriate boxes (If the information has
already been registered in Windows
®
, it will
automatically appear.), and then click the
Next button. A dialog box appears, asking for
confirmation of the entered information.
5
Click the Yes button to register the entered
information.
☞
To change the registration information,
click the No button, and then return to
step 4.
The Choose Destination Location dialog box
appears.
6
Click the Next button to begin installation.
☞
To change the location where P-touch AV
Editor will be installed, click the Browse
button, and then select the installation
folder in the Choose Folder dialog box that
appears. Then, click the OK button.
After P-touch AV Editor is installed, a dialog
box appears, allowing you to select where
shortcuts to P-touch AV Editor will be added.
7
Select the desired locations for the shortcuts,
and then click the Next button. A dialog box
appears, allowing you to select whether or
not to install the printer driver.
Содержание P-touch 2600
Страница 7: ...vi ...
Страница 9: ...2 KEYBOARD LCD DISPLAY Power key Cursor keys Delete key Return key ...
Страница 120: ...113 5 Press r 6 Press _ 7 Press _ 3 B R e y n A D D R E S S 1 P R I N T M E N U 2 2 C O P I E S 1 2 C O P I E S ...
Страница 134: ...127 ...
Страница 139: ...GUÍA DE USUARIO ...
Страница 217: ...75 REFERENCE REFERENCIA ...
Страница 245: ...103 ...
Страница 250: ......


