


SEWING
Se
w
in
g Ba
sics
59
2
e
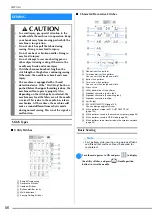
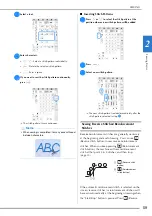
Select a font.
f
Enter characters.
•
: Select a stitch pattern individually.
•
: Delete the selected stitch pattern.
•
: Enter a space.
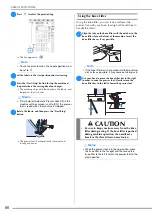
g
If you want to sew the stitch pattern continuously,
press .
The stitch pattern turns continuous.
■
Inserting Stitch Patterns
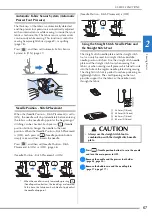
a
Press
or
to select the stitch pattern at the
position where a new stitch pattern will be added.
b
Press
.
c
Select a new stitch pattern.
The new stitch pattern is added immediately after the
stitch pattern selected in step
a
.
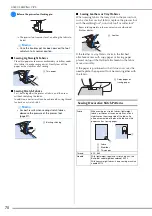
Sewing Reverse Stitches/Reinforcement
Stitches
Reverse/reinforcement stitches are generally necessary
at the beginning and end of sewing. You can use
(Reverse stitch button) to sew reverse/reinforcement
stitches. When you keep pressing
(Reinforcement
stitch button), the machine will sew reinforcement
stitch at that point 3 to 5 stitches, and then stop.
(page 13)
If the automatic reinforcement stitch is selected on the
screen, reverse stitches (or reinforcement stitches) will
be sewn automatically at the beginning of sewing when
the “Start/Stop” button is pressed. Press
(Reverse
Memo
• When sewing is completed, trim any excess thread
between characters.
1
(Reverse stitch
button)
2
(Reinforcement
stitch button)
Содержание 882-W70
Страница 2: ......
Страница 12: ...CONTENTS 10 ...
Страница 56: ...CHANGING THE PRESSER FOOT 54 ...
Страница 57: ...Chapter 2 Sewing Basics ...
Страница 73: ...Chapter 3 Various Stitches ...
Страница 106: ...MY CUSTOM STITCH 104 ...
Страница 107: ...Chapter 4 Basic Embroidery ...
Страница 141: ...Chapter 5 Advanced Embroidery ...
Страница 156: ...EMBROIDERY APPLICATIONS 154 ...
Страница 157: ...Chapter 6 My Design Center ...
Страница 176: ...STIPPLING 174 ...
Страница 177: ...Chapter 7 Appendix ...
Страница 193: ...ERROR MESSAGES 191 Appendix 7 ...
Страница 205: ......
Страница 206: ......
Страница 207: ......
Страница 208: ......
Страница 209: ......
Страница 210: ......
Страница 211: ......