


ILLUSTRATION CONVERSION
168
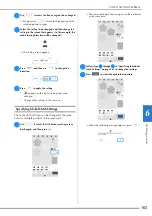
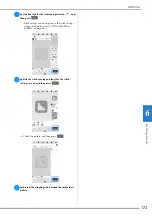
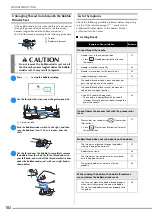
e
Move
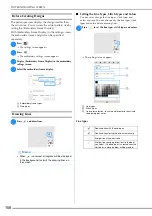
to frame the image for the pattern.
f
Press .
The screen for confirming the converted image
appears.
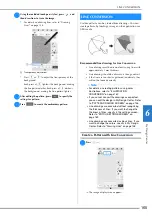
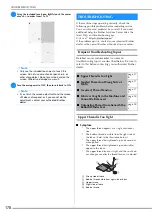
g
In the screen for confirming the converted image,
adjust the image as necessary as in step
d
.
*
: Enlarge the image.
*
: Display the image before being
converted. Compare the images before and after
being converted, and then change the settings if
necessary.
*
: Return to the previous screen.
After changes to the settings described above have
been applied,
changes to
. Press
to check that the image is as desired.
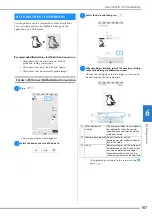
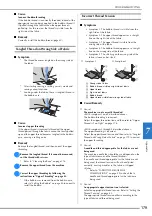
h
Press .
The pattern drawing screen appears.
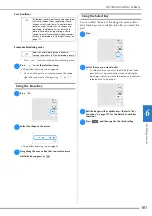
i
If necessary, edit the loaded image.
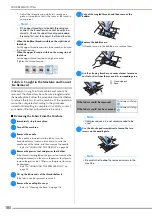
*
After the loaded image is converted to stitching, it
appears as a background in the pattern drawing
screen. Use gauge
1
to adjust the transparency of
the background. Each press of
lightens the
background, making the illustration pattern darker.
Each press of
darkens the background, making
the illustration pattern lighter.
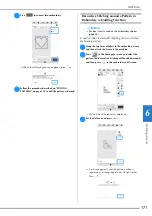
Memo
• Press
to detect the outline.
Line thickness can be specified from 1.0 mm (1/16
inch) to 5.0 mm (3/16 inch).
• Press
to select the outline color. Select by
touching the color, or moving
icon using
in the color selection screen.
1
Содержание 882-W70
Страница 2: ......
Страница 12: ...CONTENTS 10 ...
Страница 56: ...CHANGING THE PRESSER FOOT 54 ...
Страница 57: ...Chapter 2 Sewing Basics ...
Страница 73: ...Chapter 3 Various Stitches ...
Страница 106: ...MY CUSTOM STITCH 104 ...
Страница 107: ...Chapter 4 Basic Embroidery ...
Страница 141: ...Chapter 5 Advanced Embroidery ...
Страница 156: ...EMBROIDERY APPLICATIONS 154 ...
Страница 157: ...Chapter 6 My Design Center ...
Страница 176: ...STIPPLING 174 ...
Страница 177: ...Chapter 7 Appendix ...
Страница 193: ...ERROR MESSAGES 191 Appendix 7 ...
Страница 205: ......
Страница 206: ......
Страница 207: ......
Страница 208: ......
Страница 209: ......
Страница 210: ......
Страница 211: ......