


MY CUSTOM STITCH
100
b
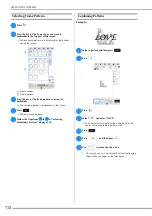
Select the desired stitch pattern, and then press
.
■
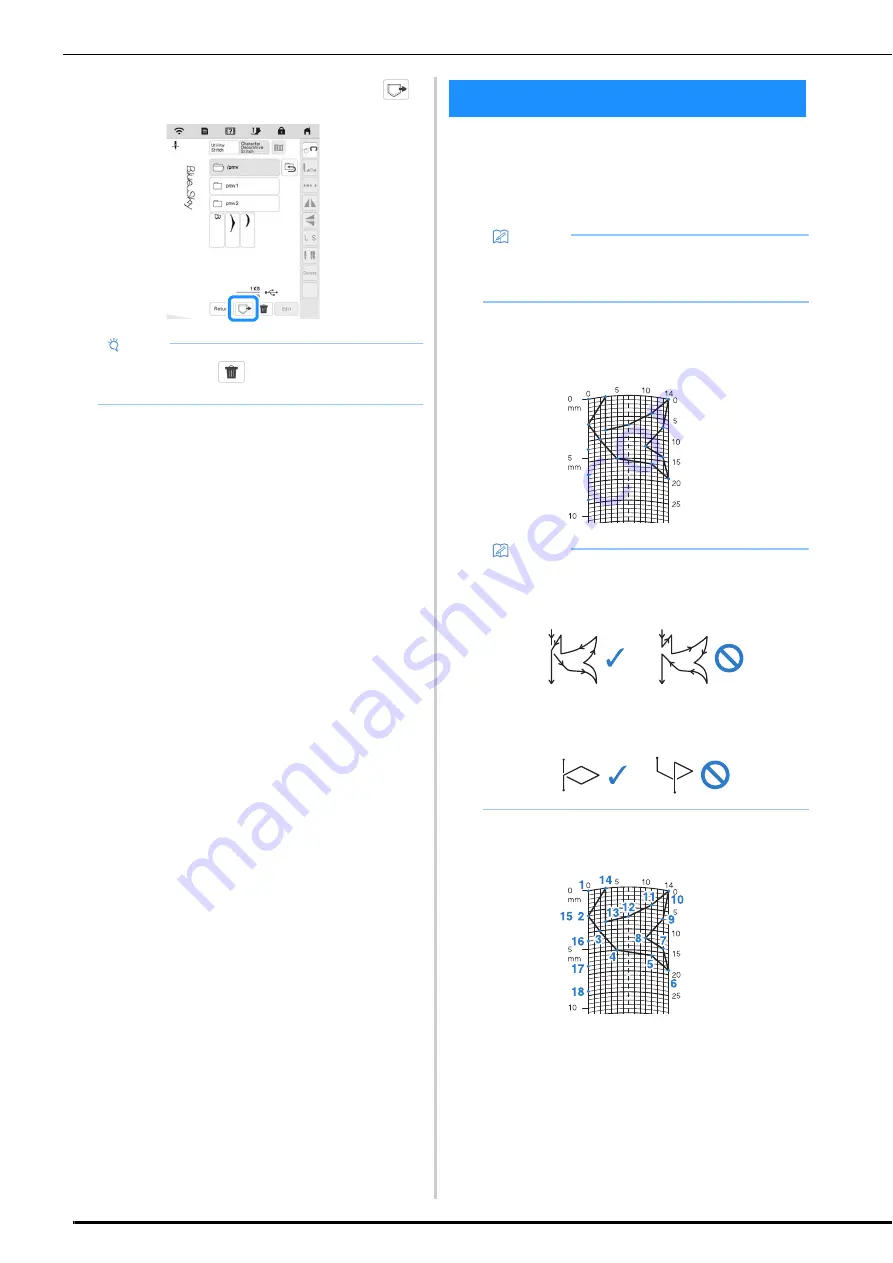
Designing a Stitch
By using the MY CUSTOM STITCH function, you can
register stitches you have created yourself. You can also
sew designs combining MY CUSTOM STITCH creations
with built-in characters (page 58).
a
Draw the stitch design on the grid.
Place points where the stitch pattern intersects with
the grid, and connect all the points with a line.
b
Determine the x and y coordinates of each of the
marked points.
Note
• When you press
, the selected stitch pattern
will be deleted permanently.
MY CUSTOM STITCH
Memo
• Stitches that you create with MY CUSTOM STITCH
can be a maximum of 7 mm (approx. 9/32 inch)
wide and 37 mm (approx. 1-1/3 inches) long.
Memo
• Simplify the design so that it can be sewn as a
continuous line. For a more attractive stitch, close
the design by intersecting lines.
If the design is to be repeated and linked, the start
point and end point of the design should be at the
same height.
Содержание 882-W70
Страница 2: ......
Страница 12: ...CONTENTS 10 ...
Страница 56: ...CHANGING THE PRESSER FOOT 54 ...
Страница 57: ...Chapter 2 Sewing Basics ...
Страница 73: ...Chapter 3 Various Stitches ...
Страница 106: ...MY CUSTOM STITCH 104 ...
Страница 107: ...Chapter 4 Basic Embroidery ...
Страница 141: ...Chapter 5 Advanced Embroidery ...
Страница 156: ...EMBROIDERY APPLICATIONS 154 ...
Страница 157: ...Chapter 6 My Design Center ...
Страница 176: ...STIPPLING 174 ...
Страница 177: ...Chapter 7 Appendix ...
Страница 193: ...ERROR MESSAGES 191 Appendix 7 ...
Страница 205: ......
Страница 206: ......
Страница 207: ......
Страница 208: ......
Страница 209: ......
Страница 210: ......
Страница 211: ......