STIPPLING
172
d
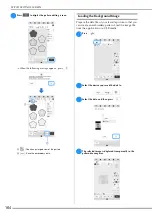
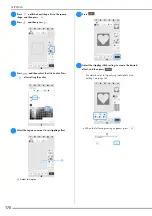
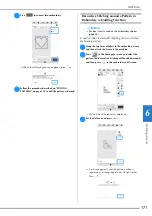
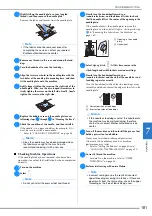
Press
to continue to the embroidery screen,
and then embroider the pattern at the center.
e
Remove the embroidery frame from the carriage.
f
Photograph the embroidery frame with the application.
g
Attach the embroidery frame to the carriage again.
h
Place the batting and bottom layer of fabric under the
embroidery frame.
i
Press
in the home page screen to start My
Design Center.
j
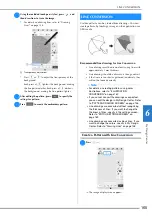
Press
to load the embroidered fabric. Refer to
“Loading the Background Image” on page 164 for
details.
k
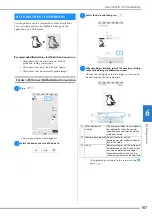
Press
, press
to recall the stamp shape
registered in step
c
, and then arrange it over the
loaded pattern.
l
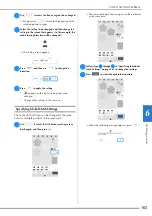
Use a stamp or rectangular frame to determine the
region to be stitched.
m
Use the brush tool keys to select the stitch and color of
the decorative stitching.
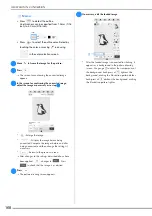
n
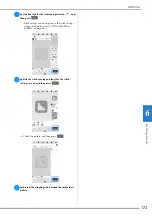
Fill the region to be stitched outside of the stamp shape
outline.
Note
• If the region is to be drawn by hand, be sure to
draw a completely closed shape. If the region is not
closed, it will not be correctly closed with any of
the fill stitches.
Содержание 882-W70
Страница 2: ......
Страница 12: ...CONTENTS 10 ...
Страница 56: ...CHANGING THE PRESSER FOOT 54 ...
Страница 57: ...Chapter 2 Sewing Basics ...
Страница 73: ...Chapter 3 Various Stitches ...
Страница 106: ...MY CUSTOM STITCH 104 ...
Страница 107: ...Chapter 4 Basic Embroidery ...
Страница 141: ...Chapter 5 Advanced Embroidery ...
Страница 156: ...EMBROIDERY APPLICATIONS 154 ...
Страница 157: ...Chapter 6 My Design Center ...
Страница 176: ...STIPPLING 174 ...
Страница 177: ...Chapter 7 Appendix ...
Страница 193: ...ERROR MESSAGES 191 Appendix 7 ...
Страница 205: ......
Страница 206: ......
Страница 207: ......
Страница 208: ......
Страница 209: ......
Страница 210: ......
Страница 211: ......

