


EDITING PATTERNS
121
B
asic
E
m
br
oi
der
y
4
f
Attach the embroidery frame to the machine, and then
press .
g
Press
to set the starting point to the center top of
the pattern.
h
Press .
i
Press
, and then press
.
j
Press
to move the embroidery frame until the
thread mark on the fabric is aligned with the light of
the LED pointer.
*
To check the needle drop point with the light of the
LED pointer, press
.
k
Press .
l
Remove the thread mark.
m
Start embroidering.
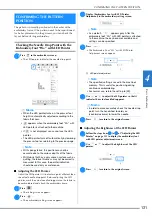
Memo
• For the accurate needle drop point, slowly turn the
handwheel toward you (counterclockwise) to lower
the needle. Then, turn the handwheel away from
you (clockwise) until the mark on the handwheel is
at the top. The carriage cannot move if the mark on
the handwheel is not at the top.
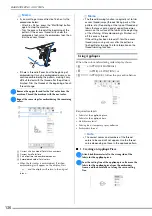
1
Mark
a
Содержание 882-W70
Страница 2: ......
Страница 12: ...CONTENTS 10 ...
Страница 56: ...CHANGING THE PRESSER FOOT 54 ...
Страница 57: ...Chapter 2 Sewing Basics ...
Страница 73: ...Chapter 3 Various Stitches ...
Страница 106: ...MY CUSTOM STITCH 104 ...
Страница 107: ...Chapter 4 Basic Embroidery ...
Страница 141: ...Chapter 5 Advanced Embroidery ...
Страница 156: ...EMBROIDERY APPLICATIONS 154 ...
Страница 157: ...Chapter 6 My Design Center ...
Страница 176: ...STIPPLING 174 ...
Страница 177: ...Chapter 7 Appendix ...
Страница 193: ...ERROR MESSAGES 191 Appendix 7 ...
Страница 205: ......
Страница 206: ......
Страница 207: ......
Страница 208: ......
Страница 209: ......
Страница 210: ......
Страница 211: ......