Dispense Keypad Settings
Distance Units
Specifies the units (miles or kilometers) of odometer readings for each WO .
Odometer
To request that mileage be tracked, check the Odometer checkbox .
Registration
To request that the car registration number be tracked, check the Registration checkbox . This
allows the system users to enter the car registration number in the Pending WO and save it to the
Completed WO .
Display Timeout
Sets how long (in minutes) a PIN will be able to sit idle before timing out and forcing the user to log
back in .
Top off Timer
Sets the time that the user is allowed to keep the meter open after the allotted amount of fluid has
been dispensed (timer is in seconds) .
Barcode Timeout
The amount of time in increments of 10 ms to display the entered parameter on the screen after
the barcode scanner input is entered . A value of 100 will equal 1000 ms or 1s of display time . This
timeout is only used when the barcode scanner feature is selected on the keypad .
Int. Printer
If you have an optional internal printer connected to the keypad, select the checkbox next to the
Int.
Printer
field .
Buzzer
To activate the key click buzzer, check the box next to the
Buzzer
field .
Keypad RF Timeout
Sets how long (in minutes) a PIN will be able to sit idle before timing out and forcing the user to log
back in .
Miscellaneous WO
A configurable numeric input that allows the user to define what number a miscellaneous work
order gets . This would be used in the event any fluid needs to be dispensed independent of a system
work order . The miscellaneous work order number along with the user ID number will be in the work
order report . To change, simply highlight the number, delete, and enter a new number .
Auto Override
Activates System Auto Override feature in all keypads so users can dispense WOs when the Master
Keypad is not operational . No supervisor intervention is required . Available with v3 .X firmware only .
Master Keypad Settings
COM Port
Select the COM port on the PC for the serial connection to the Master Keypad . To change, simply
click on the drop down and select the appropriate COM port .
Buzzer
To activate the key click buzzer, check the box next to the
Buzzer
field .
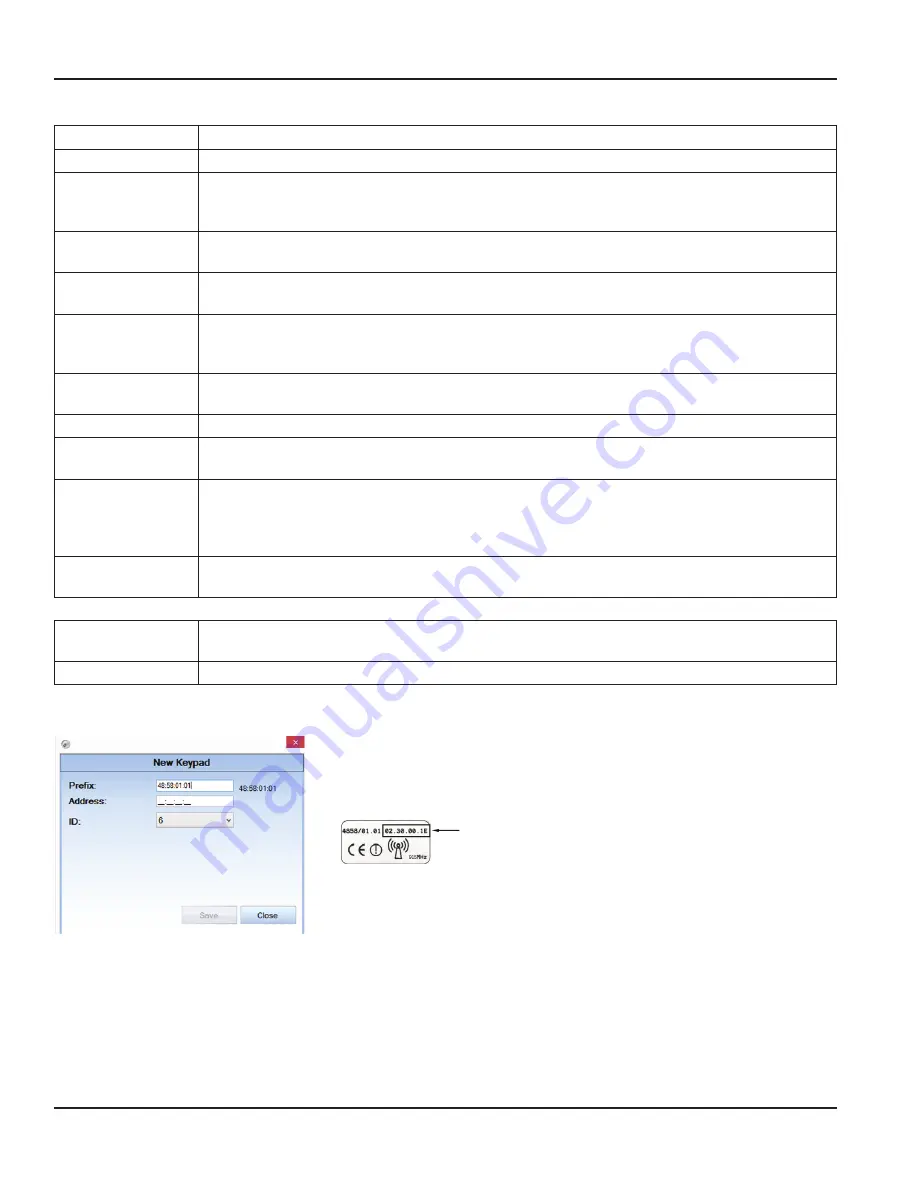
Adding a Dispense Keypad
1 . From the
Keypad and Hoses
screen, click
NEW KEYPAD
.
2 . The prefix is pre-filled with the number to the right of the box, if the number is
different, double clicking the text box will reset the number to the default
3 . Enter the Dispense Keypad address found on the back of the keypad . Use only
the last 8 characters as shown here:
Keypad address
4 . The ID field automatically displays the next available sequential number .
5 . Click
SAVE
. The new keypad will appear on the
Keypad and Hoses
screen, and
the
New Keypad
screen will reset for another new keypad .
6 . Once you have finished adding keypads, click
CLOSE
.
Using The FMS Software
Page 44
December 2014
FMS-UM-01200-EN-01


