Maintenance and Service
35
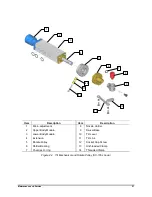
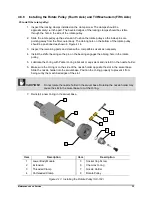
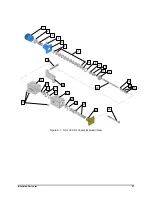
4.6.6 Installing the Rotate Pulley (Fourth Axis) and Tilt Mechanism (Fifth Axis)
To install the rotate pulley:
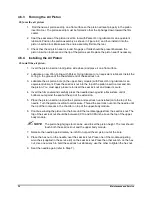
1. Inspect the locking clamps installed on the clamp screw. The clamps should be
approximately
1/8
-inch apart. The beveled edges of the locking clamps should be visible
through the hole in the side of the rotate pulley.
2. Slide the rotate pulley up the extension. Position the rotate pulley so the index pins are
pointing away from the film coater body. The oblong hole on the bottom of the rotate pulley
should be positioned as shown in Figure 4-14.
3. Inspect the remaining parts and clean with a compatible solvent as necessary.
4. Install the shifter bearing so the pin on the bearing engages the oblong hole in the rotate
pulley.
5. Lubricate the O-ring with Parker O-ring lubricant or equivalent and install it in the nozzle holder.
6. Make sure the O-ring is on the side of the nozzle holder opposite the slot in the swivel base.
Slide the nozzle holder into the swivel base. Position the O-ring properly to prevent it from
being cut by the machined edges of the slot.
CAUTION!
Do not rotate the nozzle holder in the swivel base. Rotating the nozzle holder may
cause the slot in the swivel base to cut the O-ring.
7. Reinstall a new O-ring in the swivel base.
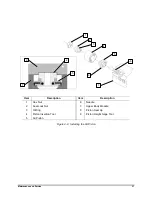
Item
Description
Item
Description
1
Lower Body Module
5
Socket Cap Screw
2
Extension
6
Chemraz O-ring
3
Threaded Clamp
7
Nozzle Holder
4
Unthreaded Clamp
8
Rotate Pulley
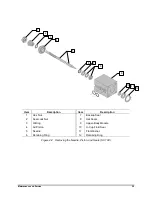
Figure 4-13 Installing the Rotate Pulley (SC-104)
1
2
8
6
7
3
4
5

