


Configuring Communication
24
NXD-500i 5" Modero Wall/Flush Mount Touch Panel with Intercom
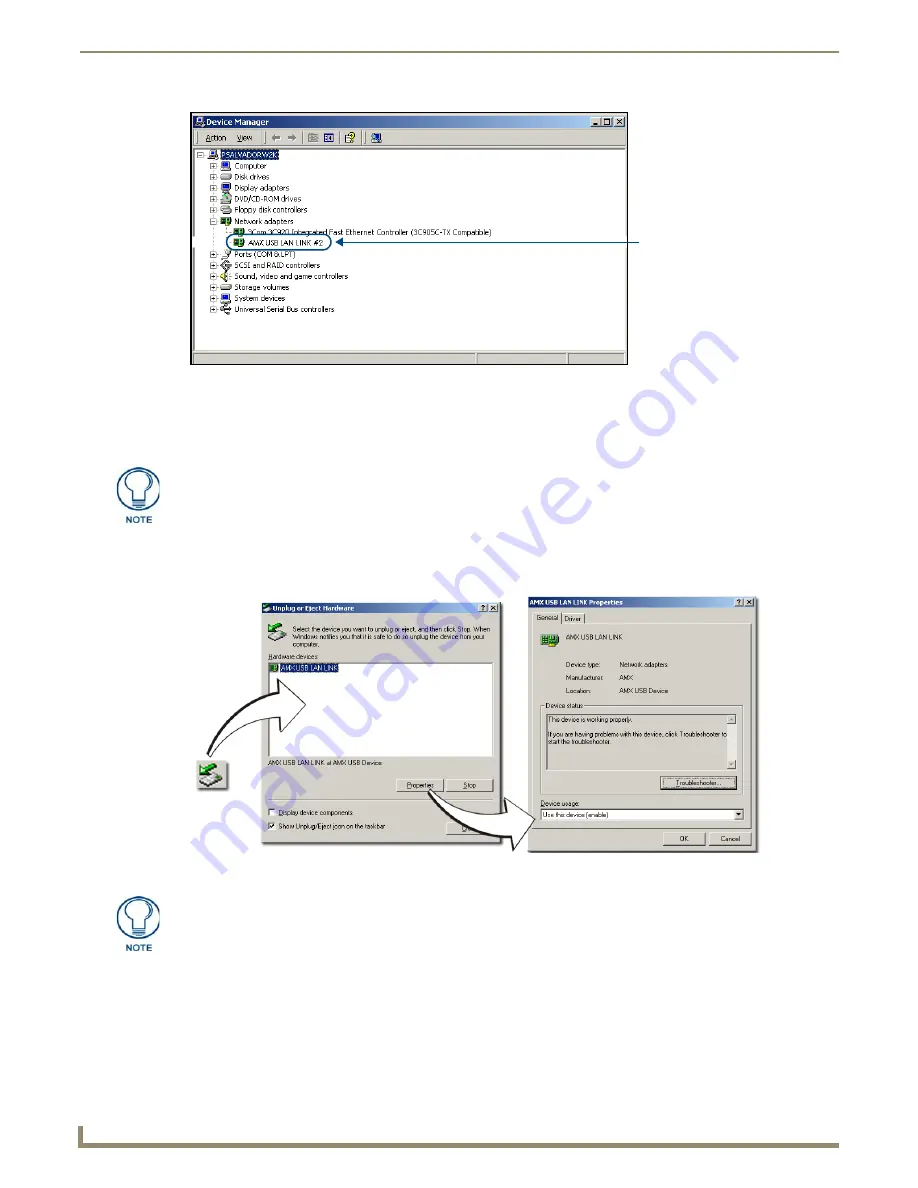
3.
Confirm that a new USB detection icon (FIG. 20) appears in the lower-right taskbar on the PC display window.
4.
Double-click on the icon to open the
Unplug or Eject Hardware
window and confirm the AMX USB LAN LINK
has been installed and is operating properly.
5.
Click the
Properties
button to view further information about the installed USB driver.
To remove the USB driver association
from a previously connected touch panel, navigate back to the Device Manager,
right-click on the panel’s USB driver (example AMX USB LAN LINK #2) and select
Uninstall
from the context menu
and then
OK
.
Once the system completes the removal of the device, the
Device Manager
window will refresh, and the
device will no longer appear.
FIG. 19
Device Manager dialog showing USB device
USB connected touch
panel (showing the
recognized panel)
A Virtual NetLinx Master (VNM) is used when the target panel is not connected to a
physical NetLinx Master. In this situation, the PC takes on the functions of a Master
via a Virtual NetLinx Master.
This connection is made by either using the PC’s Ethernet Address, via TCP/IP
using a known PC’s IP Address as the Master, or using a direct mini-USB
connection to communicate directly to the panel
.
FIG. 20
USB Properties windows
USB
detection
icon
If a yellow exclamation point appears next to the AMX USB LAN LINK device (within
the hardware devices section of the Unplug or Eject Hardware window), stop and
close the USB operation. Reconnect the USB cable to the panel and repeat the setup
procedures. Refer to the Troubleshooting
section on page 119
for more detailed
information.
Содержание Modero NXD-500i
Страница 4: ......
Страница 12: ...viii NXD 500i 5 Modero Wall Flush Mount Touch Panel with Intercom Table of Contents...
Страница 30: ...NXD 500i Touch Panel Accessories 18 NXD 500i 5 Modero Wall Flush Mount Touch Panel with Intercom...
Страница 32: ...Panel Calibration 20 NXD 500i 5 Modero Wall Flush Mount Touch Panel with Intercom...
Страница 130: ...Programming 118 NXD 500i 5 Modero Wall Flush Mount Touch Panel with Intercom...
Страница 134: ...Troubleshooting 122 NXD 500i 5 Modero Wall Flush Mount Touch Panel with Intercom...
Страница 140: ...Appendix A Text Formatting Codes 128 NXD 500i 5 Modero Wall Flush Mount Touch Panel with Intercom...
Страница 143: ...Appendix B Complex Script Support 131 NXD 500i 5 Modero Wall Flush Mount Touch Panel with Intercom...


