35
RS1500000 Rev. 0
Disassembly Procedures
To avoid risk of electrical shock, personal injury, or
death, disconnect power to unit before following any
disassembly procedures.
WARNING
!
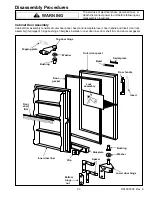
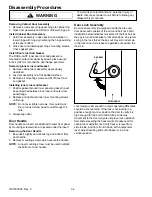
Removing Door Lock Assembly
1. Remove all inner door liner mounting screws on door
lock side, and four from the top and bottom, working
in from the lock side.
2. Pull inner door liner out far enough to reach the lock
bolt.
3. Using a screw driver pushed through foam block.
Remove screw securing lock cam. Lock cam then
can be removed.
4. Remove clip holding lock to outer door panel. Push
lock out of door panel.
5. Reassemble in reverse order.
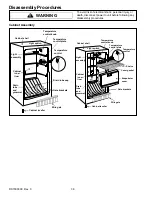
Cabinet Door Alignment
Cabinet door on each model is in correct alignment
when:
Hinge side of door is equidistant from cabinet flange at
the top and bottom.
Gasket seals smoothly and is compressed no more
than 1/16 inch (1.6 mm) along the hinge side with door
closed.
Handle side of door should be 1/16 inch (1.6 mm)
above the handle side of the cabinet (viewed from the
front). Upper hinge side corner of door should be 1/16
inch (1.6 mm) above the cabinet top.
In many cases, levelling the freezer will eliminate needed
for cabinet door adjustments. Verify freezer is level by
checking both front edges as well as both sides of the
cabinet, with a carpenters level. Adjust levellers until
cabinet is in a true vertical position.
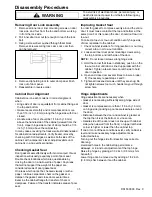
Checking Gasket Seal
Door gasket seals effectively with its normal pull. Visual
inspection will usually reveal any point of poor seal.
Double check locations which are questionable by
closing the door on a narrow strip of paper. Any areas
that will not support the weight of the paper are
considered areas of poor gasket seal.
On areas which cannot be checked visually or with a
paper, rub blue carpenters chalk on the gasket, or
dampen the gasket, and close door several times.
Examine the cabinet flange for transfer of chalk or
dampness. Failure of the transfer indicates areas of poor
seal.
Improving Gasket Seal
In order for gasket to compress evenly around the entire
door, it must make contact at the top and bottom at the
same time. For this reason the door, should not toe-in or
toe-out.
To correct a toe-in or toe-out condition verify hinge side
of door is parallel to the cabinet.
1. Check cabinet levellers. Turning leveller in or out may
correct a toe-in or toe-out condition.
2. Loosen all inner door panel mounting screws along
the top, bottom, and latch side of the door.
NOTE:
Do not loosen screws along hinge side.
3. Hold the corner that toes-in stationary; push in on the
toe-out corner until door is lined up parallel with the
cabinet. Tighten a few screws on latch side to hold
door in position.
4. Open and close door several times to insure proper
fit. If necessary, repeat steps 2 and 3.
5. Tighten all loosened screws until they are snug. Do
not tighten screws too much, heads may pull through
screw hole.
Hinge Adjustments
Hinge adjustments are necessary when:
Gasket is not sealing sufficiently along hinge side of
door.
Gasket is compressed more than 1/16 inch (1.6 mm)
on hinge side (causing a poor seal elsewhere around
the door).
Distance between the door and cabinet is greater at
the top than it is at the bottom, or vice versa.
Handle side of the door does not line up with cabinet
side (when viewed from the front), or upper latch side
corner is higher or lower than the cabinet top.
If one or more of these conditions exist, verify cabinet is
level and make necessary hinge adjustments as
instructed below.
Turning out the hinge side front leveller may correct a
door sag.
Oversized holes in the cabinet top permit some
sideways, or in and out adjustments of the top hinge.
Raise top hinge by placing a 1/32 inch (0.8 mm) shim
beneath it.
Lower hinge can be moved out by adding a 1/32 inch
(0.8 mm) shim between it and the cabinet.

