45
RS1500000 Rev. 0
Service Information
To avoid risk of electrical shock, personal injury, or death,
always disconnect electrical power source to the freezer
before attempting to service unless test procedures require power to be connected. When removing any wiring from
terminals, replace on the same terminals. Ensure all ground wires are connected before certifying unit as repaired
and/or operational.
WARNING
!
WARNING
!
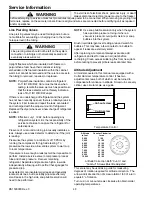
To avoid death or severe personal injury, cut drier at
correct location. Cutting drier at incorrect location will
allow desiccant beads to scatter. Completely clean
area of beads, if spilled.
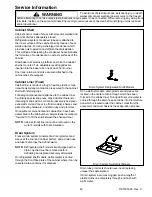
Replacement HFC134a Service Compressor
HFC134a service compressors are charged with ester oil
and pressurized with dry nitrogen. Before replacement
compressor is installed, pull out one rubber plug. A
pop
from pressure release should be heard. If a
pop
sound is
not heard, do not use compressor. Positive pressure in
compressor is vital to keep moisture out of ester oil. Do
not leave compressor open to atmosphere for more than
10 minutes.
The holding charge assures the compressor is dry. A
compressor, it is recommended that the tubes be cut
close to the soldered joints where they are connected to
the compressor tube. If the tubes are not long enough, it
may be necessary to unsolder the joints to allow
connections to the replacement compressor. When
replacing compressor, proceed as follows:
1. Disconnect power cord from electrical outlet.
2. Install a service valve on process tube.
3. Connect a hose to service valve and capture charge.
4. Clean the tubing for about 3 inches (76 mm) at the
points to be cut. Before cutting tube, be sure it will be
long enough to reconnect to replacement
compressor. If not, unbraze joints.
5. Disconnect wires from compressor terminals.
6. Remove retaining clips from compressor mounts. Lift
compressor from mounting rails and transfer rubber
grommets to replacement compressor.
7. Set replacement compressor into position and install
retaining clips.
8. Remove all rubber plugs. Clean stubs of compressor
and compare the size of tubing to stubs of
replacement compressor. It may be necessary to
swag copper tubing to make the joints.
9. Install a 6 inch (152 mm) copper tube to low side
process tube on compressor. Add a service valve to
end of this tube.
10.Connect all tubing. Apply flux to compressor stubs
and braze all the joints. Flux must be wiped off after
brazing.
11. Install a new drier.
12.Visually check all joints for leaks. Evacuate and
recharge the system.
13.Reconnect wire leads to compressor terminals and
test unit to make sure it is operating properly.
14.Pinch the process tube and cut off service valve.
Braze joint and test for leaks.
Refrigerant Charge
Refrigerant charge in all capillary tube systems is critical
and exact amount is required for proper performance.
Factory charges are shown on serial plate. Do not use
refrigerant other than shown on serial plate.
Leak Testing
Undetected leaks lead to repeated service calls and
eventually result in system contaminations, restrictions,
and burned out compressors.
After recharging, sealed system must be thoroughly
tested for leaks. If a very small leak is difficult to isolate,
coat area with soap suds and observe. Bubbles will form
in location of leak.
Evacuation and Charging
DANGER
!
Free oxygen will explode on contact with oil.
Acetylene will explode spontaneously when put under
pressure.
To prevent violent explosions that may result in
serious injury or death to persons in or near the
immediate vicinity, NEVER use oxygen or acetylene
for pressure testing or cleanout of refrigeration
systems.
WARNING
!
To avoid severe personal injury or death from fire
keep system free from contamination due to presence
of air. Follow instructions exactly.
WARNING
!
To reduce risk of fire, sealed refrigeration system
must be air free. To reduce risk of air contamination
follow evacuation procedures exactly.

