


3-10
Function Reference
Auto Align & Add to Trajectory
Auto Align & Add to Trajectory
Allows alignment at several wavelengths, ensuring amplitude accuracy of your measurements.
Before initiating the alignment, connect a broadband light source to the front-panel input con-
nector. (You may add and/or update the existing points in the trajectory table.) Press Auto Align
Preset to clear the table.
Turn on an active marker and manually place the marker at the desired wavelength. If an active
marker is not turned on, the instrument will automatically turn on an active marker and auto align
at the largest input signal. The minimum recommended spacing between points is 5 nm for the
external, single mode fiber (Agilent 86146B only) and 50 µm for the internal, multi-mode fiber.
The span must be >3 nm for the single mode fiber and >25 nm for the multi-mode fiber.
N o t e
Error 5001, Auto align cannot find input signal, will occur if a broadband light source is not
connected to the front-panel input connector.
Error 5070, Trajectory Add Failed, will occur if the trajectory table is full or the computed trajectory
table is invalid.
Key Path
Systems > More System Functions > Service Menu > Adv Service Functions >More Adv Ser-
vice Menu > Multi-Point Align > Auto Align & Add to Trajectory
Related Functions
Auto Align Preset
Calibrator Multi-Pt Align
User Source Mutli-Pt Align
Remote Commands
CALibration:ALIGn:TADD
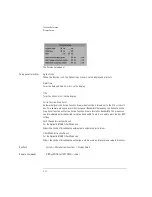
Auto Meas
Pressing the Auto Meas button on the front panel of the instrument performs an automatic mea-
surement of the largest signal found in a full span sweep and places a marker at the signal peak.
The signal must have at least 10 dB of excursion. (
Refer to “Peak Excursion (Marker Setup
Panel)” on page 3-51
for additional information.) Auto measure requires the connection of an
external, broadband or narrowband light source. If there is insufficient signal power, the auto-
matic measurement will not be performed, and a warning message will be reported. This auto-
matic measurement routine is normally the best way to adjust sensitivity while maintaining the
fastest sweep rates.
Содержание 8614 B Series
Страница 1: ...Agilent 8614xB Series Optical Spectrum Analyzer User s Guide ...
Страница 12: ...1 4 Getting Started Product Overview Agilent 8614xB Front and Rear Panels ...
Страница 13: ...1 5 Getting Started Product Overview ...
Страница 15: ...1 7 Getting Started Product Overview Figure 1 2 Display Annotations ...
Страница 16: ...1 8 Getting Started Setting Up the Analyzer Setting Up the Analyzer Step 1 Receive and Inspect the Shipment ...
Страница 26: ...1 18 Getting Started The Softkey Panels ...
Страница 31: ...1 23 Getting Started The Softkey Panels The Systems Menus continued ...
Страница 40: ...1 32 Getting Started Product Options and Accessories ...
Страница 75: ...3 Function Reference ...
Страница 186: ...4 16 Remote Front Panel Operation Remote Front Panel ...
Страница 226: ...6 2 Maintenance Changing the Printer Paper Changing the Printer Paper ...
Страница 264: ...7 16 Specifications and Regulatory Information Declaration of Conformity Declaration of Conformity ...
Страница 271: ......