Deployment Guide
39
4. Select the icon, drag it to the position where you want it to be, and then click
Save
.
5. Click
HiveAP Maps
>
CorpOffices
>
Topology
>
Add Submap
.
6. In the Add HQ-B1-F1 dialog box, enter the following, and then click
OK
:
•
Name:
HQ-B1-F2
•
Icon:
floor
•
Background Map:
HQ-B1-F2.png
•
Location:
HQ-B1-F2
A green floor icon (
) labeled "HQ-B1-F2" appears on the CorpOffices image, and a new entry named
"HQ-B1-F2" appears nested under "CorpOffices" in the menu tree.
7. Select the icon, drag it to the position where you want it to be, and then click
Save
.
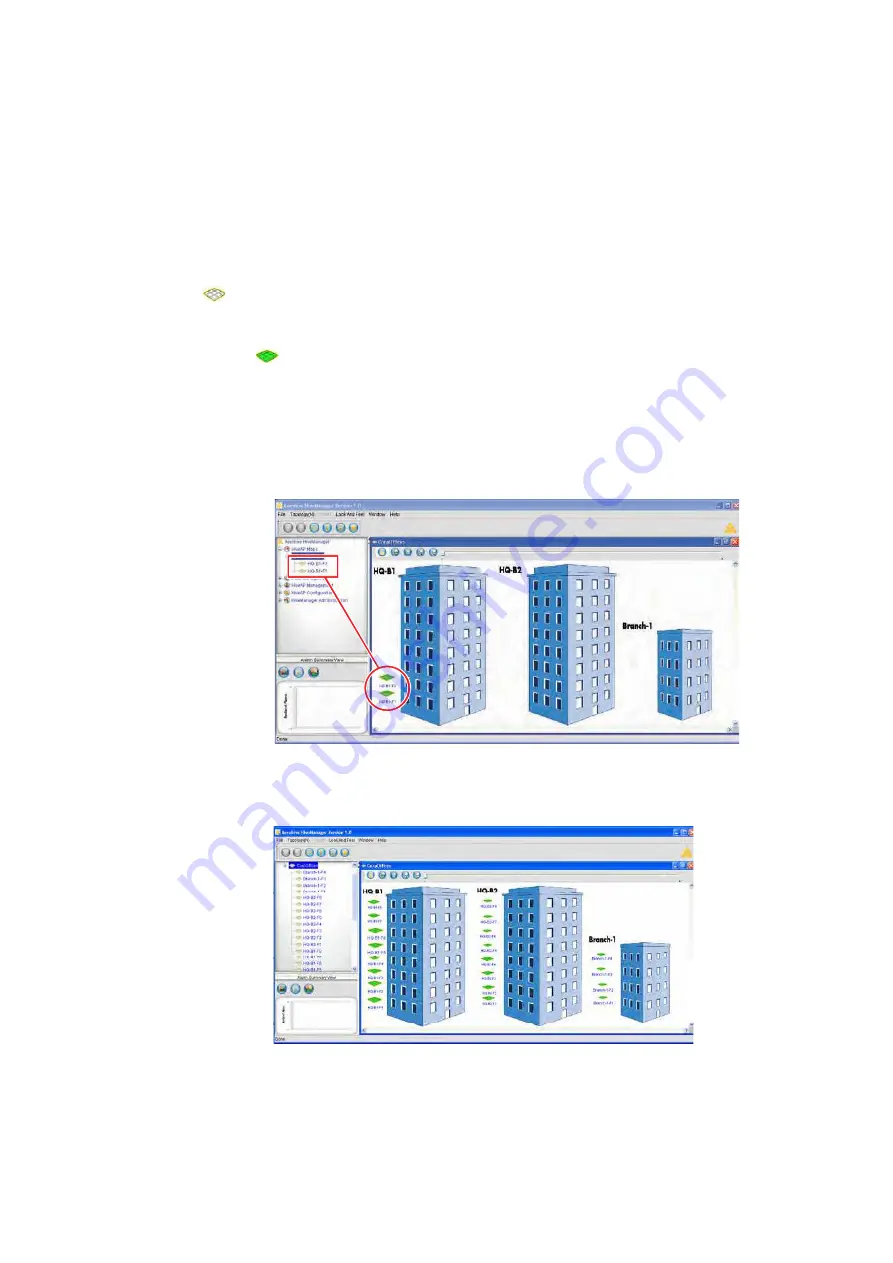
After adding the CorpOffices "map" (really an illustration showing three buildings), two floor plans for the first
and second floors of "HQ-B1", and dragging the floor icons into position, the display of the CorpOffices map
looks similar to that in
Figure 4
.
Figure 4
CorpOffice Map (Level 1) with Links to Level-2 Maps HQ-B1-F1 and HQ-B1-F2
8. Repeat this process until you have arranged all the maps and icons in place as shown in
Figure 5
.
Figure 5
CorpOffice Map with Links to All Level-2 Maps
The icons on this map
link to other maps. Click
an icon to open the map
to which it links.
Содержание HiveAP 20 ag
Страница 1: ...Aerohive Deployment Guide...
Страница 6: ...HiveAP Compliance Information 6 Aerohive...
Страница 64: ...Chapter 4 HiveManager Examples 64 Aerohive...


