


CI/AZ40-EN Rev. A
11
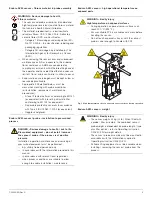
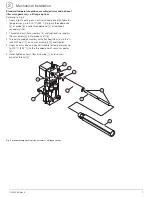
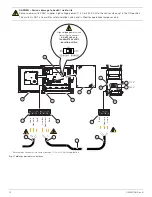
Standard temperature probe – all other flange versions
Referring to Fig. 12:
1. Remove 4 nuts and washers
A
from sensor assembly
threads
B
.
2. Secure flange
C
to sensor assembly threads
B
using
4 nuts and washers (removed at step 1).
3. Feed flanged probe / filter / sensor assembly
D
through
flange
E
and secure flange
C
to flange
E
using 4 nuts
and washers
F
(not supplied).
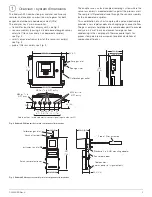
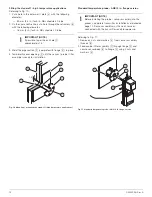
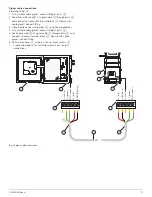
High-temperature probe
Referring to Fig. 13.
1. Feed flanged probe / filter / sensor assembly
A
through
flange
B
.
2. Secure flange
B
to flange
C
using 4 nuts and washers
D
(not supplied).
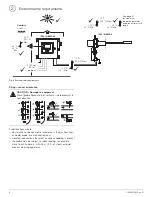
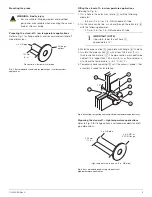
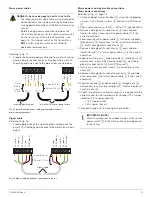
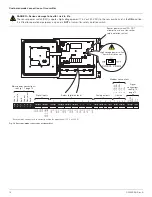
Mounting the transmitter
Referring to Fig. 14.
1. Fix the transmitter
A
to a solid wall using 4 x fixings (not
supplied) at location
B
. Fixings must be capable of
supporting a minimum weight of 7.6 kg (16.65 lb.).
IMPORTANT (NOTE)
Before installing the probe / sensor assembly into the
process, complete transmitter installation as detailed on
page 12. The sensor assembly must have all services
connected with the transmitter ready for power up.
Fig. 12 Standard temperature probe – all other flange versions
IMPORTANT (NOTE)
Before installing the probe / sensor assembly into the
process, complete transmitter installation as detailed on
page 12. The sensor assembly must have all services
connected with the transmitter ready for power up.
Fig. 13 High temperature probe
Fig. 14 Mounting the transmitter


