Chapter 8 Basic Setting
XS1920 Series User’s Guide
88
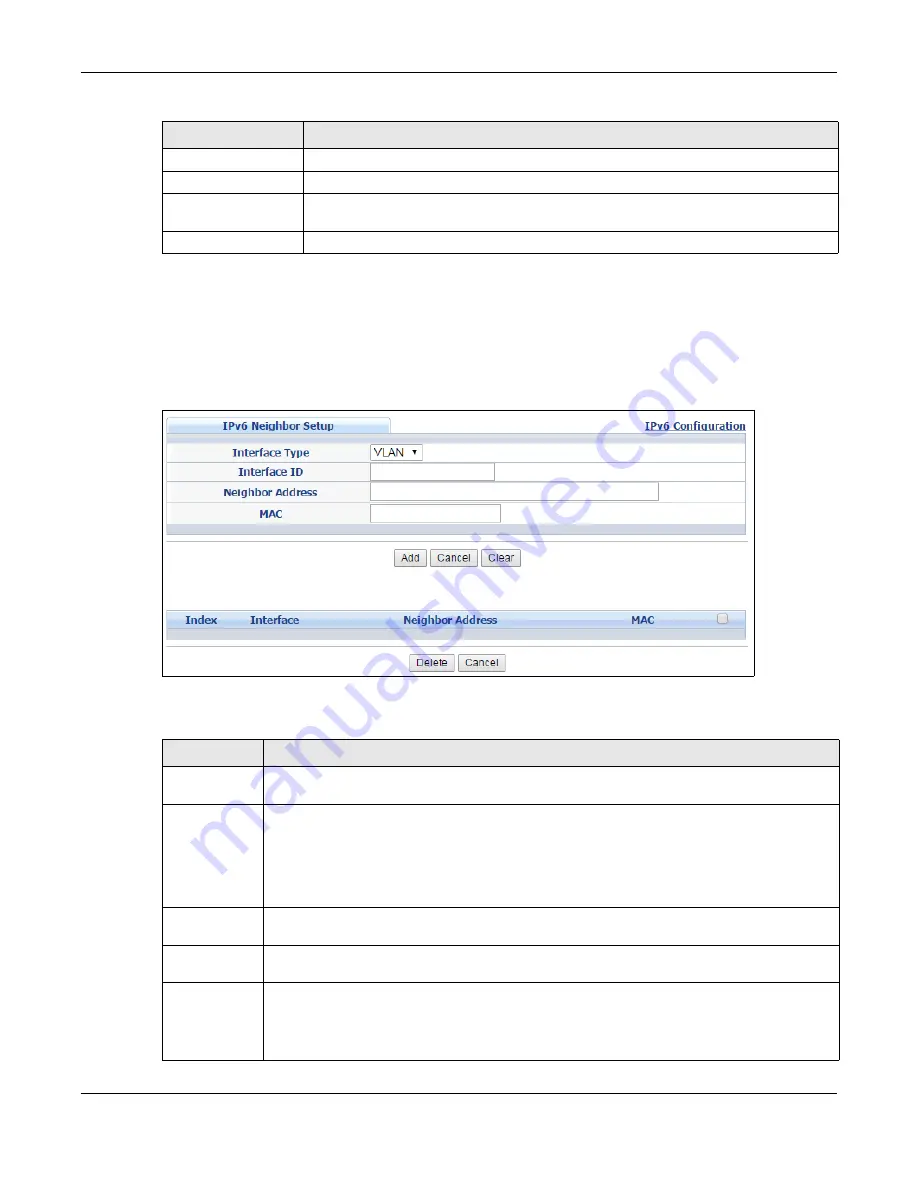
8.9.10 IPv6 Neighbor Setup
Use this screen to create a static IPv6 neighbor entry in the Switch’s IPv6 neighbor table to store
the neighbor information permanently. Click the link next to
IPv6 Neighbor Setup
in the
IPv6
Configuration
screen to display the screen as shown next.
Figure 59
Basic Setting > IPv6 > IPv6 Configuration > IPv6 Neighbor Setup
The following table describes the labels in this screen.
Valid Lifetime
This field displays the IPv6 prefix valid lifetime.
Preferred Lifetime
This field displays the preferred lifetime of an IPv6 address generated from the prefix.
Delete
Check the entry(ies) that you want to remove in the
Delete
column and then click
Delete
to remove the selected entry(ies) from the summary table.
Cancel
Click
Cancel
to clear the
Delete
check boxes.
Table 29
Basic Setting > IPv6 > IPv6 Configuration > IPv6 Prefix Setup (continued)
LABEL
DESCRIPTION
Table 30
Basic Setting > IPv6 > IPv6 Configuration > IPv6 Neighbor Setup
LABEL
DESCRIPTION
Interface Type Select the type of IPv6 interface for which you want to configure. The Switch supports the
VLAN interface type for IPv6 at the time of writing.
Interface ID
Specify a unique identification number (from 1 to 4094) for the interface.
A static IPv6 neighbor entry displays in the
Management > Neighbor Table
screen only
when the interface ID is also created in the
Basic Setup > Interface Setup
screen.
To have IPv6 function properly, you should configure a static VLAN with the same ID number
in the
Advanced Application > VLAN
screens.
Neighbor
Address
Specify the IPv6 address of the neighboring device which can be reached through the
interface.
MAC
Specify the MAC address of the neighboring device which can be reached through the
interface.
Add
Click this to create a new entry or to update an existing one.
This saves your changes to the Switch’s run-time memory. The Switch loses these changes if
it is turned off or loses power, so use the
Save
link on the top navigation panel to save your
changes to the nonvolatile memory when you are done configuring.
Summary of Contents for XS1920 Series
Page 18: ...18 PART I User s Guide ...
Page 32: ...32 PART II Technical Reference ...
Page 177: ...Chapter 21 Classifier XS1920 Series User s Guide 177 Figure 122 Classifier Example EXAMPLE ...
Page 408: ...Appendix C IPv6 XS1920 Series User s Guide 408 ...
Page 412: ...Appendix D Legal Information XS1920 Series User s Guide 412 Environmental Product Declaration ...


