background image

Overview

Fixture setup can only be done using a

monitor.

This section describes how the

fixture data files control fixtures, and

explains how to create new files or

modify existing ones.

The desk is designed to control all

fixture types. The way in which the

desk handles individual fixtures is

defined by the data file for that fixture.

If a fixture has several modes of

operation with different numbers of

channels, etc. Each mode is defined in

a separate fixture type data file.

Each desk is supplied with a range of

fixture data files, see the Fixture List in

Appendix B. Every effort has been

made to verify the information

contained in the fixture data files, and

where possible manufacturers’ fixture

data has been used. However,

Zero 88 Lighting Ltd. cannot be held

responsible for the accuracy of the

fixture data supplied with this desk.

If the need arises, the operator can

create a completely new fixture data

file, modify an existing one, or

customise an existing data file.

Create a New Fixture

This option would most commonly be

used when controlling a New or

obscure fixture type. The operator will

have to provide and enter all the

information on the fixture, including

parameter names, channels address,

channel data types, level and

parameter data. This information

should be available in the manual

supplied with the fixture, or from the

fixture supplier or manufacturer.

Edit an Existing Fixture

A existing fixture’s file could be

selected, modified, and saved as a

new fixture type if, for example, a new

version of a fixture was available with

extra facilities, such as rotating gobos,

or a simpler version of a fixture using

less channels. The existing data could

be modified, without the need to

re-enter the data for every channel.

Set-Up: Fixture Set-Up

/p5-20/3

Create a Variant of Existing fixture.

A customised data file (called a variant)

based on an existing fixture can only

be modified in limited ways.

For example, changing the names of

the gobos in a gobo wheel would be

permitted as only the parameter detail

name has changed, no data values

have changed. Changing the number

of gobos in a fixture would not be

permitted as a variant as the data

values would have to change. All

variants of a particular fixture have the

same Manufacturers name and fixture

type but a different variant number is

allocated. (The variant number is an

internal mechanism allowing the

control and programming of different

variants of the same fixture at the

same time.)

The desk differentiates between the

fixture data files supplied with the desk,

and those defined by the operator.

When assigning a fixture to a desk

channel, operator defined files are

shown in white, and those supplied

with the desk are shown in black.

Operator fixture data files should be

backed up onto to a floppy disk (see

the sections on Saving and Loading

Operator Fixture Data on page 5-4).

New fixture data files will be released

as data is supplied to Zero 88 by fixture

manufacturers. The files will be

available either from the local

Zero 88 dealer (from whom the desk

was purchased), or from the

Zero 88 World Wide Web site at

http://www.zero88.com.

All files retrieved from the Internet,

should be virus checked before use.

The information contained in the fixture

data files is detailed below.

MANUFACTURER’S NAME

This text field is used to sort and group

fixtures when the desk is allocating

them to channels.

FIXTURE TYPE

This field serves three purposes.

Firstly, it allows the operator to select

the correct fixture and operating mode

for that fixture.

Secondly, the desk compares this field

and Manufacturers Name for multiple

fixtures to check whether fixtures can

be selected and therefore programmed

together.

/p21/3

5

n

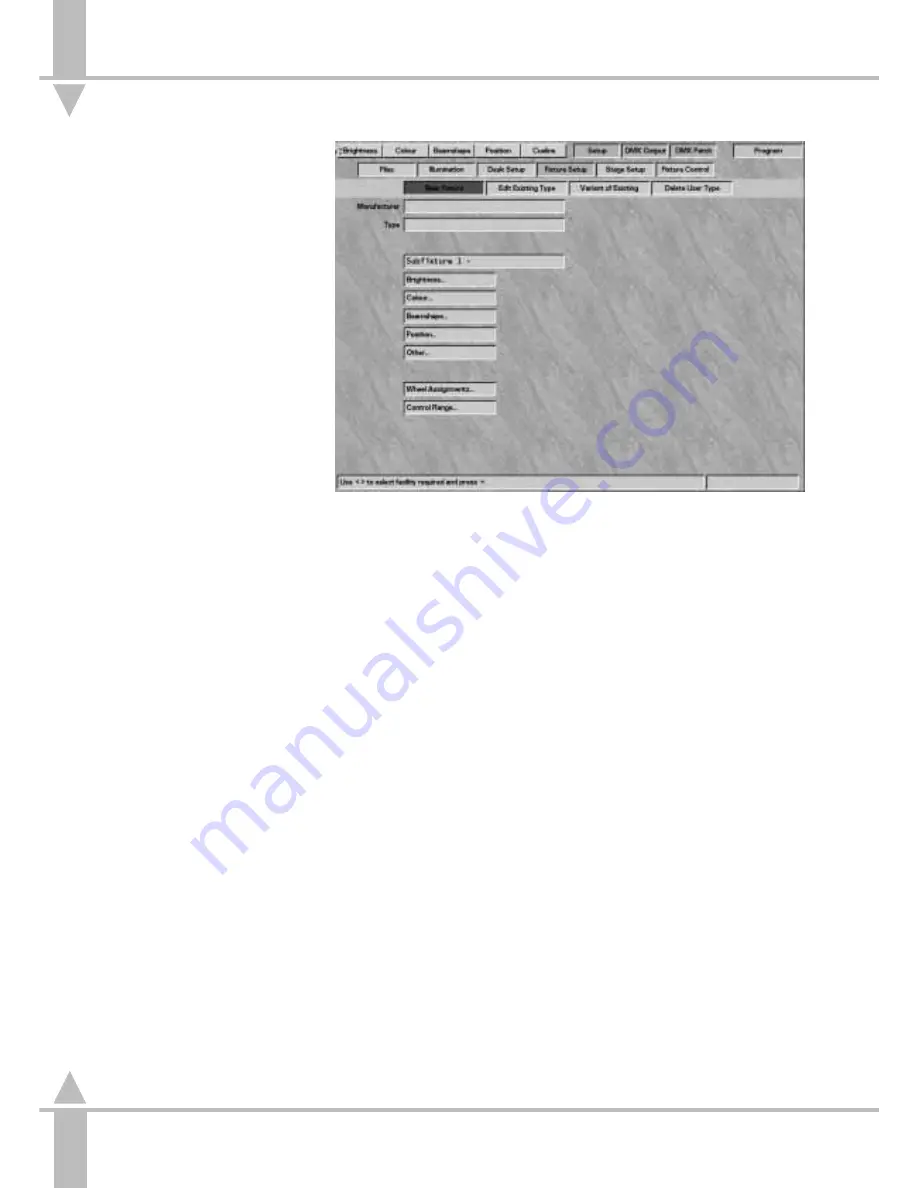
Figure 5-18: Fixture Set-Up screen

Set-Up: Fixture Set-Up

5 - 20

7364000/p5-20/3

Summary of Contents for SIRIUS 500

Page 1: ...SIRIUS 500 250 OPERATOR S MANUAL...

Page 2: ...appropriately qualified or trained person MFixture Data Zero 88 Lighting Ltd cannot be held responsible for the accuracy of the fixture data supplied with this desk although every effort has been mad...

Page 3: ...ii...

Page 4: ...Memory Full Scene 3 14 Programming a Position Memory Full Scene 3 16 Movement Effects 3 17 Modifying Memories Editing a Brightness Memory 3 18 Setting up for Editing Brightness Memories 3 18 Adding a...

Page 5: ...lanning 5 1 Piv v3 Internal Memory Structure 5 2 Controls 5 2 Navigating SetUp 5 2 Setup Files Selecting SetUp Options 5 3 Saving a Show 5 3 Loading a Show 5 3 Saving Operator Fixture Data 5 4 Loading...

Page 6: ...bmasters Output 6 8 Brightness Submasters Running the Show Manually 6 9 Using a Brightness Submaster Fader 6 9 Accessing a Memory on a Different Page Page Overlay 6 9 Adding a Brightness Memory to a B...

Page 7: ...Pvi V3 TABLE OF CONTENTS vi 7364000 Pvi V3...

Page 8: ...nt panel appear in capital letters references to wording appearing in the memory display and wheel display or on the monitor screen is shown in the text in italics p1 1 3 This manual may be available...

Page 9: ...orrect height and ensure that it provides adequate support to the lower back The working surface must also be at the correct height in relation both to the chair and to the equipment Forearms should b...

Page 10: ...heel The Beamshape attribute could have a gobo wheel an iris and a shutter The individual channels comprising a Colour Beamshape or Position attribute are referred to as parameters All fixtures must h...

Page 11: ...IDE mode can only be activated when the desk is in PROGRAM or RUN mode not in PRESETS ONLY mode p1 4 3 When in WIDE mode the Sirius 500 can control 96 fixtures and the Sirius 250 can control 48 fixtur...

Page 12: ...emory desk To modify the set up it is necessary for the operator to know what fixtures are to be controlled by the desk p1 5 3 Assigning Fixtures Select an appropriate desk channel s and allocate the...

Page 13: ...he desk is divided into the following sections MASTER CONTROLS MEMORY CONTROL FEATURES 4 WHEEL DRIVE EFFECTS CONTROL CHANNEL PRESETS CHANNEL FLASH BUTTONS PLAYBACK BRIGHTNESS SUBMASTERS ATTRIBUTE MEMO...

Page 14: ...e rear panel adjacent to the Key Switch just above the connector for the litlite The switch was deliberately positioned above the litlite connector so that a 90 litlite will protect the desk from acci...

Page 15: ......

Page 16: ...ol of the GRAND MASTER or a timed crossfade can be made using the PRESET CROSSFADE The green channel lights always show the actual output of each of the 48 24 Brightness channels WIDE mode is not avai...

Page 17: ...to zero down 5 Set the Master Faders to zero by moving the MASTER A down and the MASTER B up the FLASH MASTER to full by moving it up and set the PRESET CROSSFADE to the off position fully anti clockw...

Page 18: ...is active and changes to green when the selected screen becomes active The Desk Output Desk O P Screen Shows a bar graph representing the output of the Preset section of the desk together with the num...

Page 19: ...by the FLASH MASTER to see the effect Soloing Channels 1 Change the FLASH FUNCTION to SOLO by pressing the FLASH FUNCTION button until the red SOLO light comes on 2 Press and hold an individual chann...

Page 20: ...s allows other attribute changes to be seen The Brightness memories can be programmed from PRESET A or B or an existing memory on a submaster Any memory programmed is a combination of current Brightne...

Page 21: ...de time for later replay l ADD BUTTON Allows more than one memory to be associated with the same submaster fader l MODIFY BUTTON Used in RUN mode to allow live editing of some parameters l VIEW DATA B...

Page 22: ...d i e red If Memory 2 is then output all fixtures turn green If Memory 3 is then output fixture 2 turns blue and the others remain unaffected i e green Scene Memory A scene memory contains channel lev...

Page 23: ...ction Selecting Memories In PROGRAM mode once a programmed memory has been selected for a short time that memory becomes live on the DMX output When the memory number is changed the old memory is imme...

Page 24: ...r lock is on if using a numeric keypad Press return or enter to select the memory For a colour beamshape and position memory you simply type in the page number followed by a full stop and the memory n...

Page 25: ...r iris or some other parameter not being at the expected values If the default values set in the fixture data file move the fixture to bright white open 50 pan and 50 tilt or some other values that al...

Page 26: ...rammed 2 Press the key to select a suitable memory type see the section on Memory Types on page 3 3 3 Use the and keys to select Scene 4 Press the key once Memory Data Levels Set Channel Levels and Pr...

Page 27: ...gain to alter the Fade In Time from its default 8 Press the key once to alter the Fade Out Time from its default Use the wheels to adjust the fade times The Wheel Display prompts the operator as to wh...

Page 28: ...the external keyboard Press the FLASH FUNCTION button when finished to return the active bar to the memory number Level Adjustments Level adjustments can be made at any time Fade Times Fade times can...

Page 29: ...old the TRANSFER WITH TIME or TRANSFER NO TIME button as appropriate When transferring with time the Memory Display shows Trans Mem 9 T User Info Text Push Submaster Flash Or when transferring without...

Page 30: ...p3 11 3 7364000 p3 11 3 3 11...

Page 31: ...e button which turns red once selected The Wheel Display indicates how the various fixture parameters have been mapped onto the 4 Wheel Drive see Figure 3 11 If the selected fixtures have more than fo...

Page 32: ...ory by using wheels or an external keyboard or left at a default value Default Times Times all have defaults which are set in Desk Set Up Skipping the Required Point If the key is pressed too many tim...

Page 33: ...a yellow light in the button which turns red once selected The Wheel Display indicates how the various fixture parameters have been mapped onto the 4 Wheel Drive If the selected fixtures have more tha...

Page 34: ...ry by using wheels or an external keyboard or left at a default value Default Times Times all have defaults which are set in Desk Set Up Skipping the Required Point If the key is pressed too many time...

Page 35: ...ton which turns red once selected Use the wheels to adjust the Position on the selected fixture or fixtures The thumb wheel is mapped to control Pan and the index finger wheel to control Tilt see Figu...

Page 36: ...lamp is on If it is off use the PRESETS to turn it on or transfer a Brightness memory to a submaster using the TRANSFER buttons see the section on Transferring a Brightness Memory to a Submaster on pa...

Page 37: ...ose channels that are currently programmed The extra channel does not have a yellow light in the channel flash button 4 Press the PROGRAM button to add the extra channel to the memory at which point t...

Page 38: ...to zero is easy However it must be borne in mind that in HTP bringing a channel to zero turns the lamp off completely whereas in LTP zero does not equal off For example zero in a mirror position canno...

Page 39: ...ing a Chase Step Zero 1 Press the BRIGHTNESS button The Memory Display shows Memory No 10 User Info Text Select Mem Press Use the and keys to select a memory number 2 Press the key twice Memory Data S...

Page 40: ...memory using the channel flash buttons or using the external keyboard 5 Press the key again to alter the Fade In Time from its default 6 Press the key once to alter the Fade Out Time from its default...

Page 41: ...select a memory 3 Press the PROGRAM button The current memory is now duplicated in the selected memory 4 Review the newly copied memory to double check that the action has been effected Copying a Memo...

Page 42: ...ion is entered by mistake press the MEMORY COPY button again to exit Adding a Step in a Chase DO NOT press the SEQUENCE ADD STEP button at the end of the last step unless an empty step is needed at th...

Page 43: ...hase on page 3 29 Chase Controls l SEQUENCE ADD STEP BUTTON Adds a step to a chase memory l SEQUENCE DELETE STEP BUTTON Deletes the selected step from a chase memory l ONESHOT BUTTON When selected whe...

Page 44: ...ng PRESETS see page 3 7 and Programming a Brightness Memory Scene using 4 Wheel Drive see page 3 8 5 Once all the levels have been set press the PROGRAM button to save that step 6 Press the SEQUENCE A...

Page 45: ...selection button for BRIGHTNESS Memory No 1 User Info Text Select Mem Press Select the Memory Number using the and keys to select the Chase Memory to be previewed 2 Press the key Memory Type Chase Sel...

Page 46: ...fader it is possible to define when the chase starts to run There are three options FLASH Button Fader Level and Transfer FLASH Button A chase on a submaster is always at Step 1 until the associated...

Page 47: ...n to show them and edit with the wheels as normal 4 Press the PROGRAM button to save the step Memory Data Step STEP 1 Press Add Step or if Last Step 5 To create another step press the SEQUENCE ADD STE...

Page 48: ...y Programming a Colour Memory Partial Chase Colour Beamshape and Position chase memories can be either full or partial chases The procedure for programming a partial chase is exactly the same as descr...

Page 49: ...button to show them and edit with the wheels as normal 4 Press the PROGRAM button to save the step Memory Data Steps STEP 1 Press Add Step or if Last Step 5 To create another step press the SEQUENCE...

Page 50: ...Programming a Beamshape Memory Partial Chase Colour Beamshape and Position chase memories can be either full or partial chases The procedure for programming a partial chase is exactly the same as des...

Page 51: ...he Wheel Display to adjust the parameters 5 Press the PROGRAM button to save the step 6 Continue adding steps using the SEQUENCE ADD STEP button and programming until the end of the chase Do not add a...

Page 52: ...tly the same as described for a full chase section with the addition of one step as follows Press the key to select the Memory Type The Memory Display shows Memory Type FULL SCENE Select Type Press Us...

Page 53: ...determined by the level of the filters Ripple sound is programmed in a similar way except that the output is governed by the intensity and the speed control and not by the frequency of the music p3 3...

Page 54: ...Attack Press The Audio Effect can now be seen live on the outputs if a sound source is plugged in 5 Set the responce using the wheel indicated in the WHEEL DISPLAY Select the Attack drive using the AT...

Page 55: ...FOCUS SUBMASTER This allows the operator to activate a complete scene comprising Brightness Colour Beamshape and Position memories with one action Programming a Hotlink 1 The Hotlink is set up in PRO...

Page 56: ...nnels to a programmed level For more details please refer to the section on setting the Auxiliary controls in Desk Set Up see page 5 15 The buttons may also be remotely activated from within CueLine P...

Page 57: ......

Page 58: ...Tracks contain the memory and crossfading information for a particular attribute Brightness Colour etc These are shown as a series of events A show has a minimum of three tracks and a maximum of eigh...

Page 59: ...nserted in the event area by placing the cursor in a track and clicking Clicking in the cue track inserts a cue clicking in another track inserts the appropriate type of memory Cues and memories are i...

Page 60: ...only 4 Auxiliary on Sirius 250 Once a track type has been defined that track can only control the associated memory type or AUXILIARY CONTROL button 3 Select Brightness A for Track 1 4 Click on Track...

Page 61: ...ar the join of the two cues Clicking on the left hand side of a cue inserts a cue before it and on the right hand side inserts a cue after it p4 4 1 Once the CueLine tracks have been defined and at le...

Page 62: ...t memory will be held even through cues until the second memory is triggered THE CueLine will trigger a memory and its output is then held until another memory event is triggered 5 Extra memories can...

Page 63: ...re 4 9 The fade in and out attacks can be changed to slow or fast And a blackout between if required The fade up and down times are indicated during editing in the bottom corner Transition fades only...

Page 64: ...ens Select Auxiliary on and click on Insert A 5 second on state appears the timing of which can be adjusted Changing the Default Time 1 Select the Edit button 2 To change a state s duration click in t...

Page 65: ...ows how this is displayed It is apparent from Figure 4 13 that only one action can occur at a time Therefore if 5 seconds into the first memory the third memory needs to be added to the output of the...

Page 66: ...ry to factory defaults 1 Use the and keys to Select CLEAR MEMORIES Super User CLEAR MEMORIES Press to select or for next Option 2 Press the key to enter Clear Memory The Memory Display shows Clear Mem...

Page 67: ...p4 10 1...

Page 68: ...rather thanpatchedindividually p5 1 3 Thereforeworkoutwhat thetechnical limitationsoftheequipmentarein termsofcontrol Allthedimmers usually havetobegroupedtogether as they havetobeaddressed consecutiv...

Page 69: ...fixturedata filesusedintheshow Ifthedeskisinaninstallationwhere therigdoesnot changeverymuch but many differentshowsareperformed it isadvisabletocreateashowcalled BasicRig withall fixturesandstart add...

Page 70: ...MovetoLoad Show TheMemory Display shows Files LOAD SHOW FRM FLOPPY Press to Select or for More 2 Insertafloppy diskcontaining previouslysavedshowsintothe diskdrive 3 Pressthe keytoopenthe Load Show di...

Page 71: ...isk Notyetimplemented 1 ThenextoptionisCopy disk Pressthe key toopentheCopy dialoguebox Theboxcontainsa listoffilesonthedisk All Files is anoption default 2 Use and keystoselectwhich file s tocopy 3 P...

Page 72: ...he lights LEDS onthedesk The levelofthelightsisshowninthe window NOTOutput Lights 3 Usethe keytomovetoMemory LCD Theindexfinger wheel controlstheBrightnessofthe backlightingontheMemory Display andthem...

Page 73: ...t up Brightness SHOW AS DMX VALUE Select DMX or Press to Continue Usethe and keystochoose betweenpercentage shownas 0 100 orDMXvalue shownas 0 255 6 Pressthe key Set up Other SHOW AS DMX VALUE Select...

Page 74: ...ashbuttonstojumptoafixture ThedataisshownintheMemory Display andonthemonitor The MemoryDisplay shows Current Fix 48 Cyberlight Mode 1 DMX Address 100 to Return Thecurrentlyselected channel fixtureisin...

Page 75: ...hisoptioncanchangethewhole deskset up Readinstructions beforeuse TheClear Set Up optionchangesall fixturesandallstartaddressestoNot Assigned 1 Pressthe key Assign Fixtures CLEAR SET UP Press to Clear...

Page 76: ...he PROGRAMbuttonorthe key to openawindowshowingthe availablefixturetypesforthat manufacturer SeeFigure5 8for monitordisplay Mod Set Up Select HIGH END SYSTEMS Cyberlight Mode 3 Program to SAVE Usethe...

Page 77: ...Pressthe keyonce selectioniscomplete p5 10 3 3 TheMonitor showstheautopatch screen seefigure5 9 The Memory display shows Auto Patch DMX START Enter DMX to Patch Press Program EntertheDMXstartaddressa...

Page 78: ...notherfixture awarningappears ERROR WARNING DMX Address DMX Channels Overlap Press to Continue 4 Pressthe key andenter aValid DMXaddressandpressProgram Havingsuccessfully entereda validDMXaddresstheEn...

Page 79: ...hebeamstillmovesupwards whenthecontrolwheel ismoved upwards The and keystoggle betweennormalandreverse operation 4 Pressthe keytomovetoPan Tilt Swap Pan Tilt Swap 5 Thismaintainsnormaloperation evenwh...

Page 80: ...s Program 4 Pressthe keytwice Set Up Fix 1 Use to Finish to Set Controls to Add Duplicates p5 13 3 Pressthe keytoaddduplicates Duplicate Fixt 1 No of Duplicates 0 Enter No Duplicates and Press Program...

Page 81: ...sh to Set Controls to Add Duplicates 10 Pressthe keytoselectanother fixture NOTE Duplicates Duplicates can be set up at the same time as the primary instance of a fixture The instructions are detailed...

Page 82: ...tons orusingthe externalkeyboard 4 Pressthe key Aux Control 1 Action Set To MOMENTARY Set using and Press to Continue Usethe and keystotoggle betweenMomentary and Push On Push Off 5 Pressthe key Aux C...

Page 83: ...OGRAMbuttonto confirmtheaboveDMXaddress ThetoplineoftheMemory display changestothenextDuplicateof the Auxiliary Control Aux Cntrl 1 DMX 2 DMX Address _ Enter Address and Press Prog for More 6 Enterthe...

Page 84: ...heelDrive onpage3 26 3 Pressthe key Usethewheel to adjusttheChase Speed whichis showninbeatsper minute The factory defaultis60 4 Pressthe key Usethewheel to adjusttheFade In Time shownin mins secs ten...

Page 85: ...time takentomovefromonememory to thenext Thefactory defaultis 0 05 0 Usethewheel toadjust timeifrequired Transitiontimescanalsobe enteredviatheexternalkeyboard SeeEditingTimesonpage3 5 4 Pressthe key...

Page 86: ...Here Enter Name Press To Cont to Exit 2 Ifthe keyispressedoncefrom Show Name theMemory Display shows Set up has been modified Press Prog to Save Abandoned Modify PressthePROGRAMbuttonto saveall change...

Page 87: ...5 20 3 Create a Variant of Existing fixture Acustomiseddatafile calledavariant basedonanexistingfixturecanonly bemodifiedinlimitedways Forexample changingthenamesof thegobosinagobowheelwouldbe permitt...

Page 88: ...elwhichcontrolsthespecific parameteriftheDMXstartaddressfor thefixtureisone Iftheparameterisa wordparametertwochannels MSB andLSB mustbesupplied LEVELDATA A parameter canbesettoeither Variable orFixed...

Page 89: ...e bar jumpstoBrightness 5 Modifytheparameter dataas required 6 Modifywheel assignmentas required Creating a Variant Thisfeatureisnot yetavailable Deleting a User Fixture Type Followtheinstructionsinth...

Page 90: ...rsneedentering ormodifyingthenrepeat steps1to9 p5 23 3 NOTE Parameter Name Chosen by the Operator Make the choice of name logical and relative to the parameter being controlled e g colour wheel Bright...

Page 91: ...or thisrangeintheDetails column andpressthePROGRAMbutton 4 Thehighlightedbar movestothe secondline Enter detailsofthe secondrangeasbeforeand continueuntilallthedetailsabout theParameterareinplace 5 Wh...

Page 92: ...ers grouped by type withallnamesand channelnumbersshown together withthedefaultvalues Itisnot possibletochangeany ofthis informationinthisscreen 2 Thefifthcolumnonthescreenis Group andthecurrentparame...

Page 93: ...tosave anoperatorfixturedatafilewiththe samemanufacturerandfixturetypeas anexistingfixturetype anerror messageappearspromptingthe operator touseauniquename Ifan attemptismadetosaveitover an existingop...

Page 94: ...1 3 DMX Output and DMX Patch The DMX Output and DMX Patch screens show live DMX output values and current DMX patch data In RUN mode all programming functions are disabled Shows are replayed using a...

Page 95: ...one memory to be allocated to the same submaster fader l MODIFY BUTTON Allows live editing of some parameters l VIEW DATA INFO BUTTON Shows associated lighting data l HELP FACILITY When available pre...

Page 96: ...utton only works the CueLine and does not have the same effect as it would in Replay and Brightness mode p6 3 3 Zoom Buttons To get a more detailed view of the CueLine event area us the mouse and clic...

Page 97: ...fade The SLOW or FAST light flashes to indicate that the crossfade time has been altered from real time 6 Pressing the STOP button halts a crossfade completely Pressing the GO button restarts the cros...

Page 98: ...s which memories are allocated to which submasters p6 5 3 View Fixture Data A fixtures details can be displayed including DMX output values To display current data about any fixture press and hold dow...

Page 99: ...nge the next memory number using the and keys When the GO button is pressed the Next Memory is transferred to the Current Memory and crossfaded to the outputs in the displayed times The Fade Out time...

Page 100: ...e for Brightness Submasters see page 6 9 Unprogrammed memories cannot be selected and the numbers are grayed out on the monitor the full stop appears in the page display on the desk if the button is p...

Page 101: ...sters Output Press and hold the VIEW DATA button and press and release the BRIGHTNESS SUBMASTER FLASH button Release the VIEW DATA button The monitor changes to show the Submaster x The display change...

Page 102: ...mory on BRIGHTNESS SUBMASTER 2 is now the only memory that is live p6 9 3 Accessing a Memory on a Different Page Page Overlay This feature is called Page Overlay and operates on all four pages of each...

Page 103: ...g the FLASH button again stops the chase pressing it again re starts the chase from step one Running from the Fader Level The chase stays at Step 1 until the fader exceeds the level set in Start Effec...

Page 104: ...3 Hotlinks A BRIGHTNESS SUBMASTER fader can be hotlinked to a FOCUS SUBMASTER button As the fader is moved above the effect level the Hotlink is activated The software then activates the operator def...

Page 105: ...have several chases of any attribute running together however it must be remembered that they work on a Latest Takes Precedence basis Therefore if Memory 1 1 runs a chase on fixtures 1 to 5 and Memory...

Page 106: ...see the section on Editing a Brightness Memory on page 3 18 p6 13 3 Modifying Position Live Where available 1 To modify the Position parameters of a fixture whilst in RUN press the MODIFY button foll...

Page 107: ......

Page 108: ...r User is not listed amongst the options in the normal entry screens Accessing Super User Press the and keys together whilst simultaneously turning the Key Switch to PROGRAM mode p7 1 3 The following...

Page 109: ...lear Or to Abort Use the and keys to select the type of memories to clear from the following options Brightness only Colour only Beamshape only Position only CueLine Brightness Submasters Focus Submas...

Page 110: ...d may need to be reprogrammed p7 3 3 Setting Recovery Use the and keys to enter Recovery The Memory Display shows Super User RECOVERY IS OFF Select On or Off Press for next Use the or key to select on...

Page 111: ......

Page 112: ...ingle button selection JBrightness Submasters Four pages of 20 12 on Sirius 250 submasters providing instant access to 80 48 memories Memories may be scenes chases or effects pA 1 3 JAttribute Memorie...

Page 113: ...6 inches Height 155mm 6 2 inches Weight 23 5kg 51 8lbs Packed by factory for shipping Length 1450mm 57 12 inches Depth 717mm 28 25 inches Height 250mm 9 85 inches Weight 26 9kg 59 4lbs Optional Perip...

Page 114: ...3 Normal Goldenscan 3 Expanded Goldenscan HPE Miniscan Miniscan HPE pB 1 3 Pinscan Polycolor Stagescan Superscan Superscan Zoom 12 channel Superscan Zoom 16 channel Tiger Multicolor Tiger MRG Tiger Sc...

Page 115: ...AL Destroyer X250 Single Channel mode Destroyer X250 Multichannel mode Imagescan Mode 1 Imagescan Mode 2 MAC 500 Mode 1 MAC 500 Mode 2 MAC 500 Mode 3 MAC 500 Mode 4 MAC 600 Mode 1 MAC 600 Mode 2 MAC 6...

Page 116: ...ictory 250 Hi Res Victory II 250 Lo Res Victory II 250 Hi Res SHOW PRO Accubeam 400 AB 400 Accubeam 500 AB 500 Accucolor Power AB 60 Accustar Power AB 20 Cyberscan Mode 1 Cyberscan Mode 2 pB 3 3 STRON...

Page 117: ......

Page 118: ...t DMX addresses controlled from one desk channel e g cyc lights and light curtains etc Fixture Data File Contains data on what parameters a fixture has and how the parameters are addressed and control...

Page 119: ...ngineers time code originally referred to the system used in the motion picture industry for synchronising pictures and speech so that when films were edited the voice and the pictures matched perfect...

Reviews: