User Guide for SIP VP-T49G IP Phone
68
3.
Tap the desired value in the pop-up dialog box.
4.
Tap the
Save
soft key to accept the change or to cancel.
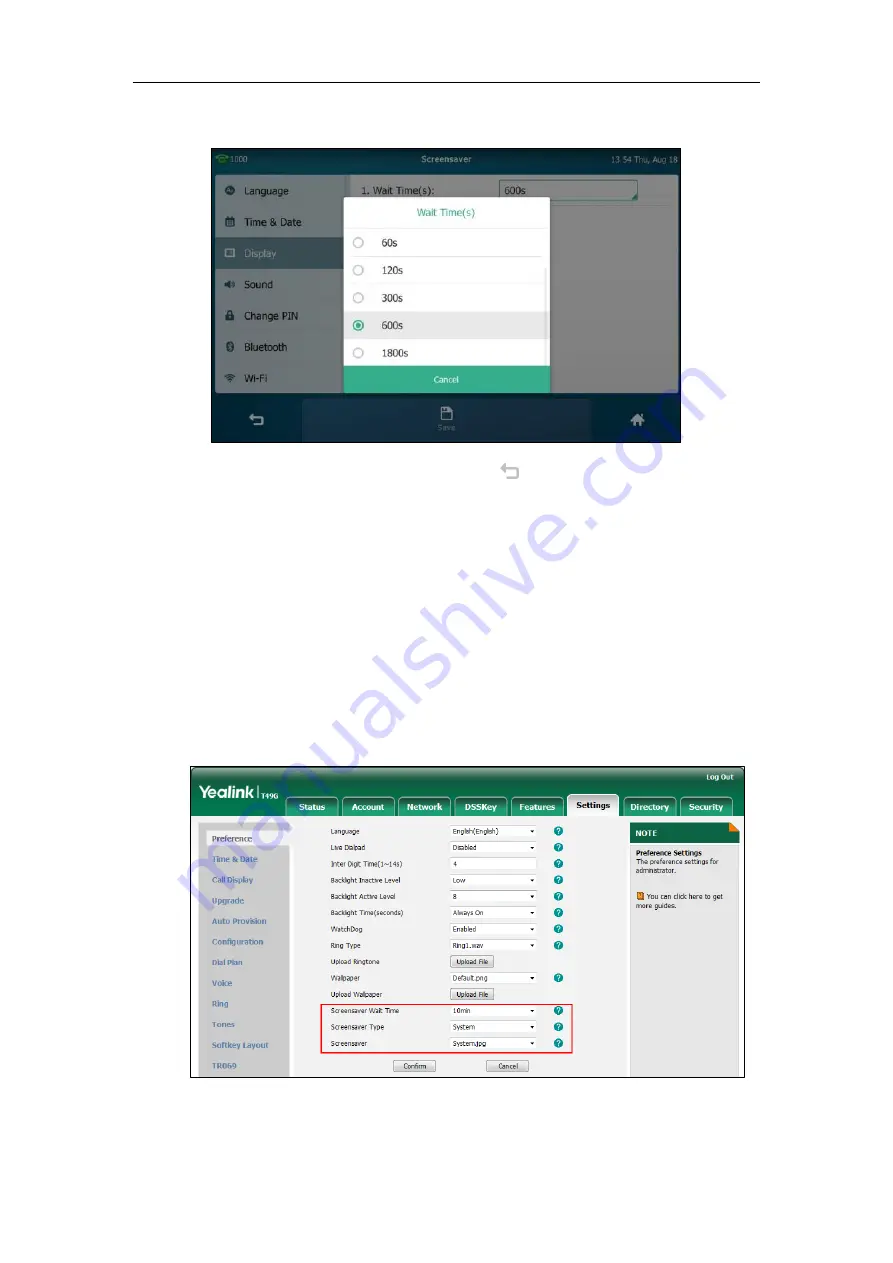
To configure the screen saver via web user interface:
1.
Click on
Settings
->
Preference
.
2.
Select the desired wait time from the pull-down list of
Screensaver Wait Time
.
You can set to 15s, 30s, 1min, 2min, 5min, 10min or 30min. The default value is 10min.
After no activity, the phone will wait the specified period of time before displaying the
screen saver.
3.
Select the desired screen saver type from the pull-down list of
Screensaver Type
.
-
If you select
System
.
The IP phone will automatically set System.jpg as the screen saver.
-
If you select
Upload Picture
.
The IP phone will automatically set the custom pictures you upload as the screen saver,
Summary of Contents for SIP VP-T49G
Page 1: ...nime VC_ Clou d ...
Page 8: ...User Guide for SIP VP T49G IP Phone viii ...
Page 14: ...User Guide for SIP VP T49G IP Phone xiv ...
Page 30: ...User Guide for SIP VP T49G IP Phone 30 ...
Page 158: ...User Guide for SIP VP T49G IP Phone 158 ...
Page 228: ...User Guide for SIP VP T49G IP Phone 228 ...
Page 313: ...Appendix 313 Appendix B Menu Structure ...


