4. Disassembly, Inspection and Reassembly of Engines
82
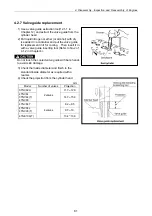
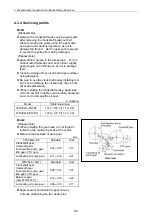
4.2.8 Valve stem seal replacement
Always use a new seal after the intake/exhaust valve
is disassembled. Since the one for the exhaust valve
is marked with yellow paint, do not confuse the intake
and exhaust valves.
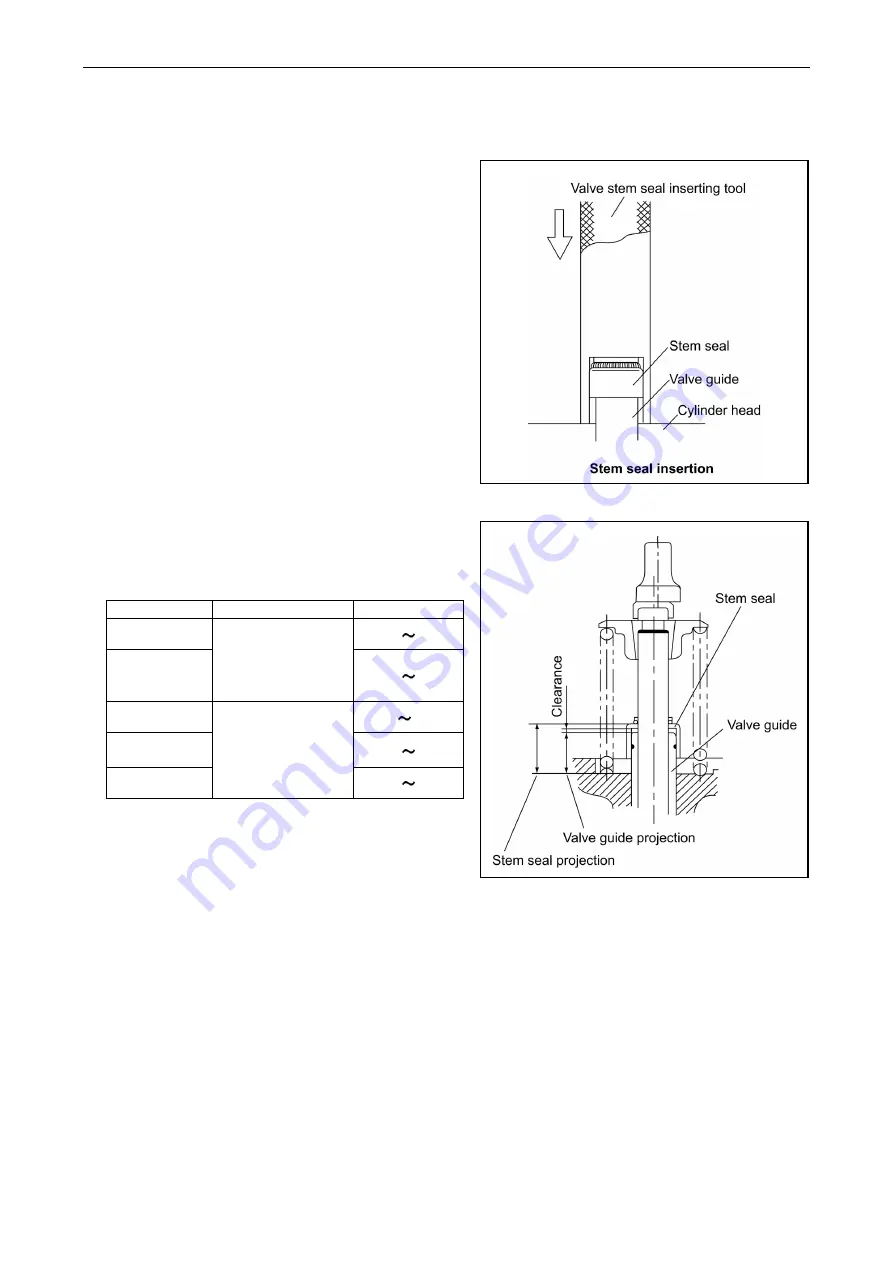
1) Apply engine oil to the lip.
2) Push with the inserting tool (Refer to No.5 of
4.1.2 in Chapter 4) for installation.
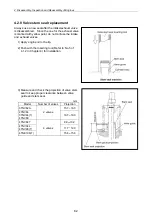
3) Measure and check the projection of valve stem
seal to keep proper clearance between valve
guide and stem seal.
mm
Model
Number of valves
Projection
3TNV82A 15.7 16.0
4TNV84
3TNV84(T)
4TNV88
2 valves
18.7 19.0
4TNV84T 9.9 10.2
4TNV94L
4TNV98(T)
11.7 12.0
4TNE106(T)
4 valves
15.4 15.6
Summary of Contents for 3TNV Series
Page 1: ...4TNV106 4TNV106T 4TNV94L 4TNV98 4TNV98T 3TNV82A 3TNV84 T 4TNV84 T 3TNV88 4TNV88 ...
Page 31: ...1 General 1 4 Engine External Views 16 ...
Page 32: ...1 General 1 5 Structural Description 17 ...
Page 156: ...9 Starting Motor 9 1 2 Components 141 ...
Page 157: ...9 Starting Motor 9 1 3 Troubleshooting 142 ...
Page 172: ...9 Starting Motor 9 2 3 Troubleshooting 157 ...
Page 175: ...9 Starting Motor 2 Removal of magnetic switch Remove the M6 bolts 10mm 2 160 ...
Page 185: ...9 Starting Motor 3 Brush 1 Check wear of the brush and the brush spring force 170 ...
Page 194: ...10 Alternator 179 10 1 6 Troubleshooting ...
Page 195: ...11 Electric Wiring 180 11 ELECTRIC WIRING 11 1 Electric Wiring Diagram ...
Page 213: ......

