REAR WHEEL
4-33
EAS22050
REMOVING THE REAR WHEEL
NOTICE
ECA1MC1029
Keep magnets (including magnetic pick-up
tools, magnetic screwdrivers, etc.) away
from the rear wheel hub “1”, otherwise the
wheel sensor rotor equipped in the wheel
hub may be damaged, resulting in improper
performance of the ABS and UBS.
1. Stand the vehicle on a level surface.
WARNING
EWA13120
Securely support the vehicle so that there is
no danger of it falling over.
TIP
Place the vehicle on the centerstand so that the
rear wheel is elevated.
2. Remove:
• Rear wheel sensor
• Rear wheel axle nut
• Brake torque rod
• Rear wheel axle
• Rear brake caliper
• Rear wheel
• Rear wheel sensor housing
NOTICE
ECA3P6D016
• Do not operate the brake pedal when re-
moving the brake caliper.
• Be sure to remove the rear wheel sensor
before removing the rear wheel sensor
housing, otherwise the sensor could be
damaged.
TIP
Move the rear wheel to the right to separate it
from the final drive assembly.
ET3P6D002
DISASSEMBLING THE REAR WHEEL
NOTICE
ECA3P6D003
• Keep magnets (including magnetic pick-up
tools, magnetic screwdrivers, etc.) away
from the wheel sensor rotor.
• Do not drop the wheel sensor rotor or sub-
ject it to shocks.
• If any solvent gets on the wheel sensor ro-
tor, wipe it off immediately.
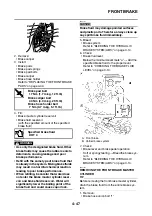
1. Remove:
• Oil seal
• Bearing retainer
• Wheel bearings
▼▼▼
▼
▼ ▼▼▼
▼
▼ ▼▼▼
▼
▼ ▼▼▼
▼
▼ ▼▼▼
▼
▼ ▼▼▼
▼
▼▼▼
a. Clean the surface of the rear wheel hub.
b. Remove the oil seal “1” with a flathead screw-
driver.
TIP
To prevent damaging the wheel sensor rotor,
place a rag “2” between the screwdriver and the
surface of the rotor.
c. Loosen the bearing retainer “1” with the hexa-
gon wrench (41) “2”.
NOTICE
ECA3P6D007
The bearing retainer has left-handed
threads. To loosen the retainer, turn it clock-
wise.
1
Hexagon wrench (41)
90890-01525
YM-01525
Summary of Contents for FJR1300A(D)
Page 1: ...2013 SERVICE MANUAL FJR1300A D 1MC 28197 E0 ...
Page 6: ......
Page 8: ......
Page 70: ...SPECIAL TOOLS 1 61 ...
Page 101: ...LUBRICATION POINTS AND LUBRICANT TYPES 2 30 ...
Page 104: ...LUBRICATION SYSTEM CHART AND DIAGRAMS 2 33 EAS20410 LUBRICATION DIAGRAMS 5 6 7 1 2 3 4 ...
Page 106: ...LUBRICATION SYSTEM CHART AND DIAGRAMS 2 35 1 3 2 ...
Page 107: ...LUBRICATION SYSTEM CHART AND DIAGRAMS 2 36 1 Main axle 2 Drive axle 3 Oil delivery pipe 1 ...
Page 108: ...LUBRICATION SYSTEM CHART AND DIAGRAMS 2 37 6 5 4 3 2 1 ...
Page 110: ...LUBRICATION SYSTEM CHART AND DIAGRAMS 2 39 1 2 3 4 5 6 7 8 9 ...
Page 112: ...LUBRICATION SYSTEM CHART AND DIAGRAMS 2 41 4 5 3 2 1 9 8 6 7 ...
Page 116: ...COOLING SYSTEM DIAGRAMS 2 45 7 1 2 3 4 5 5 8 9 6 8 9 10 11 12 ...
Page 124: ...CABLE ROUTING 2 53 Horn and radiator left side view A B 1 1 2 3 4 5 5 6 C 7 7 8 ...
Page 132: ...CABLE ROUTING 2 61 Rear fender top view 1 2 3 B C A B ...
Page 138: ...CABLE ROUTING 2 67 ...
Page 141: ......
Page 377: ...MIDDLE GEAR 5 76 Middle driven pinion gear shim Thickness mm 0 10 0 15 0 20 0 30 0 40 0 50 ...
Page 428: ...WATER PUMP 6 15 ...
Page 455: ...IGNITION SYSTEM 8 6 ...
Page 461: ...ELECTRIC STARTING SYSTEM 8 12 ...
Page 465: ...CHARGING SYSTEM 8 16 ...
Page 477: ...SIGNALING SYSTEM 8 28 ...
Page 533: ...FUEL INJECTION SYSTEM 8 84 ...
Page 551: ...CRUISE CONTROL SYSTEM 8 102 ...
Page 555: ...FUEL PUMP SYSTEM 8 106 ...
Page 563: ...ACCESSORY BOX SYSTEM 8 114 ...
Page 573: ...IMMOBILIZER SYSTEM 8 124 ...
Page 577: ...ABS ANTI LOCK BRAKE SYSTEM 8 128 ...
Page 616: ...ELECTRICAL COMPONENTS 8 167 7 1 3 2 18 21 20 19 9 11 12 13 14 15 16 17 6 8 4 5 10 ...
Page 658: ......
Page 659: ......
Page 660: ......


