EDIT screen
102
— Reference Guide
●
PITCH (pitch change)
Modify the pitch of the entire track without
changing the length of the audio. After this
command is executed, all regions included in
the track will be combined into a single region.
• TRACK
Select the track whose pitch you wish to modify.
• PITCH
Adjust the amount of pitch change in semitone
units (range: ±12 semitones).
• FINE
Adjust the amount of pitch change in one-cent
units (range: ±50 cents).
Executing the T-COMP or PITCH commands
will require more processing time than the
actual length of the audio. Also, it is not pos-
sible to cancel the command after it has been
executed.
• EXECUTE
Execute the command.
Tip!
Immediately after executing an editing com-
mand of the TRACK menu (except for the
NAME command), you can press the
[UNDO] key to return the data to its previous
condition.
■
PART menu commands and
parameters
The PART menu allows you to specify an area
(“part”) of the selected track, and execute an edit-
ing command.
An area that contains no audio data cannot
be specified as a part.
The commands that can be selected in the PART
menu and their parameters are listed below.
●
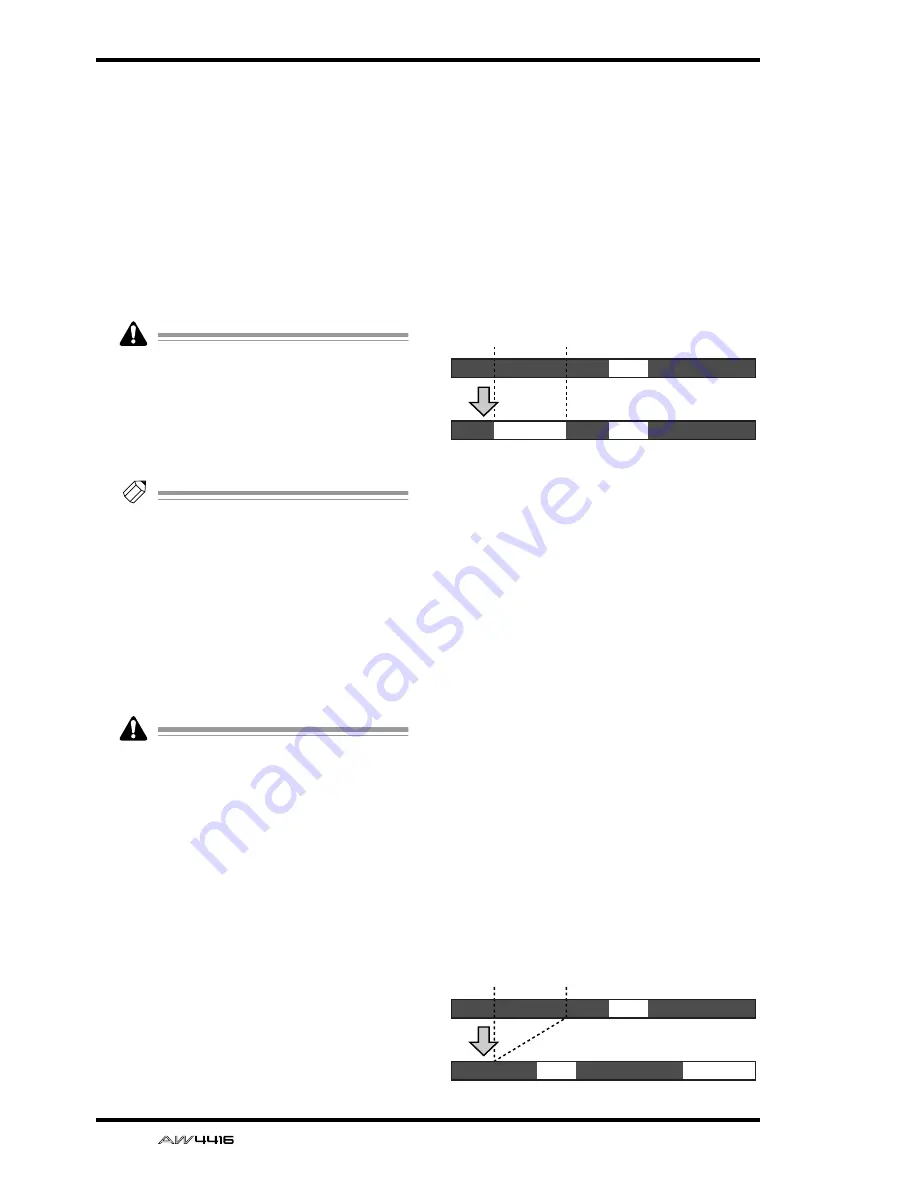
ERASE
Erase the audio data from the selected part. If all
audio data in a track is erased, the track name
will return to the “-NO REC-” display.
• TRACK
Select the track from which you wish to erase
data. For the Erase command, you can specify
all tracks as the subject of the operation. To do
so, rotate the [DATA/JOG] dial all the way
clockwise when setting the TRACK parameter,
to make the selection read “AL-C” (ALL-CUR-
RENT). With this setting, the START
→
END por-
tion of the virtual tracks currently selected for
tracks 1–16 will be selected for the operation.
• ALL V.TR (all virtual tracks)
Select whether data will be erased from all vir-
tual tracks included in the selected track(s) (YES)
or only from the currently selected virtual track
(NO).
• START
Specify the starting location of the part to be
erased.
• END
Specify the ending location of the part to be
erased.
• EXECUTE
Execute the command.
●
DELETE
Delete the audio data from the selected part.
Subsequent audio data will be moved forward
by the length of the deleted part.
• TRACK
Select the track from which you wish to delete
data. For the Delete command, you can specify
all tracks as the subject of the operation. To do
so, rotate the [DATA/JOG] dial all the way
clockwise when setting the TRACK parameter,
to make the selection read “AL-C” (ALL-CUR-
RENT). With this setting, the START
→
END range
of the virtual tracks currently selected for tracks
1–16 will be selected for the operation.
• ALL V.TR (all virtual tracks)
Select whether data will be deleted from all vir-
tual tracks included in the selected track(s) (YES)
or only from the currently selected virtual track
(NO).
• START
Specify the starting location of the part to be
deleted.
• END
Specify the ending location of the part to be
deleted.
• EXECUTE
Execute the command.
A
B
A
B
A’
START
END
ERASE
A
B
A’
B
START
END
DELETE
Summary of Contents for AW4416
Page 1: ......
Page 2: ...PROFESSIONAL AUDIO WORKSTATION E Operation Guide ...
Page 87: ...Chapter4 Connections and setup 72 Operation Guide ...
Page 123: ...Chapter5 Recording on the AW4416 108 Operation Guide ...
Page 161: ...Chapter8 Patching 146 Operation Guide ...
Page 179: ...Chapter9 Track and virtual track operations 164 Operation Guide ...
Page 282: ...PROFESSIONAL AUDIO WORKSTATION E Reference Guide ...
Page 473: ...PROFESSIONAL AUDIO WORKSTATION E Tutorial ...
Page 477: ...Tutorial AW4416 Professional Audio Workstation 4 Tutorial ...


