Chapter13—Scene memory
— Operation Guide
205
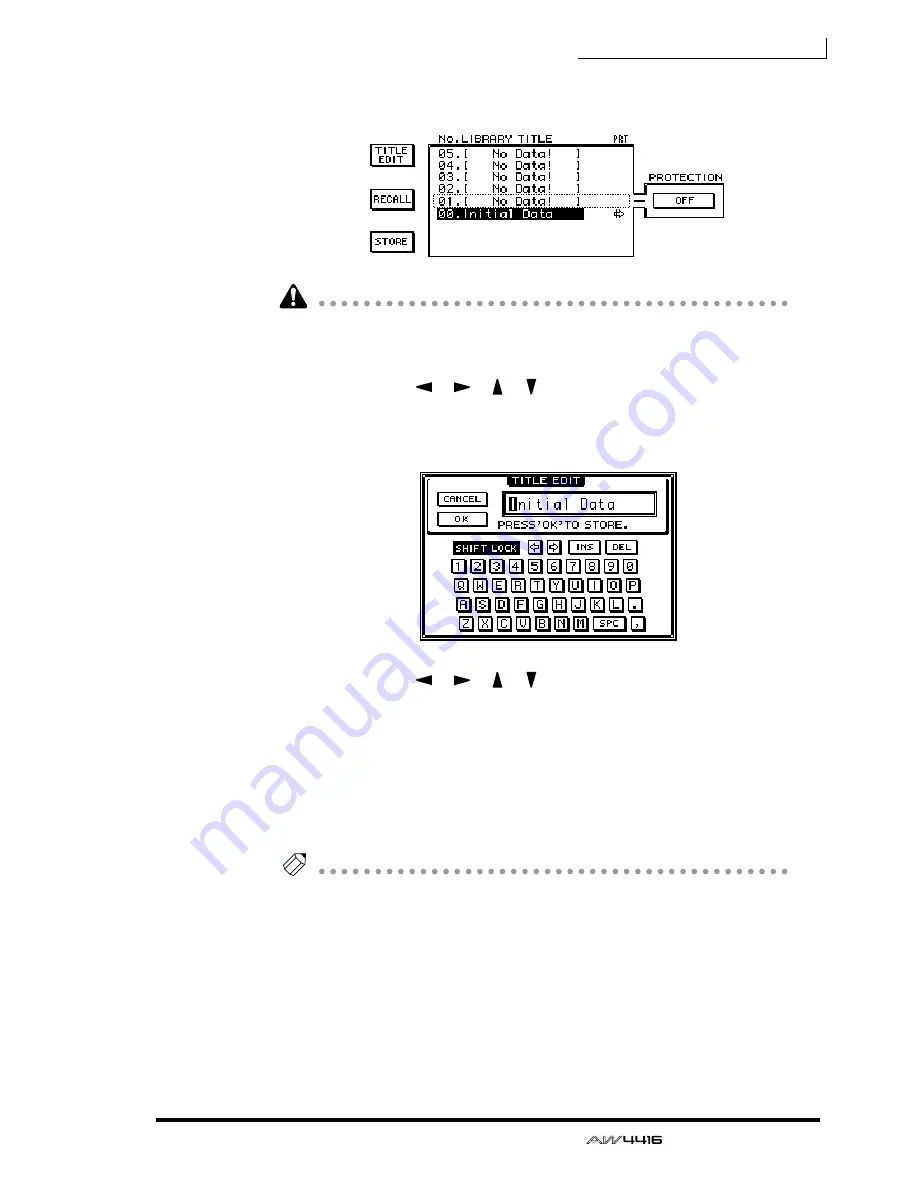
2. Use the [DATA/JOG] dial to select the store destination scene number
(01–96).
• Scene number 00 is for recall only, and cannot be stored.
• Be aware that if you select a previously-stored scene number and execute the
Store operation, the previous scene will be lost.
3. Use the CURSOR [
]/[
]/[ ]/[ ] keys to move the cursor to the
STORE button in the screen, and press the [ENTER] key.
The TITLE EDIT popup window will appear, allowing you to specify the name of
the scene (scene name).
4. Use the CURSOR [
]/[
]/[ ]/[ ] keys and the [DATA/JOG] dial to
specify the name of the scene.
For details on inputting characters, refer to page 60.
5. To store the scene, move the cursor to the OK button in the screen and
press the [ENTER] key.
The scene will be stored, and the AW4416 will be in the same state as when the
store destination scene number of step 2 is recalled. To cancel without storing the
scene, move the cursor to the CANCEL button and press the [ENTER] key.
Tip!
• To prevent a stored scene from accidentally being overwritten, you can make
memory protect settings for each scene number. For details refer to page 208.
• You can use the keys of the SCENE MEMORY section to store a scene even
when you are in a screen other than the SCENE screen Scene Mem page. For
details refer to page 211.
Summary of Contents for AW4416
Page 1: ......
Page 2: ...PROFESSIONAL AUDIO WORKSTATION E Operation Guide ...
Page 87: ...Chapter4 Connections and setup 72 Operation Guide ...
Page 123: ...Chapter5 Recording on the AW4416 108 Operation Guide ...
Page 161: ...Chapter8 Patching 146 Operation Guide ...
Page 179: ...Chapter9 Track and virtual track operations 164 Operation Guide ...
Page 282: ...PROFESSIONAL AUDIO WORKSTATION E Reference Guide ...
Page 473: ...PROFESSIONAL AUDIO WORKSTATION E Tutorial ...
Page 477: ...Tutorial AW4416 Professional Audio Workstation 4 Tutorial ...


