Chapter8—Patching
— Operation Guide
135
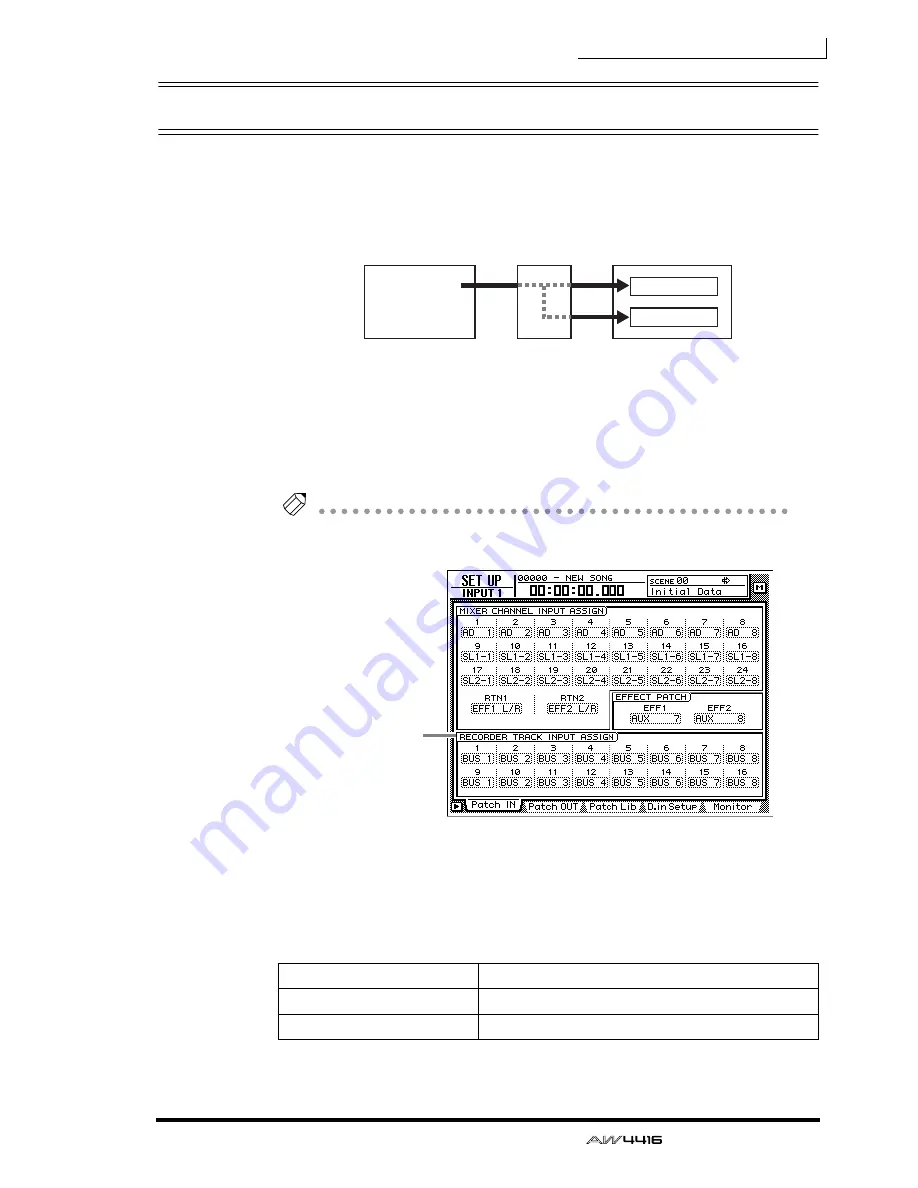
Patching to the recorder inputs
When the AW4416 is in the default state, buses 1–8 are assigned respectively to
recorder inputs 1–8 and 9–16, but you can assign the direct signals from the
input channels as desired.
Here’s how to assign the desired signals to recorder inputs 1–16.
1. Press the [SETUP] key
→
[F1] (Patch IN) key to access the SETUP screen
Patch IN page.
The RECORDER TRACK INPUT ASSIGN column will indicate the patched status
of recorder inputs 1–16.
Tip!
If the Patch IN tab is not assigned to the [F1] key, press the [SHIFT] key + [F1] key to
switch the tabs, and then press the [F1] key.
2. Move the cursor to the recorder input whose patching you wish to
change, and use the [DATA/JOG] dial to select the signal that you wish
to assign.
The following types of signal can be assigned to each input.
❍
Recorder inputs 1–16
Display
Type of signal
BUS 1 – BUS 8
Buses 1–8
DIR 1 – DIR16
Input channel direct out 1–16
Buses 1–8
Mixer section
Recorder section
Recorder
input patch
Tracks 1–8
Tracks 9–16
×
8
×
8
RECORDER
TRACK INPUT
ASSIGN column
Summary of Contents for AW4416
Page 1: ......
Page 2: ...PROFESSIONAL AUDIO WORKSTATION E Operation Guide ...
Page 87: ...Chapter4 Connections and setup 72 Operation Guide ...
Page 123: ...Chapter5 Recording on the AW4416 108 Operation Guide ...
Page 161: ...Chapter8 Patching 146 Operation Guide ...
Page 179: ...Chapter9 Track and virtual track operations 164 Operation Guide ...
Page 282: ...PROFESSIONAL AUDIO WORKSTATION E Reference Guide ...
Page 473: ...PROFESSIONAL AUDIO WORKSTATION E Tutorial ...
Page 477: ...Tutorial AW4416 Professional Audio Workstation 4 Tutorial ...


