background image

Troubleshooting

WorkCentre 6505 Color Laser Multifunction Printer

User Guide

193

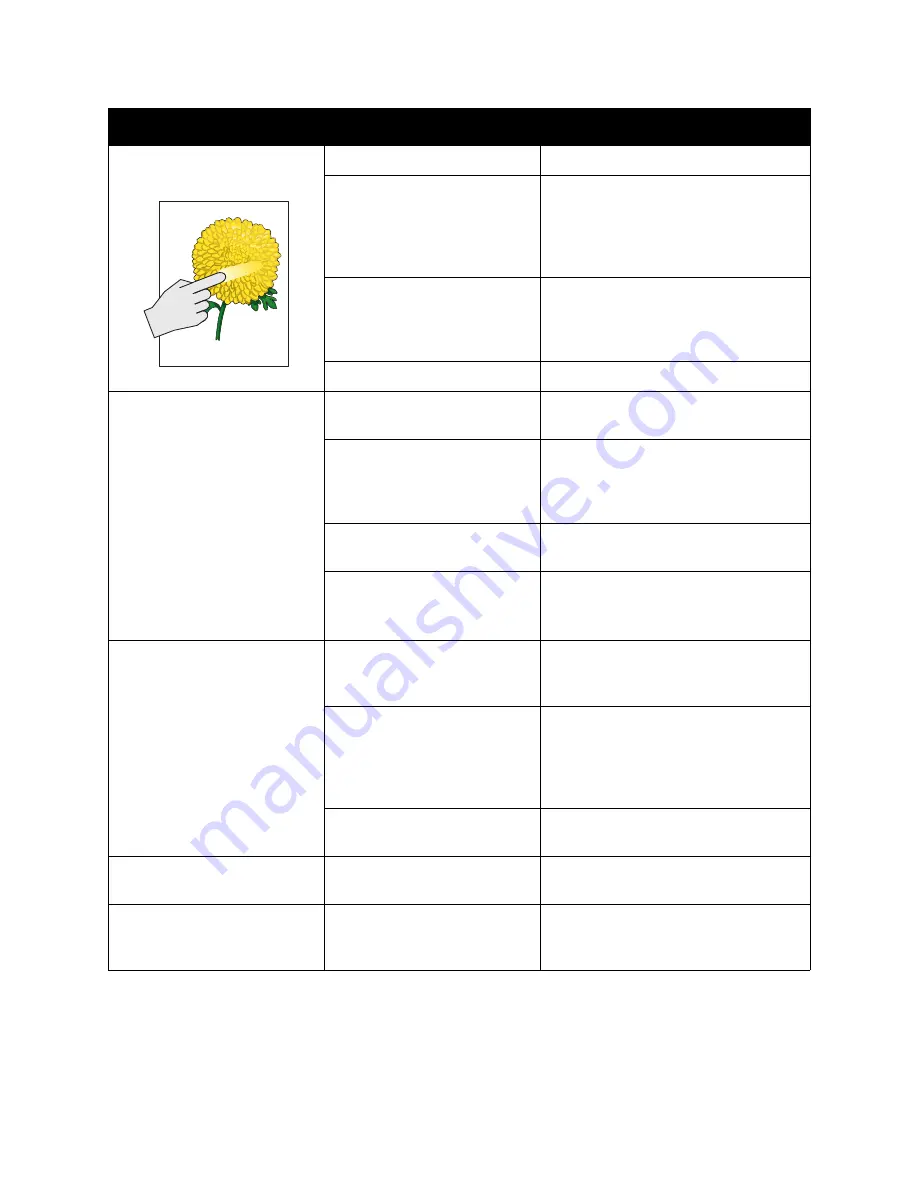
Toner smears when rubbed.

The paper is damp.

Replace the paper.

The paper is outside the 
recommended specification 
range, or the paper type setting 
is not correct.

Replace the paper with a recommended 
size and type, then confirm that your 
print driver settings are correct. For 
details, see 

Supported Paper and Media 

on page 56.

The toner cartridges are not 
Xerox

®

 toner cartridges.

Verify that the toner cartridges meet 
specifications and replace if necessary. 
For details, see 

Consumables 

on 

page 169.

The fuser is old or damaged.

Replace the fuser.

Printed pages are blank.

Two or more sheets are feeding 
at once.

Remove the paper stack from the tray, 
fan it, then reinsert it.

The toner cartridges are not 
Xerox

®

 toner cartridges.

Verify that the toner cartridges meet 
specifications and replace if necessary. 
For details, see 

Consumables 

on 

page 169.

The transfer belt unit is old or 
damaged.

Replace the transfer belt unit.

The cable to the laser unit or 
controller is defective.

For assistance, see the Xerox

®

 Support 

website at:

www.xerox.com/office/WC6505support

Hair-like marks appear in or 
around black half-tone printing. 
Shadows appear around areas 
of dense black printing.

The paper was left unwrapped 
for a long time, especially in a 
dry environment.

Replace the paper. Also, see 

Paper 

Storage Guidelines 

on page 57.

The paper is outside the 
recommended specification 
range.

Replace the paper with a recommended 
size and type, then confirm that your 
print driver settings are correct. For 
details, see 

Supported Paper 

on 

page 58.

The transfer belt unit is old or 
damaged.

Replace the transfer belt unit.

Color around the edge of 
printing is incorrect.

The color registration is 
incorrect.

Adjust the color registration. For details, 
see 

Color Registration 

on page 199.

Colored dots are printed at 
regular intervals (about 
28 mm).

The imaging unit is dirty.

Gently clean the imaging unit. For 
details, see 

Cleaning the Imaging Unit 

and Laser Lens 

on page 196.

Symptom

Cause

Solution

Summary of Contents for WorkCentre 6505

Page 1: ...tsch Benutzerhandbuch Español Guía del usuario Português Guia do usuário Nederlands Gebruikershandleiding Svenska Användarhandbok Dansk Betjeningsvejledning Čeština Uživatelská příručka Polski Przewodnik użytkownika Magyar Felhasználói útmutató Русский Руководство пользователя Türkçe Kullanım Kılavuzu Ελληνικά Εγχειρίδιο χρήστη ...

Page 2: ...d or other countries Apple AppleTalk Bonjour EtherTalk Macintosh Mac OS and TrueType are trademarks of Apple Inc registered in the U S and other countries HP GL HP UX and PCL are trademarks of Hewlett Packard Corporation in the United States and or other countries IBM and AIX are trademarks of International Business Machines Corporation in the United States and or other countries Microsoft Windows...

Page 3: ...w 18 Rear View 19 Internal View 19 Control Panel 20 Configurations and Options 21 Configurations 21 Standard Features 21 Additional Capabilities 21 Optional Features 22 Energy Saver Mode 23 Setting the Power Saver Time 23 Exiting Energy Saver Mode 23 Starting Energy Saver Mode 23 Information Pages 24 Menu Map 24 Configuration Page 24 Startup Page 24 CentreWare Internet Services 25 Accessing Centre...

Page 4: ...vers and Utilities for Macintosh OS X Version 10 5 and Later 41 Installing Other Drivers 43 Installing Utilities for Windows 44 Installing the Address Book Editor 44 Installing PrintingScout 44 Enabling Optional Features 46 Enabling Optional Features for the Windows PostScript Driver 46 Enabling Optional Features for the Windows PCL Driver 47 Enabling Optional Features for Macintosh OS X 10 5 and ...

Page 5: ...ng on Custom Size Paper 89 Printing on Both Sides of the Paper 91 Automatic 2 Sided Printing Guidelines 91 Binding Edge Options 91 Automatic 2 Sided Printing 92 Manual 2 Sided Printing 92 Printing Using Secure Print 95 Storing a Print Job in Memory 95 Printing a Secure Print Job 96 Printing Using Proof Print 97 Setting Up a Proof Print Job 97 Printing a Proof Print Job 98 5 Copying Basic Copying 1...

Page 6: ...ocuments for Faxing 128 Basic Faxing 129 Sending a Fax from the Printer 129 Sending a Fax from Your Computer 130 Using the Fax Address Book 132 Faxing to an Individual 132 Faxing to a Group 133 Selecting Fax Options for Single Jobs 137 Setting the Fax Resolution 137 Making the Image Lighter or Darker 137 Turning On Hook On or Off 137 Sending a Delayed Fax 138 Including a Fax Cover Page 138 Setting...

Page 7: ...hecking Printer Status with PrintingScout 172 Checking Printer Status using Email 173 Checking Page Counts 176 Viewing the Billing Meter 176 Printing the Print Volume Report 176 Moving the Printer 178 10 Troubleshooting Troubleshooting Overview 182 Error and Status Messages 182 PrintingScout Alerts 182 Online Support Assistant 182 Information Pages 182 More Information 183 Control Panel Messages 1...

Page 8: ...rce 214 Power Consumption 214 Performance Specifications 215 12 Regulatory Information Electromagnetic Interference 218 United States FCC Regulations 218 Canada Regulations 218 European Union 219 Other Regulations 220 Turkey RoHS Regulation 220 Copy Regulations 221 United States 221 Canada 222 Other Countries 223 Fax Regulations 224 United States 224 Canada 225 European Union 226 South African Sta...

Page 9: ...l Safety on page 10 Operational Safety on page 12 Maintenance Safety on page 14 Printer Symbols on page 15 Your printer and the recommended supplies have been designed and tested to meet strict safety requirements Attention to the following information ensures the continued safe operation of your printer ...

Page 10: ...ve the printer on for optimum performance It does not pose a safety hazard If however you do not use the printer for an extended period turn it off and unplug it The following are hazards to your safety The power cord is damaged or frayed Liquid is spilled into the printer The printer is exposed to water If any of these conditions occur do the following 1 Turn off the printer immediately 2 Disconn...

Page 11: ...urrent capacity of the printer Verify that the printer is plugged into an outlet that provides the correct voltage and power Review the electrical specification of the printer with an electrician if necessary WARNING Avoid the potential of electrical shock by ensuring that the printer is properly grounded Electrical products can be hazardous if misused Do not place the printer in an area where peo...

Page 12: ...lation Ventilation is important if you are printing in high volume or if the printer is being used continuously over a long period Printer Location Do not block or cover the slots or openings on the printer These openings are provided for ventilation and to prevent overheating of the printer Place the printer in a dust free area where there is adequate space for operation and servicing For details...

Page 13: ...CAUTION Use of non Xerox supplies is not recommended The Xerox Warranty Service Agreements and Total Satisfaction Guarantee do not cover damage malfunction or degradation of performance caused by use of non Xerox supplies They also do not cover damage or degradation of performance caused by the use of Xerox supplies not specified for this printer The Total Satisfaction Guarantee is available in th...

Page 14: ...is not described in the documentation supplied with your printer Do not use aerosol cleaners Clean with a dry lint free cloth only Do not burn any consumables or routine maintenance items For information on Xerox supplies recycling programs go to www xerox com gwa See also Cleaning the Printer on page 166 Moving the Printer on page 178 ...

Page 15: ...t surface on or in the printer Use caution to avoid personal injury Do not expose the item to sunlight Do not expose the item to light Do not touch components with this symbol as personal injury could result Do not touch the transfer belt with your fingers or with sharp objects It can cause print quality problems The belt can be easily punctured Do not place or drop any object on the transfer belt...

Page 16: ...Safety WorkCentre 6505 Color Laser Multifunction Printer User Guide 16 ...

Page 17: ...rinter User Guide 17 Features This chapter includes Parts of the Printer on page 18 Configurations and Options on page 21 Energy Saver Mode on page 23 Information Pages on page 24 CentreWare Internet Services on page 25 More Information on page 26 ...

Page 18: ...on page 18 Rear View on page 19 Internal View on page 19 Control Panel on page 20 Front View 1 Tray 1 250 sheet paper tray 2 Manual feed slot 3 Front cover 4 Front cover release button 5 Control panel 6 USB memory port 7 Automatic document feeder ADF tray 8 Output tray 9 Power switch 10 Side door wc6505_003 5 6 4 3 2 1 7 8 9 10 ...

Page 19: ... View 1 Power plug 2 ADF cover 3 USB port 4 Memory slot door 5 Network connector 6 Line out to telephone 7 Line in from wall jack 1 Button for opening the front cover 2 Transfer unit 3 Imaging unit 4 Fuser 5 ADF document glass 6 Toner cartridges wc6505_004 2 1 4 5 6 7 3 wc6505_005 1 2 3 4 5 6 ...

Page 20: ...ears all text numbers or instructions 12 Stop button Cancels the current print job 13 Start button Press to start a copy scan or fax job 14 Status indicator light The green or red light indicates printer status Lights green when the printer is ready to receive data Blinks green when the printer is busy receiving data Lights red to indicate an error condition or warning that requires your attention...

Page 21: ...printer configurations have one memory slot supporting 512 MB or 1024 MB DDR2 DIMMs Maximum RAM is 1280 MB 256 MB standard plus 1024 MB optional 10Base T 100 1000Base TX Ethernet interface network connection USB 2 0 connection Energy Saver mode PrintingScout printer monitoring utility Windows only Printer information pages including a Menu Map Configuration Page and Demo Page Billing meters Admini...

Page 22: ...t only the first set to check the print results If the first copy is satisfactory print the remainder from the control panel Form Overlay Enables writing PCL5 forms Font Download Enables the downloading of fonts to the RAM Disk Optional Features Duplex unit for automatic 2 sided printing optional for WorkCentre 6505N 250 sheet feeder Tray 2 Wireless network adapter Productivity Kit 512 MB See also...

Page 23: ...l panel and all sensors after the printer enters Mode 1 Reduces power consumption to 12 W or less Range is 5 120 minutes The default setting is 5 6 Press OK 7 Press the Up Arrow or Down Arrow button to select the desired time then press OK 8 Press the Return button to return to the Ready screen Exiting Energy Saver Mode The printer automatically cancels Energy Saver mode when it receives data from...

Page 24: ...button 3 At Menu Map press OK to print the page Configuration Page The Configuration Page lists printer information such as default settings installed options network settings with IP address and font settings Use the information on this page to help you configure network settings for your printer and to view page counts and system settings To print the Configuration Page 1 On the control panel pr...

Page 25: ... configuration and security settings diagnostic functions and more CentreWare Internet Services requires A TCP IP connection between the printer and the network in Windows Macintosh or Linux environments TCP IP and HTTP enabled on the printer A network connected computer with a Web browser that supports JavaScript Accessing CentreWare Internet Services At your computer open a Web browser type the ...

Page 26: ...de Packaged with the printer Quick Use Guide Packaged with the printer Video Tutorials www xerox com office WC6505docs Recommended Media List Europe www xerox com europaper North America www xerox com paper Online Support Assistant www xerox com office WC6505support Technical Support www xerox com office WC6505support Information Pages Print from the control panel menu Supplies www xerox com offic...

Page 27: ...ecting the Printer on page 30 Configuring Network Settings on page 32 Setting the Date and Time on page 37 Installing the Software on page 38 Installing Other Drivers on page 43 Installing Utilities for Windows on page 44 Enabling Optional Features on page 46 Setting up Scanning on page 49 See also Online Support Assistant at www xerox com office WC6505support Installation Guide packaged with your...

Page 28: ... The Startup Page prints by default If it does not see Startup Page on page 24 If you are connected to a network keep the Startup Page for referencing network settings such as the IP address of your printer 5 If connected to a network configure network settings For details see Configuring Network Settings on page 32 6 Install drivers and software utilities from the Software and Documentation disc ...

Page 29: ...ith the 250 sheet feeder the duplex unit and supplies the weight is 34 5 Kg 76 1 lb 3 Ensure that your printer has the proper amount of clearance for all of its features including any options you purchased See the following measurements The recommended minimal spacing for the printer includes the following 4 After positioning the printer you are ready to connect it to the power source and computer...

Page 30: ...e network You cannot connect the printer directly to the computer It must be connected through a router or hub An Ethernet network can be used for one or more computers and supports many printers and systems simultaneously Ethernet connection is typically faster than USB and allows you direct access to the settings of the printer using CentreWare Internet Services USB If you connect the printer to...

Page 31: ... it on For safety information see Power Cord on page 10 4 Connect the other end of the USB cable to the USB Port on the computer 5 When the Windows Found New Hardware Wizard appears cancel it 6 You are ready to install the print drivers For details see Installing the Software on page 38 Connecting to a Telephone Line To connect the printer to a telephone line 1 Make sure that the printer is turned...

Page 32: ...nfiguration Protocol DHCP server A DHCP server automatically assigns an IP address to every computer and printer on the network that is configured to use DHCP If you use a Cable or DSL router see the documentation for your router for information on IP addressing Assigning the IP Address of the Printer This section includes Allowing the IP Address to be Assigned Automatically on page 33 Assigning t...

Page 33: ...inter to the network refer to the device instructions on assigning network addresses The router or device documentation can give you a range of acceptable address numbers you can use It is important that the addresses be similar to the IP addresses used by other printers and computers on the network but not the same Only the last digit must be different For example your printer can have the IPv4 a...

Page 34: ...rn to Network Mask 14 Press the Down Arrow button to select Gateway Address then press OK Repeat step 10 to set the Gateway Address 15 Press the Return button to return to the Ready screen 16 Print the Configuration Page to verify the new settings For details see Configuration Page on page 24 17 You are ready to install software For details see Installing the Software on page 38 See also Online Su...

Page 35: ...nu then press the OK button 3 Press the Up Arrow or Down Arrow button to select Network Setup then press OK 4 Press the Up Arrow or Down Arrow button to select TCP IP then press OK 5 Press the Up Arrow or Down Arrow button to select IPv4 then press OK 6 Press the Up Arrow or Down Arrow button to select IP Address then press OK The IP address of the printer appears on the IP Address screen Enabling...

Page 36: ... fax numbers and email addresses to the printer address book using CentreWare Internet Services If the printer is connected with a USB cable you can add fax numbers and email addresses to the printer address book using Address Book Editor For details see Adding an Individual Fax Address Book Entry on page 132 Creating a Fax Group on page 134 and Editing Address Book Fax Groups on page 135 For more...

Page 37: ... press OK 5 At Set Date Time press OK 6 At Time Zone press the Up Arrow or Down Arrow button to select the UTC offset for your time zone then press OK Note For example the Coordinated Universal Time UTC zone for Pacific Standard time is 08 00 7 At Set Date press the Up Arrow or Down Arrow button to set the month then press the Forward Arrow button 8 Press the Up Arrow or Down Arrow button to set t...

Page 38: ...ion to Linux platforms through the network interface Available Print Drivers To access special printing options use a Xerox print driver Xerox provides drivers for various page description languages and operating systems The following print drivers are available To download the latest drivers go to www xerox com office WC6505drivers Print Driver Source Description Adobe PostScript 3 Driver Softwar...

Page 39: ...n page 35 5 In the Installation Options screen select PostScript and or PCL 6 Note You can install both drivers at once Each will be displayed in your printer list after installation 6 Click Install to start the installation 7 When the installation is complete at the Installation Status screen select the following Set Printer As Default optional Print a Test Page Share Printer optional 8 Click Fin...

Page 40: ...y to use Installing Print and Scan Drivers for Windows USB To install the print driver 1 If a USB cable is not connected from the printer to your computer connect it now 2 Cancel the Windows Found New Hardware Wizard 3 Wait for the wizard to appear again and cancel it again Note Windows recognizes the printer as two devices a printer and a scanner and tries to help you install the drivers 4 Insert...

Page 41: ...nstall the print driver Install the scan driver Add the printer Note Before installing drivers verify that the printer is plugged in turned on and connected by USB or to an active network Make sure that the printer is receiving network information by monitoring the LEDs on the back of the printer near the Ethernet cable jack RJ45 When the printer is connected to a functioning network and receiving...

Page 42: ...orm 8 Complete the online registration then close the browser 9 At the Finish Up window click Quit 10 Next add the printer to your printer queue For details see Adding the Printer on page 42 Adding the Printer For networking set up your printer using Bonjour Rendezvous or connect using the IP address of your printer for an LPD LPR connection For a non network printer create a desktop USB connectio...

Page 43: ...h OS X Version 10 5 and Later on page 41 Installing Other Drivers This section includes Linux Drivers on page 43 Other Xerox Drivers on page 43 Linux Drivers A complete list of supported Linux distributions and the associated drivers to download are provided at www xerox com office WC6505drivers Other Xerox Drivers The following drivers are also available to download for Windows at www xerox com o...

Page 44: ...WorkCentre 6505 Address Book Editor 8 Click Connect via Network to manage the address book over the network then click OK 9 Enter the IP address in the IP Address field of the IP Address Settings 10 Click OK The computer synchronizes information with the printer and displays it in the Address Book Editor Installing PrintingScout PrintingScout is a Windows utility that enables you to monitor the st...

Page 45: ...ifunction Printer User Guide 45 6 At the next screen click Next to accept the default installation destination 7 Click Next 8 Click Finish The PrintingScout icon appears in your Windows Taskbar See also Checking Printer Status with PrintingScout on page 172 ...

Page 46: ...For Windows XP SP1 and later click Start Settings Printers and Faxes For Windows Vista click Start Control Panel Hardware and Sound Printers For Windows Server 2003 and later click Start Settings Printers For Windows 7 click Start Devices and Printers 2 In the list of printers right click the WorkCentre 6505 PS printer and select Properties 3 Click the Configuration tab then click the Get Informat...

Page 47: ...nabling Optional Features for a Network Connected Printer 1 Navigate to the list of printers on your computer For Windows XP SP1 and later click Start Settings Printers and Faxes For Windows Vista click Start Control Panel Hardware and Sound Printers For Windows Server 2003 and later click Start Settings Printers For Windows 7 click Start Devices and Printers 2 In the list of printers right click ...

Page 48: ...y from the drop down Memory Capacity list To enable the optional 250 sheet feeder click Paper Tray Configuration and select 2 Tray from the drop down list If you have enough memory to use the RAM Disk feature select Available from the RAM Disk drop down list Note A minimum of 512 MB is required To enable the duplex unit select Available from the Duplex Unit drop down list 6 Click OK Enabling Optio...

Page 49: ...nning to an email address Configure the email server in CentreWare Internet Services If the printer is connected using a USB cable you cannot scan to an email address or a network location You can scan to a folder on your computer or scan into an application after installing the scan drivers and the Express Scan Manager utility For more information see Installing the Software on page 38 Setting Up...

Page 50: ... prompts for entering your password 6 Click Done 7 Click Show All then click the Network icon 8 Select Built in Ethernet from the Show drop down list Note Record your IP address to use when creating the address book entry 9 Click Show All then click Accounts Note Record your Short Name to use when creating the address book entry 10 Close System Preferences 11 Create a folder in your Public folder ...

Page 51: ... printer see Finding the IP Address of Your Printer on page 35 2 Click Address Book 3 Under Network Scan Comp Serv click Comp Server Address Book 4 Click Add next to any unused entry and enter the following information Name Enter the name that you want to appear in the Address Book Network Type Select Computer SMB Host Address Enter the IP address of your computer Port Number Enter the default por...

Page 52: ...rver For more information see Setting Up Scanning to an FTP Server on page 51 Setting Up Scanning to an Email Address Before you can scan to an email address you must configure the printer to communicate with your SMTP email server To configure the SMTP server settings 1 Open your Web browser type the IP address for your printer in the address field then press Enter or Return Note To find the IP a...

Page 53: ...can scan to a folder on your computer you must install the Express Scan Manager utility For more information see Installing the Software on page 38 1 Start Express Scan Manager Windows Click Start Programs Xerox WorkCentre 6505 Express Scan Manager Macintosh Navigate to Applications Xerox WorkCentre 6505 and double click Express Scan Manager 2 Click OK to accept the default Destination Path folder...

Page 54: ...Installation and Setup WorkCentre 6505 Color Laser Multifunction Printer User Guide 54 ...

Page 55: ... Media on page 56 Loading Paper on page 61 Setting Paper Types and Sizes on page 68 Selecting Printing Options on page 70 Printing on Specialty Media on page 77 Printing Custom Sizes on page 87 Printing on Both Sides of the Paper on page 91 Printing Using Secure Print on page 95 Printing Using Proof Print on page 97 ...

Page 56: ...Total Satisfaction Guarantee is available in the United States and Canada Coverage can vary outside these areas Please contact your local representative for details See also Recommended Media List Europe www xerox com europaper Recommended Media List North America www xerox com paper Paper Usage Guidelines Each printer tray accommodates certain sizes and types of paper or other specialty media Fol...

Page 57: ...quality Store paper in dark cool relatively dry locations Most paper items are susceptible to damage from ultraviolet UV and visible light UV radiation emitted by the sun and fluorescent bulbs is particularly damaging to paper items Reduce the intensity and length of exposure to visible light on paper items as much as possible Maintain constant temperatures and relative humidity Avoid moisture exc...

Page 58: ...due to moisture such as water rain or vapor For details contact your reseller Tray 1 Paper Size Letter 8 5 x 11 in US Folio 8 5 x 13 in Legal 8 5 x 14 in Executive 7 25 x 10 5 in A4 210 x 297 mm 8 2 x 11 5 in A5 148 x 210 mm 5 2 x 8 2 in JIS B5 182 x 257 mm 10 Envelope 4 1 x 9 5 in Monarch Envelope 3 9 x 7 5 in DL Envelope 110 x 220 mm C5 Envelope 162 x 229 mm Custom size range Width 76 2 215 9 mm...

Page 59: ...210 8 355 6 mm 8 3 14 in Paper Type and Weight Plain Paper 60 105 g m2 16 28 lb Bond Letterhead Hole Punched Colored Paper Loading Capacity 250 sheets 20 lb Manual Feed Slot Paper Size Letter 8 5 x 11 in Legal 8 5 x 14 in Executive 7 25 x 10 5 in US Folio 8 5 x 13 in No 10 Envelope 4 1 x 9 5 in Monarch Envelope 3 9 x 7 5 in DL Envelope 110 x 220 mm C5 Envelope 162 x 229 mm A4 210 x 297 mm A5 148 x...

Page 60: ... 163 220 g m2 60 80 lb Cover Hole Punched plain Colored Paper plain Labels Envelope short edge feed only for Monarch and DL envelopes Special Loading Capacity One sheet at a time Duplex Unit 2 Sided Printing Paper Size A4 210 x 297 mm Letter 8 5 x 11 in US Folio 8 5 x 13 in Legal 8 5 x 14 in Custom size range Width 76 2 215 9 mm 3 8 5 in Height 127 355 6 mm 5 14 in Paper Type and Weight Plain 60 1...

Page 61: ... guidelines when loading paper into Tray 1 Load up to 250 sheets of plain paper or a stack of paper 65 220 g m2 17 40 lb Bond 40 80 lb Cover less than 15 mm high 0 60 in Tray 1 holds paper within the following dimensions Width 76 2 216 mm 3 8 5 in Length 127 355 6 mm 5 14 in For automatic 2 sided printing you can load paper in the range of 60 105 g m2 16 28 lb Bond Do not load different types of p...

Page 62: ...ull out the paper tray 2 Slide the paper width guides to the edge of the tray Extend the width guides fully as shown in the following illustration 3 Before loading the paper flex the sheets back and forth and then fan them Straighten the edges of the stack on a level surface wc6505_008 wc6505_009 wc6505_014 ...

Page 63: ...Use the manual feed slot for a wide range of media including Plain Paper Letterhead Lightweight Cardstock Heavyweight Cardstock Lightweight Glossy Cardstock Coated 2 and Coated 3 Heavyweight Glossy Cardstock Colored Paper Labels Envelopes Special For a more complete list of paper types and sizes usable in the Manual Feed Slot see Supported Paper on page 58 Follow these guidelines to avoid problems...

Page 64: ...nual feed slot to fit the paper you are using 2 Place the paper into the slot with the print side face down and the top of the sheet entering the printer first Note You can insert paper during the ready mode or sleep mode of the printer The printer automatically detects the paper and holds it while it waits for a print job wc6505_011 wc6505_012 ...

Page 65: ...paper in the tray at the same time To print high quality use high quality paper intended for laser printers Do not remove or add paper to the 250 sheet feeder during printing Doing so can cause a paper jam Remove the paper align it with the new paper and insert both into the tray together Do not put any objects other than paper in the tray Do not push or force down the tray Always load paper short...

Page 66: ...ngth guide then slide the tray until the arrow lines up with the appropriate paper size The guide clicks into place 4 Before loading the paper flex the sheets back and forth and then fan them Straighten the edges of the stack on a level surface 5 Place the paper into the tray with the print side face up Note Do not exceed the maximum fill line in the tray Overfilling the tray can cause paper jams ...

Page 67: ...il they rest lightly against the edge of the paper stack Note Be careful not to bend the paper 7 Insert the tray back into the printer until it stops CAUTION Be careful not to use excessive force on the tray Doing so could damage the printer See also Setting Paper Types and Sizes on page 68 wc6505_017 wc6505_050 ...

Page 68: ...nt quality problems can occur Note If None is selected in the Paper Type menu in the print driver the printer uses the control panel settings The printer prints only when the settings for the paper size and type configured in the print driver match the control panel settings If the settings in the print driver and control panel do not match the print driver setting overrides the control panel sett...

Page 69: ...505 Color Laser Multifunction Printer User Guide 69 4 Press the Up Arrow or Down Arrow button to select Paper Size then press OK 5 Select the paper size then press OK 6 Press the Return button to return to the Ready screen ...

Page 70: ...ng Defaults in Windows for a Shared Network Printer on page 71 Use the following procedure to set the default settings used for all print jobs sent to the printer from your computer using the specific driver You can override the default settings for an individual print job when printing from an application 1 Navigate to the list of printers on your computer For Windows XP SP1 and later click Start...

Page 71: ... save your selections Selecting Printing Options for an Individual Job in Windows This section includes Printing Options for Windows PostScript Driver on page 72 Printing Options for Windows PCL Driver on page 73 To use special printing options for a particular job change the print driver settings in the application before sending the job to the printer Note The print driver includes online help w...

Page 72: ...les you to load and edit a set of saved settings Printer Status button Opens the internal settings page of the printer in CentreWare Internet Services in your computer Web browser for network printers only Defaults button Returns all of the Paper Output tab settings to their default settings Default All button Returns all settings in the Properties dialog of the printer to their default settings H...

Page 73: ...ced tab Set Features to Default button Returns the Advanced tab settings to their defaults Driver Tab Printing Option Paper Output Job Type Specifies the type of print job Normal Print Secure Print Proof Print Secure Print and Proof Print are available with extra RAM memory only 2 Sided Print 1 Sided Print Flip on long edge Flip on short edge Paper Size Specifies the size of the paper to print on ...

Page 74: ...e Order Available only if more than one page is being printed on a sheet Determines the order in which pages are printed on the sheet Draw Outlines When multiple pages are printed per sheet prints a border around each page Booklet Poster Mixed Document Rotation button Provides selection of Poster printing Booklet Creation and Image Rotation Poster printing enlarges one page of data and prints it a...

Page 75: ... print driver options click the question mark button in the print driver dialog boxes to view the online help Driver Drop Down Title Printing Options Copies Pages Copies Specifies number of copies and whether to collate Pages All Current Selection From x to x Page range Layout Pages per Sheet Specifies the number of pages to print on each sheet of paper Layout Direction Specifies the order in whic...

Page 76: ...ount Mode User Administrator User Settings Specifies account settings such as name and password Printer Features Print Quality Color Specifies output color image quality brightness color correction method halftone screen settings and adjust color balance Color Adjustment Specifies RGB color adjustment settings Color Balance C M Y K Specifies amount of color to use Media Handling Specifies manual f...

Page 77: ...sizes For a listing of supported envelope sizes for Tray 1 and the manual feed slot see Supported Paper on page 58 Store unused envelopes in their packaging to avoid the effects of moisture and dryness which can affect print quality and cause wrinkling Excessive moisture can cause the envelopes to seal before or during printing For best results maintain constant temperatures and relative humidity ...

Page 78: ...y back into the printer until it stops 6 On the control panel press the System button to display the Menu screen 7 Press the Up Arrow or Down Arrow button to select Tray Settings then press the OK button 8 At Tray 1 press OK 9 Press the Up Arrow or Down Arrow button to select Paper Type then press OK 10 Press the Up Arrow or Down Arrow button to select Envelope then press OK 11 Press the Return bu...

Page 79: ... Driver on page 79 If you are printing using the PCL driver go to Printing Envelopes using the PCL Driver on page 79 Printing Envelopes using the PostScript Driver 1 After loading the envelopes in the appropriate tray or the manual feed slot in the application you are printing from open the Print dialog box 2 Select the WorkCentre 6505 PS printer from the list of printers then click the Properties...

Page 80: ... includes Guidelines for Printing Labels on page 80 Printing Labels from Tray 1 on page 81 Printing Labels from the Manual Feed Slot on page 81 To order paper or other specialty media contact your local reseller or go to the Xerox Supplies website at www xerox com office WC6505supplies Guidelines for Printing Labels Note Labels can be printed from Tray 1 and from the manual feed slot Do not use vi...

Page 81: ... the Paper Tray list select Tray 1 b From the Paper Size list select the size of the sheet of labels c From the Paper Type list select Labels 7 Click OK 8 In the Print dialog box click OK or Print to start printing Printing Labels from the Manual Feed Slot Note Generally it is best to print labels from Tray 1 The manual feed slot paper path has more bends and is more likely to cause the labels to ...

Page 82: ...Cardstock mode for paper weight less than 163 g m2 Use Heavyweight Cardstock mode for paper weight more than 163 g m2 You can print on glossy cardstock from Tray 1 or from the manual feed slot Do not perform automatic 2 sided printing using glossy cardstock Do not open sealed packages of glossy cardstock until you are ready to load them into the printer Leave glossy cardstock in the original wrapp...

Page 83: ...you are printing from open the Print dialog box and select the WorkCentre 6505 printer You can use the PCL or the PostScript driver 5 Click the Properties or Preferences button 6 Click the Paper Output tab then do the following a From the Paper Size list select the paper size b From the Paper Type list select Lightweight Glossy Cardstock or Heavyweight Glossy Cardstock c From the Paper Tray list s...

Page 84: ... necessary reposition the paper guides to fit the sheet 3 In the application you are printing from open the Print dialog box and select the WorkCentre 6505 printer If you have both the PCL and the PostScript drivers installed you can use either driver 4 Click the Properties button 5 Click the Paper Output tab then do the following a From the Paper Size list select the size of the glossy cardstock ...

Page 85: ...s in the tray at the same time Do not use cardstock that is coated or designed for inkjet printers Printing on Cardstock from Tray 1 1 Gently pull out the paper tray and slide open the paper guides For details see Loading Paper in Tray 1 on page 61 2 Fan the sheets to release any that are stuck together 3 Insert the cardstock into the tray with the print side face up Note Do not load a stack of ca...

Page 86: ...ed straight not crooked If necessary reposition the paper guides to fit the sheet 3 In the application you are printing from open the Print dialog box and select the WorkCentre 6505 printer You can use the PCL or the PostScript driver 4 Click the Properties or Preferences button 5 Click the Paper Output tab then do the following a From the Paper Size list select the size of the cardstock b From th...

Page 87: ...ermission to save custom paper sizes on your computer See your system administrator for help Defining the Custom Paper Size in the Windows PostScript Driver Note You can save only one custom paper size at a time as you print Once saved the dimensions are retained until you change them To create a custom paper size for the PostScript driver and save it under a unique name for repeat use see Creatin...

Page 88: ...ize list on the Paper Output tab of the print driver They are also available in the Print dialog box of most applications The exact location varies with the application 1 Navigate to your printer directory or list then right click the WorkCentre 6505 PCL driver and select Properties 2 In the Properties dialog box click the Configuration tab 3 At the bottom of the Configuration tab click the Custom...

Page 89: ...To print using a custom size in the Print dialog box select the custom paper size name from the dialog box size menu or list Click the Properties button and skip to step 4 To print using the Custom Page Size defined in the PostScript driver properties in the Print dialog box click the Properties button On the Paper Output tab select Custom Page Size from the Paper Size list In the PostScript Custo...

Page 90: ...Printing WorkCentre 6505 Color Laser Multifunction Printer User Guide 90 5 Select any other desired options then click OK 6 In the Print dialog box click OK or Print to start printing ...

Page 91: ...t 2 sided pages one sheet at a time using the PostScript driver For details see Performing Manual 2 sided Printing from the Manual Feed Slot on page 93 Automatic 2 Sided Printing Guidelines Before printing a 2 sided document verify that the paper is a supported size for the tray For a list of supported sizes see Supported Paper on page 58 Do not use the following media for automatic 2 sided printi...

Page 92: ...uch as 2 sided printing to be available in the print driver dialog boxes the optional features must be installed and enabled If you have not enabled your installed optional features see Enabling Optional Features on page 46 See also Automatic 2 Sided Printing Guidelines on page 91 Manual 2 Sided Printing This section includes Performing Manual 2 sided Printing from Tray 1 on page 93 Performing Man...

Page 93: ...ct Tray 1 b From the 2 Sided Print list select Flip on long edge Manual or Flip on short edge Manual c From the Paper Type field select the paper type d Select any other desired settings then click OK 8 In the Print dialog box specify the pages to print then click OK or Print to start printing Note You do not need to specify printing odd or even pages Specify all pages or a page range The driver s...

Page 94: ...propriate print driver then click the Properties button 6 Click the Paper Output tab then do the following a From the Paper Size list select the paper size b From the Paper Type list select the paper type c From the Paper Tray list select Manual Feed Slot 7 Click OK 8 In the Print dialog box specify the page you want to print 9 Click Print or OK to start printing ...

Page 95: ...n the printer then print them on demand without sending the print job from the computer each time Storing a Print Job in Memory Set up Secure Print print jobs using the PCL or PostScript print driver at your computer To store a print job in memory 1 In the application you are printing from open the Print dialog box 2 Select your WorkCentre 6505 printer then click the Properties button 3 Click the ...

Page 96: ... set up the Secure Print then press OK 4 Use the alphanumeric keypad to enter the password that you assigned to the document then press OK 5 Press the Up Arrow or Down Arrow button to select one of the following All Documents The timestamp assigned to the document The document name you created 6 Press OK 7 Press the Up Arrow or Down Arrow button to select one of the following To delete the documen...

Page 97: ...hem from the printer control panel 1 In the application you are printing from open the Print dialog box 2 Select your WorkCentre 6505 printer then click the Properties button 3 Click the Paper Output tab then do the following a From the Job Type list select Proof Print b If you are using the PostScript driver click the Setup button For the PCL driver click the Setting button c In the Proof Print d...

Page 98: ...ne of the following All Documents The document name you created The timestamp assigned to the document 5 Press OK 6 Press the Up Arrow or Down Arrow button to select one of the following To delete the document from memory after printing select Delete after Print then press OK Use the Up Arrow and Down Arrow buttons or the alphanumeric keypad to indicate the number of copies to print To delete the ...

Page 99: ...5 WorkCentre 6505 Color Laser Multifunction Printer User Guide 99 Copying This chapter includes Basic Copying on page 100 Adjusting Copying Options on page 102 Changing the Default Settings on page 107 ...

Page 100: ...on the upper right corner of the display To reset the number of copies to 1 press the Clear All button 5 Press the Up Arrow or Down Arrow button to select the copying option you want to change For details see Adjusting Copying Options on page 102 6 Press the Start button One set of copies prints If you place originals in the document feeder copying continues until the document feeder is empty Auto...

Page 101: ... in the document feeder Adjust the paper guides so that they fit against the originals Insert paper in the document feeder only when ink on the paper is dry Do not load originals above the MAX fill line Document Glass Use the document glass rather than the document feeder to copy or scan the following types of originals Paper with paper clips or staples attached Paper with wrinkles curls folds tea...

Page 102: ...e Original Size on page 103 Specifying the Original Document Type on page 103 Selecting 2 Sided Options If you have the optional duplex unit you can specify how 2 sided pages are printed To select 2 sided options 1 Press the Up Arrow or Down Arrow button to select 2 Sided then press the OK button 2 Select an option 1 1 Sided prints 1 sided copies Long Edge Binding prints 2 sided copies flipped on ...

Page 103: ... specify the size of the original document 1 Press the Up Arrow or Down Arrow button to select Document Size then press the OK button 2 Select the document size Auto Letter 8 5x11 US Folio 8 5x13 Legal 8 5x14 A4 210x297mm A5 148x210mm B5 182x257mm Executive 7 25x10 5 3 Press OK to confirm the setting Specifying the Original Document Type The scanner optimizes the appearance of the output based on ...

Page 104: ...wing Press the Up Arrow or Down Arrow button to select a preset image size Press the Back Arrow button then press the Forward Arrow or Back Arrow button to set the copy size in increments of 1 Note The default setting is 100 3 Press OK to confirm the setting Making the Image Lighter or Darker To lighten or darken the copied image 1 Press the Up Arrow or Down Arrow button to select Lighten Darken t...

Page 105: ...ght background and only prints the image itself To turn Auto Exposure on or off 1 Press the Up Arrow or Down Arrow button to select Auto Exposure then press the OK button 2 Select an option Off On Note The default setting is On 3 Press OK to confirm the setting Image Layout Adjustments You can change the following image layout adjustment settings Printing Multiple Pages per Side on page 105 Settin...

Page 106: ...er margins then press the Return button Note The margin width settings only apply when copying from the document glass Output Adjustments Collating Copies When you make several copies of a multi page document you can collate the output For example if you are making three 1 sided copies of a six page document and select Collation On the copies are printed in this order 1 2 3 4 5 6 1 2 3 4 5 6 1 2 3...

Page 107: ...t copy settings 1 On the control panel press the System button 2 Press the Up Arrow or Down Arrow button to select Default Settings then press the OK button 3 Select Copy Defaults then press OK 4 Press the Down Arrow button to select the option you want to change then press OK 5 Select the desired setting then press OK to confirm the new setting 6 Repeat steps 4 and 5 as needed 7 Press the Return ...

Page 108: ... Color Balance then press the OK button 2 Select the color you want to adjust then press OK 3 Press the Up Arrow or Down Arrow button to adjust the density setting from 3 to 3 4 Press OK to confirm the new setting 5 Select another color and adjust its density or press the Return button to return to the Ready screen Changing the Manual Feed Slot Paper Size To change the manual feed slot paper size ...

Page 109: ...ect Admin Menu then press the OK button 3 If prompted enter the four digit password then press OK 4 Select Secure Settings then press OK 5 Select Service Lock then press OK 6 Select Copy then press OK 7 Select an option Unlocked turns off the service lock Locked turns on the service lock disabling the copy function Password Locked requires a password to use the copy function Enter a new password t...

Page 110: ...r Laser Multifunction Printer User Guide 110 Color Saturation Auto Exposure On Off Special Copy Mode Margin Top Bottom Margin Left Right Margin Center Collated Note For individual settings see Adjusting Copying Options on page 102 ...

Page 111: ...a Computer with a USB Connection on page 113 Scanning to a USB Flash Drive on page 114 Scanning to a Shared Folder on a Network Computer on page 115 Scanning to an Email Address on page 116 Scanning to an FTP Server on page 117 Scanning Images into an Application on page 118 Adjusting Scanning Options on page 120 See also Installation and Setup Overview on page 28 ...

Page 112: ...s see Automatic Document Feeder Guidelines on page 100 Document Glass Lift the document feeder or the document glass cover then place the original face down in the upper left corner of the document glass Document Feeder Insert originals face up with the top of the page entering the feeder first Adjust the paper guides so they fit against the originals wc6505_019 wc6505_020 ...

Page 113: ...ress the Scan button 3 Press the Up Arrow or Down Arrow button to select Scan to Computer USB then press the OK button 4 Press the Up Arrow or Down Arrow button to select the options you want to change For details see Adjusting Scan Settings on page 120 5 Press the Start button to begin the scan A Xerox WorkCentre 6505 USB scanner dialog box opens on your computer where you select which applicatio...

Page 114: ...rd Arrow button b Press the Up Arrow or Down Arrow button to navigate to the folder c Press the OK button 4 Press the Up Arrow or Down Arrow button to select any scanning options you want to change For details see Adjusting Scanning Options on page 120 5 Press the Start button to begin the scan 6 If the Another Page prompt appears select one of the following No completes the scanning process Yes p...

Page 115: ...network 1 On the control panel press the Scan button 2 Press the Up Arrow or Down Arrow button to select Scan to Network then press the OK button 3 At Scan to press OK 4 At Computer Network press OK 5 Press the Up Arrow or Down Arrow button to select the shared folder on your computer then press OK 6 If you want to change any other scan settings press the Up Arrow or Down Arrow button to select th...

Page 116: ...om the Address Book Email Group allows you to select a group email address from the Address Book Note When using the Address Book press the Up Arrow or Down Arrow button to select the address for the desired recipient Press the Forward Arrow button to select TO or BCC When finished selecting addresses press OK 5 Press the Start button to begin the scan 6 If the Another Page prompt appears select o...

Page 117: ... Load the original on the document glass or in the document feeder 2 On the control panel press the Scan button 3 Press the Up Arrow or Down Arrow button to select Scan to Network then press the OK button 4 At Scan to press OK 5 Press the Up Arrow or Down Arrow button to select Server FTP then press OK 6 Press the Up Arrow or Down Arrow button to select the FTP address then press OK 7 Press the St...

Page 118: ...rosoft Word 2003 to place an image in a document a Click Insert b Click Picture c Select From Scanner or Camera d Select the scanner then click Custom Insert 3 Select the paper source from the Paper Source menu Document Glass Document Feeder 4 Specify the other scan driver settings as desired Note For more information click the Help button to view the online help 5 Press the Scan button to begin t...

Page 119: ...ected to the computer with a USB cable To import images into an application 1 Open the file in which you want to place the image 2 In the application select the menu item to acquire the image For example if you are using Microsoft Word 2003 to place an image in a document a Select Insert b Select Picture c Select From Scanner or Camera d Select the scanner then click Acquire 3 Specify the paper so...

Page 120: ...n on page 121 Specifying the Original Document Size on page 121 Specifying the Scanned Image File Format on page 121 Automatically Suppressing Background Variations on page 122 Adjusting Image Brightness on page 122 Adjusting Image Sharpness on page 122 Adjusting Image Contrast on page 122 Adjusting the Top and Bottom Margins on page 123 Adjusting the Left and Right Margins on page 123 Adjusting t...

Page 121: ...n 2 Select an option 200x200 produces the lowest resolution and smallest file size 300x300 produces medium resolution and a medium file size 400x400 produces high resolution and a large file size 600x600 produces the highest resolution and largest file size 3 Press OK Specifying the Original Document Size To specify the size of the original 1 Press the Up Arrow or Down Arrow button to select Docum...

Page 122: ...rn Auto Exposure on or off 1 Press the Up Arrow or Down Arrow button to select Auto Exposure then press the OK button 2 Select On or Off then press OK Note The default setting is On Adjusting Image Brightness 1 Press the Up Arrow or Down Arrow button to select Lighten Darken then press the OK button 2 Press the Forward Arrow or Back Arrow button to move the slider to the desired setting 3 Press OK...

Page 123: ...ings unless you change them for an individual scan job This section includes Setting the Scan to Network Option on page 123 Setting the Default Color on page 124 Setting the Color Button Sets on page 124 Setting the Auto Exposure Level on page 124 Setting the TIFF File Format on page 124 Setting the Image Compression on page 125 Setting the Maximum Email Size on page 125 Changing General Scan Defa...

Page 124: ...lor Button Set then press the OK button 2 Select B W Button then press OK 3 Select a setting Black White Grayscale 4 Press OK 5 Select Color Button then press OK 6 Select a setting Color Color Photo 7 Press OK Setting the Auto Exposure Level 1 Press the Up Arrow or Down Arrow button to select Auto Expo Level then press the OK button 2 Select a setting Normal Higher 1 Higher 2 3 Press OK Setting th...

Page 125: ...ral Scan Default Settings You can also change the default setting for the following general scan settings Resolution Document Size Lighten Darken Sharpness Contrast Auto Exposure Margin Top Bottom Margin Left Right Margin Middle Note For individual settings see Adjusting Scan Settings on page 120 Limiting Access to Scan Operations The Scan Lock options limit access to scan operations To set scan l...

Page 126: ...Scan to E Mail Scan to Network Scan to USB Memory 7 Press OK 8 Select an option Unlocked turns off the service lock Locked turns on the service lock disabling the scan function Password Locked requires a password to use the scan function Enter a new password then press OK 9 Press OK ...

Page 127: ...es Loading Documents for Faxing on page 128 Basic Faxing on page 129 Using the Fax Address Book on page 132 Selecting Fax Options for Single Jobs on page 137 Changing the Default Fax Job Settings on page 139 Managing Fax Functions on page 140 See also Installation and Setup Overview on page 28 ...

Page 128: ...see Automatic Document Feeder Guidelines on page 100 Document Glass Lift the document feeder or the document glass cover then place the original face down in the upper left corner of the document glass Document Feeder Insert originals face up with the top of the page entering the feeder first Adjust the paper guides so they fit against the originals wc6505_019 wc6505_020 ...

Page 129: ...lect a number from the Fax Address Book For details see Faxing to an Individual in the Address Book on page 133 Group Dial allows you to send the fax to numerous recipients For details see Faxing to an Address Book Group on page 136 Search Local Phone Book allows you to search the printer address book using a partial name For details see Searching the Local Phone Book on page 136 Search Server Pho...

Page 130: ... image quality and select a quality setting from the drop down menu Standard High Quality Super high image quality 5 Click Transmission Report and select a setting from the drop down menu Output Regularly generates a transmission report for every fax sent Output for error in transmission only generates a transmission report when an error occurs Do not output does not generate a transmission report...

Page 131: ...olor Laser Multifunction Printer User Guide 131 Sending a Fax Using Macintosh Applications To send a fax from a Macintosh OS X version 10 5 and later computer download the latest driver from www xerox com office WC6505drivers ...

Page 132: ... add an individual entry using CentreWare Internet Services 1 At your computer open a Web browser type the IP address of the printer in the address field then press Enter or Return Note If you do not know the IP address for your printer see Finding the IP Address of Your Printer on page 35 2 In CentreWare Internet Services click Address Book 3 Under Address Book in the left navigation pane click F...

Page 133: ...lect the groups to add this entry to then click Add c Confirm the group members then click OK 7 Click OK 8 Click on the File menu then select Save All The address book is saved with the new fax entry Faxing to an Individual in the Address Book To fax to an individual in the address book 1 On the control panel press the Fax button 2 At Fax to press the Address Book button 3 At All Entries press the...

Page 134: ...ame then click the Save Changes button 6 When you see a Request Acknowledged message click the Return button 7 Click the Edit link for the group you created 8 Select the check boxes of individuals you want to include in the group Note Click the Additional Entries links at the bottom of the Group Members column to see additional Fax Address Book entries You can also add existing groups to this grou...

Page 135: ...r see Finding the IP Address of Your Printer on page 35 2 In CentreWare Internet Services click Address Book 3 Under Address Book in the left navigation pane click FAX Groups 4 In the Directory Listing click the Edit button for the group you want to edit 5 Select the check boxes of individuals you want in the group Clear the check boxes of individuals you want to remove from the group Note Click t...

Page 136: ...cal Phone Book To search for an individual or group in the local phone book using a partial name 1 On the control panel press the Fax button 2 At Fax to press the OK button 3 Press the Up Arrow or Down Arrow button to select Search Local Phone Book then press OK 4 Use the alphanumeric keypad to enter the search text then press OK 5 Press the Up Arrow or Down Arrow button to scroll through the loca...

Page 137: ...t Standard Fine Super Fine Photo Note The default setting is Standard 4 Press OK Making the Image Lighter or Darker To lighten or darken an image when it is faxed 1 On the control panel press the Fax button 2 Press the Up Arrow or Down Arrow button to select Lighten Darken then press the OK button 3 Press the Forward Arrow or Back Arrow button to move the slider and lighten or darken the fax Note ...

Page 138: ... Forward Arrow or Back Arrow button to select Minutes c Press the Up Arrow or Down Arrow button to select a number from 0 through 59 for minutes then press OK 5 Press the Start button The fax is scanned and saved and sent at the time you specified Including a Fax Cover Page To include a fax cover page when sending a fax 1 On the control panel press the Fax button 2 Press the Up Arrow or Down Arrow...

Page 139: ...Down Arrow button to select the setting you want to change then press OK 5 Press the Up Arrow or Down Arrow button to select the new setting then press OK Fax Configuration To configure the printer for faxing 1 On the control panel press the System button 2 Press the Up Arrow or Down Arrow button to select Admin Menu then press the OK button 3 If prompted enter the password then press OK 4 Select ...

Page 140: ... 4 Select Fax Settings then press OK 5 Select Fax Transmit then press OK 6 Select an option Print Always prints a monitor report for every fax Print at Error prints a monitor report when an error occurs with the fax transmission Print Disabled does not print a monitor report The default setting is Print Always 7 Press OK Printing a Monitor Report for a Group Fax To select a default option for prin...

Page 141: ...igit password then press OK Note The default password is 0000 Printing Secure Faxes If the Secure Receive Lock option is enabled you must enter your password to print a received fax To print all secure faxes 1 On the control panel press the Print button 2 At Secure Receive press the OK button 3 When prompted enter your four digit password then press OK The received faxes print Limiting Access to F...

Page 142: ...word then press OK 9 Re enter the new password then press OK The password is changed Note The default password is 0000 Limiting Who Can Send Faxes to the Printer When the Junk Fax Filter setting is On the printer only prints faxes received from phone numbers in the address book To turn the Junk Fax Filter on or off 1 On the control panel press the System button 2 Press the Up Arrow or Down Arrow b...

Page 143: ...ter the four digit password then press OK 4 Select a report Speed Dial prints information about fax numbers individual recipients and group recipients Address Book prints information about fax numbers individual recipients and group recipients Server Address prints a list of server addresses Fax Activity prints information about completed fax jobs Fax Pending prints a list of faxes waiting to be s...

Page 144: ...Faxing WorkCentre 6505 Color Laser Multifunction Printer User Guide 144 ...

Page 145: ...8 WorkCentre 6505 Color Laser Multifunction Printer User Guide 145 Control Panel Menus This chapter includes Navigating the Control Panel Menus on page 146 System Menus on page 147 ...

Page 146: ...s one level upward in menu selections or moves the cursor to the left when setting a value Up Arrow Displays the previous menu or item Press the Up and Down Arrow button at the same time to change a setting to its default value Down Arrow Displays the next menu or item Press the Up and Down Arrow button at the same time to change a setting to its default value OK Selects or executes the option or ...

Page 147: ...ation and default color PDF Settings Use to adjust PDF settings such as quantity print mode and layout PostScript Settings Use to adjust PostScript settings such as error reports job time out paper select mode and default color Network Setup Use to configure the network settings for the printer Fax Settings Use to configure default fax settings USB Setup Use to determine port status and Adobe prot...

Page 148: ...PCL macros PS Fonts List Prints a list of PostScript printer fonts PDF Fonts List Prints a list of fonts applicable to PDF documents Job History Prints information on previous printing jobs such as the date time job type document name output color and paper size The status of a maximum of 20 jobs can be printed on the Job History Report You can print the Job History Report automatically for every ...

Page 149: ...DF Settings on page 151 PostScript Settings on page 151 Network Setup on page 152 Fax Settings on page 153 USB Setup on page 156 System Setup on page 157 Maintenance on page 159 Secure Settings on page 160 Fax Address Book Use this menu to create edit and delete speed dial and group dial numbers Item Description Total Impression Displays the total number of pages printed Color Impression Displays ...

Page 150: ...fault setting is 10 00 Form Line Specifies the form line the number of lines per form You can specify a value from 5 through 128 in increments of 1 The default setting is 64 Quantity Specifies the copies to print You can specify a value from 1 through 999 The default setting is 1 Image Enhance Specifies whether to perform image enhancement Image enhancement is a feature that makes the boundary lin...

Page 151: ...ort Edge Print Mode Specifies the print mode Normal High Quality High Speed PDF Password Specifies a password to enter to print a PDF file Use the alphanumeric keypad to enter a password up to 32 characters Collated Specifies whether to collate copies Paper Size Specifies the paper size for PDF documents Letter Auto Layout Specifies the default page layout for PDF documents Auto 100 Booklet 2 Page...

Page 152: ... Half 10Base Full 100Base Half and 100Base Full The default setting is Auto 10Base Half Uses 10Base T half duplex 10Base Full Uses 10Base T full duplex 100Base Half Uses 100Base TX half duplex 100Base Full Uses 100Base TX full duplex 1000Base Full Uses 1000Base TX full duplex TCP IP Specifies the TCP IP settings for the network IP Mode Dual Stack IPv4 Mode or IPv6 Mode IPv4 Get IP Address IP Addre...

Page 153: ...tones If the phone communication in your country is serial this mode is not available DRPD Mode Before using the Distinctive Ring Pattern Detection DRPD option distinctive ring service must be installed on your telephone line by the telephone company After the telephone company provides a separate number with a distinctive ring pattern configure the fax setup to monitor for that specific ring patt...

Page 154: ...om 1 through 15 minutes Junk Fax Filter When set to On incoming faxes are only accepted from numbers registered in the Address Book Remote Receive Specifies whether to receive a fax by pressing the remote receive code on the external telephone after picking up the handset of the telephone When set to On a fax can be received by pressing the remote receive code on the external telephone Remote Rcv ...

Page 155: ...xes Off Forward Print Print and Forward Fwd Settings Num Specifies the number to which outgoing faxes are forwarded Prefix Dial Specifies whether to add the prefix number when you send a fax Prefix Dial Num Specifies the prefix dial number up to five digits This number dials before any auto dial number is started Discard Size Specifies whether the printer discards any excess data at the bottom of ...

Page 156: ...8 Kbps Country Specifies the country where the printer is used Fax Activity Turns Auto Print on or off Fax Transmit Specifies the fax transmit mode Print Always Print on Error Print Disable Fax Broadcast Specifies the fax broadcast mode Print Always Print on Error Print Disable Fax Protocol Specifies the fax protocol Print Always Print on Error Print Disable Item Description Port Status Enables or...

Page 157: ...can or Fax settings and returning to standby mode 45sec 1min 2min 3min 4min Fault Time out You can cancel a printing process when it goes beyond a set time period Set the time until the print job is canceled 3 sec to 300 sec Specifies the amount of time in increments of 1 second the printer waits for additional data before it cancels the job The default setting is 60 sec Off Cannot cancel Time Out...

Page 158: ...to Log Print Specifies whether to print the Job History Report with information about the printed data that has been processed Off Does not print the Job History Report even if the number of print jobs exceeds 22 The default setting is Off On Automatically prints a Job History Report when the number of print jobs reaches 22 Note You cannot set Auto Log Print during printing You can print the Job H...

Page 159: ...o Regi Adjust Adjusts the color registration automatically The default setting is On Adjust ColorRegi Used to correct the color registration manually For details see Color Registration on page 199 Auto Adjust Correct the color registration Color Regi Chart Print the correction chart Enter Number Enter the number to correct the registration Initialize NVM Initializes the settings stored in the NVM ...

Page 160: ...k Password on page 142 Service Lock Specifies whether a function is unlocked and available to everyone locked from everyone or password locked requiring a password for access Copy Fax Scan to Computer PC Scan Scan to Email Scan to Network Scan to USB Memory Print from USB Note Panel Lock must be enabled before setting the service locks Secure Receive Turns Secure Receive Set on or off Login Error ...

Page 161: ...the size of the paper in the manual feed slot M F Paper Type Specifies the type of the paper in the manual feed slot Collated Turns collation on or off Reduce Enlarge Reduces or enlarges the copies Document Size Specifies the size of the original Document Type Specifies the type of the original Lighten Darken Lightens or darkens copies Sharpness Specifies the sharpness of the copies Color Saturati...

Page 162: ...hite Color Button Set Adjusts the Color Mode settings B W button Black White or Grayscale Color Button Color or Color Photo Resolution Selects the scan resolution Document Size Specifies the size of the original document Lighten Darken Lightens or darkens the scanned image Sharpness Specifies the sharpness of the scanned image Contrast Specifies the contrast of the scanned image Auto Exposure Turn...

Page 163: ...tem Description Resolution Specifies the resolution of the fax Lighten Darken Lightens or darkens the scanned image Delayed Start Specifies the time delay before sending a fax job up to 23 hours and 59 minutes Item Description Color Specifies the color mode Black White or Color Paper Supply Specifies the paper supply to use Tray 1 or Manual Feed Slot M F Paper Size Specifies the paper size for the...

Page 164: ...is installed Item Description Paper Size Specifies the paper size and orientation for each tray Manual Feed Slot Paper Tray The default setting is Auto For details see Supported Paper on page 58 and Setting Paper Types and Sizes on page 68 Paper Type Specifies the type of paper loaded in each tray Manual Feed Slot The default setting is Thin Card Stock Paper Tray The default setting is Plain For d...

Page 165: ... Multifunction Printer User Guide 165 Maintenance This chapter includes Cleaning the Printer on page 166 Ordering Supplies on page 169 Managing the Printer on page 171 Checking Page Counts on page 176 Moving the Printer on page 178 ...

Page 166: ...ray containers contain explosive mixtures and are not suitable for use in electrical applications Use of such cleaners can result in a risk of explosion and fire WARNING Do not remove the covers or guards that are fastened with screws You cannot maintain or service any parts that are behind these covers and guards Do not attempt any maintenance procedure that is not described in the documentation ...

Page 167: ...rior of the printer about once a month Wipe the parts with a damp soft cloth Then wipe with another dry soft cloth For stubborn stains apply a small amount of neutral detergent to the cloth and gently wipe the stain off CAUTION Do not spray the detergent directly on the printer The liquid detergent could enter the printer through a gap and cause problems Never use cleaning agents other than water ...

Page 168: ...ieces of paper For more information see Clearing Paper Jams on page 205 Remove any dust or stains with a dry clean cloth WARNING Never touch a labeled area found on or near the heat roller in the fuser You can get burned If a sheet of paper is wrapped around the heat roller do not try to remove it immediately to avoid injuries or burns Switch off the printer immediately and wait 40 minutes for the...

Page 169: ...toner designed and manufactured under strict quality controls by Xerox for specific use with this printer Routine Maintenance Items Routine maintenance items are printer parts that have a limited life and require periodic replacement Replacements can be parts or kits Routine maintenance items are typically customer replaceable Routine maintenance items for this printer include the following Fuser ...

Page 170: ...arranty Service Agreements and Total Satisfaction Guarantee do not cover damage malfunction or degradation of performance caused by use of non Xerox supplies They also do not cover damage or degradation of performance caused by the use of Xerox supplies not specified for this printer The Total Satisfaction Guarantee is available in the United States and Canada Coverage can vary outside these areas...

Page 171: ... the IP address of the printer into the address field then press Enter or Return Checking the Status of the Printer 1 In CentreWare Internet Services click the Status button or Status tab The general status of the printer includes The type size and amount empty or full of paper in each tray The ready for printing status of the printer The frequency with which the printer status information is refr...

Page 172: ...gScout utility automatically checks the printer status when you send a print job PrintingScout can check the paper sizes of the trays the status of the output tray and the remaining consumables percentages such as toner To open PrintingScout do one of the following In the Windows taskbar double click the PrintingScout icon From the Start menu select Programs Xerox Office Printing PrintingScout Act...

Page 173: ...the Notification Items section select the events for which you would like to be notified 7 In the Connection Setup box click the Email Settings link The Email Settings page opens 8 In the Email Server Setup Required to send Email section do the following a In the Return Email Address field type the return address used by the email server b In the SMTP Server IP Address or DNS Name field type the o...

Page 174: ...ing rules Prefix all commands with the pound sign and specify the Password command at the top of the email Command lines without the pound sign are ignored Type one command on each line and separate each command and parameter with a space or a tab When the same command is written two or more times in one email the second and subsequent commands are ignored Examples of Commands To check the printer...

Page 175: ...o set the recipient email address to service xerox com and confirm the setting result on the network settings list when the full access password is admin use Password admin SetMsgAddr service xerox com NetworkInfo Note Type the SetMsgAddr command before the NetworkInfo command If they are written in reverse the information retrieved by the NetworkInfo command and the result of executing the SetMsg...

Page 176: ...ables are used Composite black is the default setting on most printers When doing automatic 2 sided printing you can insert a blank page automatically depending on the settings in the application In this case the blank page is counted as one page Viewing the Billing Meter The billing meter tracks the total number of pages printed for the life of the printer It cannot be reset To check the total nu...

Page 177: ...Maintenance WorkCentre 6505 Color Laser Multifunction Printer User Guide 177 See also Information Pages on page 24 Managing the Printer with CentreWare Internet Services on page 171 ...

Page 178: ...electrical shock 2 Wait for the printer to cool down about 40 minutes 3 Remove any paper or other media from the output tray and return the paper stopper to its original non extended position 4 Remove Tray 1 and set it aside Note If you are moving the printer a long distance remove the toner cartridges to prevent toner from spilling To prevent damage to the printer pack the printer and toner insid...

Page 179: ...ult in damage to the printer not covered by the Warranty Service Agreement or Total Satisfaction Guarantee After moving the printer 1 Reinstall any parts you removed If you removed the 250 sheet feeder put the printer back on top of it 2 Reconnect the printer to the cables and power cord 3 Plug in and turn on the printer 4 Adjust the color registration before using the printer For details see Colo...

Page 180: ...Maintenance WorkCentre 6505 Color Laser Multifunction Printer User Guide 180 ...

Page 181: ...apter includes Troubleshooting Overview on page 182 Control Panel Messages on page 184 Problems with the Printer on page 188 Print Quality Problems on page 191 Cleaning the Imaging Unit and Laser Lens on page 196 Color Registration on page 199 Color Balance on page 203 Paper Jams on page 204 ...

Page 182: ...o let you know that the printer needs attention Install PrintingScout from the Software and Documentation disc that came in the documentation packet with your printer For details see Installing PrintingScout on page 44 Note PrintingScout is a Windows only application Online Support Assistant The Online Support Assistant is a knowledge base that provides instructions and troubleshooting help to sol...

Page 183: ...e www xerox com office WC6505support Supplies for your printer www xerox com office WC6505supplies A resource for tools and information such as interactive tutorials printing templates helpful tips and customized features to meet your individual needs www xerox com office businessresourcecenter Contacts www xerox com office worldcontacts Printer registration www xerox com office register Material ...

Page 184: ...tion sheet that came in the documentation packet with your printer Insert Imaging Unit The imaging unit is not installed Install the imaging unit For details see the Imaging Unit instruction sheet that came in the documentation packet with your printer Insert Xxx Cartridge The Xxx toner cartridge is not installed correctly or is not installed Install the toner cartridge Replace Xxx Cartridge The t...

Page 185: ... Tray 1 Open Front Cover Paper is jammed inside the paper tray Remove the jammed paper then open and close the front cover For details see Clearing Jams at Tray 1 on page 205 Jam at Tray 2 Check Tray 2 Open Front Cover Paper is jammed inside the paper tray Open Tray 2 and remove the jammed paper Open and close the front cover For details see Clearing Jams at the 250 Sheet Feeder on page 207 Chk Ma...

Page 186: ...uration on the print driver does not conform to the printer you are using Press the Cancel button to cancel the print job Make sure that the configuration of the printer on the print driver conforms to the printer you are using Out of Memory Press OK Button Error 016 718 The printer memory is full and cannot continue processing the current print job Press the OK button to clear the message cancel ...

Page 187: ...87 PDL Error Press OK Button Error 016 720 An error relating to PCL emulation has occurred Press the OK button to clear the message cancel the current print job and conduct the next print job if any Press the Cancel button to cancel the print job Message Condition Reason Solution ...

Page 188: ...n on the power Is the power cord disconnected or not securely connected Turn off the power to the printer then connect the power cord to the power outlet again Turn on the power to the printer Is the power cord connected to a power outlet with the correct voltage Connect the printer exclusively to a power outlet with a suitable voltage and current rating For details see Electrical Specifications o...

Page 189: ...onnect the power plug from the outlet Refer to the Xerox Support website at www xerox com office WC6505support Light of the Ready indicator is on and blinking but there is no print output There are jobs remaining in the printer Cancel printing or force the remaining data to be printed To force the print job press the OK button To cancel the job press the Cancel button Top section of printed docume...

Page 190: ...per tray completely into the printer Is the printer placed on a flat location Place the printer on a stable flat surface Are the paper tray guides set in the correct positions Set the guides to the correct positions For details see Loading Paper on page 61 Paper is fed more than 1 sheet at a time Multiple feeding of paper can occur before the sheets of paper loaded in the tray are used up Remove t...

Page 191: ... color pages because color consumables are used Composite black is the default setting on most printers Symptom Cause Solution Faded printouts with multiple colors faded The toner cartridges are not Xerox toner cartridges Verify that the toner cartridges CMYK meet specifications and replace them if necessary The paper being used is outside the recommended specification range Replace the paper with...

Page 192: ...ines Streaks in only one color The transfer belt unit is old or damaged Replace the transfer belt unit The toner cartridges are not Xerox toner cartridges Verify that the toner cartridges meet specifications and replace them if necessary For details see Consumables on page 169 There is a problem with the toner cartridge for that color Check the toner cartridge for damage and replace if necessary R...

Page 193: ...9 The transfer belt unit is old or damaged Replace the transfer belt unit The cable to the laser unit or controller is defective For assistance see the Xerox Support website at www xerox com office WC6505support Hair like marks appear in or around black half tone printing Shadows appear around areas of dense black printing The paper was left unwrapped for a long time especially in a dry environmen...

Page 194: ...ve it on for at least one hour to get rid of the condensation If the problems still occur for assistance see the Xerox Support website www xerox com office WC6505support Vertical blanks The laser is being blocked Remove the imaging unit and clean all debris from the laser lens with a lint free cloth For details see Cleaning the Imaging Unit and Laser Lens on page 196 The transfer belt unit or fuse...

Page 195: ...ifunction Printer User Guide 195 Colors are blurry or there is white area around objects Color to color alignment is not correct Perform an automatic color registration adjustment For details see Color Registration on page 199 Symptom Cause Solution ...

Page 196: ... or wash it off with cold water and mild soap CAUTION Do not expose the imaging unit to strong light and minimize its exposure to light in general to five minutes or less if possible 1 Switch off the printer at the power switch located on the right side of the printer toward the back 2 Wait until the printer has cooled about 40 minutes 3 Remove Tray 1 and set it aside 4 Open the printer by pressin...

Page 197: ...blue transfer belt unit For details see Internal View on page 19 a Turn the four peach colored twist locks to the left to unlock the imaging unit b Grasp the imaging unit by its peach colored pull tabs on the top edge then pull the unit forward and up out of the printer c Place the imaging unit on a flat surface and cover it with a sheet of paper to minimize its exposure to light 8 Using a clean d...

Page 198: ...each colored pull tabs on the top edge and install the unit in the printer Make sure to insert the unit into the guides in the printer then push the unit all the way back into the printer b Turn the four twist locks to the right to lock the unit 11 Fold the transfer belt unit back into place and close the printer front cover wc6505_043 ...

Page 199: ...n to select Auto Regi Adjust then press OK 5 Press the Up Arrow or Down Arrow button to select On then press OK 6 Press the Return button to return to the Ready screen Performing a One time Automatic Color Registration Adjustment Use the following procedure to perform an automatic color registration adjustment Note An automatic color registration adjustment is performed every time a new toner cart...

Page 200: ...cal values are PY paper feed direction yellow PM paper feed direction magenta PC paper feed direction cyan To determine the horizontal values 1 In the top section of the Color Registration Chart lines are displayed next to the color letters LY LM LC RY RM and RC Some lines are straight and other lines are jagged A value is listed next to each line For each color examine the lines and determine whi...

Page 201: ...adjust the next value c Press the Up Arrow or Down Arrow button to select the LC value from the Color Registration Correction Chart Press OK to move to the next screen 7 Adjust the Right Horizontal registration values a Press the Up Arrow or Down Arrow button to select the RY value from the Color Registration Correction Chart Press the Forward Arrow button to adjust the next value b Press the Up A...

Page 202: ...tion Printer User Guide 202 11 If 0 is not displayed next to the straight lines examine the chart and determine additional correction values 12 When satisfied that the horizontal adjustment is complete press the Return button to return to the Ready screen ...

Page 203: ...re To adjust the color balance for the printer 1 On the control panel press the System button 2 Press the Up Arrow or Down Arrow button to select Admin Menu then press the OK button 3 Press the Up Arrow or Down Arrow button to select Maintenance then press OK 4 Press the Up Arrow or Down Arrow button to select Drum Refresh then press OK 5 At the Are you sure prompt press OK The process runs automa...

Page 204: ...Always adjust the paper guides in Tray 1 after inserting the media A guide that is not properly adjusted can cause poor print quality paper misfeeds and printer damage Avoid using paper that is folded wrinkled or excessively curled Avoid double feeding Remove the paper and fan the sheets to prevent them from sticking together Do not load more than one type size or weight of paper in a tray at the ...

Page 205: ...cutting remove it in the proper way depending on the place that the paper jam occurs CAUTION If it is difficult to open the front cover do not force it Turn off the printer using the power switch on the right side of the printer For additional assistance refer to the Xerox Support website at www xerox com office WC6505support Clearing Jams at Tray 1 1 Pull the paper tray open 2 Pull the jammed pap...

Page 206: ...rom the printer then carefully pull out any jammed paper remaining inside the printer 7 Reinsert the tray into the printer CAUTION Do not use excessive force on the tray doing so could damage the tray or the inside of the printer Clearing Jams at the Manual Feed Slot 1 Pull Tray 1 out of the printer 2 Remove any jammed or damaged paper in the tray then close the tray 3 Press the front cover button...

Page 207: ...e imaging unit to any light source for more than 5 minutes Prolonged exposure to light can damage the unit Do not touch the shiny black transfer belt unit For additional assistance refer to the Xerox Support website at www xerox com office WC6505support 1 Press the front cover button on the side of the printer and open the printer cover 2 Being careful not to touch the fuser lift the levers at bot...

Page 208: ...to light can damage the imaging unit WARNING Some components inside the printer such as the fuser and surrounding area are hot and can cause burns 4 Close the printer cover then reinsert the trays CAUTION Do not use excessive force on the tray Doing so could damage the tray or the inside of the printer Clearing Jams at the Duplex Unit 1 Press the front cover button and open the printer cover WARNI...

Page 209: ... and open the unit fully 4 Remove the jammed paper then confirm that there are no scraps of paper left inside the duplex unit or transfer belt unit 5 Close the duplex unit then close the printer cover Note To remove the entire duplex unit after opening the front cover of the printer press the front cover release button again to release the duplex unit wc6505_047 wc6505_048 ...

Page 210: ...Troubleshooting WorkCentre 6505 Color Laser Multifunction Printer User Guide 210 ...

Page 211: ...ultifunction Printer User Guide 211 Printer Specifications This chapter includes Physical Specifications on page 212 Environmental Specifications on page 213 Electrical Specifications on page 214 Performance Specifications on page 215 ...

Page 212: ...s Part Specifications Printer Width 430 mm 16 9 in Depth 544 mm 21 4 in Height 584 mm 23 in Weight 30 Kg 66 13 lb 250 Sheet Feeder optional Width 419 mm 16 5 in Depth 518 mm 20 4 in Height 106 mm 4 2 in Weight 4 5 Kg 9 92 lb Duplex Unit optional Width 326 5 mm 12 9 in Depth 313 mm 12 3 in Height 153 5 mm 6 1 in Weight 1 2 Kg 2 65 lb ...

Page 213: ...s Temperature 10 32 C 50 90 F Relative Humidity Note Under extreme environment conditions such as 10 C and 85 RH defects can occur due to condensation approximately 30 minutes after the printer is turned on 15 85 RH at 28 C 82 F Elevation For optimum performance use the printer at elevations below 3 100 m 10 170 ft ...

Page 214: ...n AC 110 127 V 220 240 V Energy Saver mode Sleep Mode 12 W or less Standby Mode 60 W or less fuser on Continuous color printing 550 W or less Continuous monochrome printing 550 W or less This printer does not consume electric power when the power switch is turned off even if the printer is connected to an AC outlet ENERGY STAR qualified multifunction printer Default time settings 30 minutes and 5 ...

Page 215: ...ume temperature of 22 C 71 6 F Continuous print speed Color 24 ppm Black and White 24 ppm Note Print speed can decrease due to paper type paper size printing conditions or image quality adjustment 2 sided print speed WorkCentre 6505DN configuration only Color 16 ppm A4 17 ppm Letter Black and White 16 ppm A4 17 ppm Letter Resolution Standard 600 x 600 dpi x 1 bit Enhanced 600 x 600 dpi x 4 bit Pos...

Page 216: ...Printer Specifications WorkCentre 6505 Color Laser Multifunction Printer User Guide 216 ...

Page 217: ...ction Printer User Guide 217 Regulatory Information This chapter includes Electromagnetic Interference on page 218 Other Regulations on page 220 Copy Regulations on page 221 Fax Regulations on page 224 Material Safety Data Sheets on page 227 ...

Page 218: ...t can cause harmful interference to radio communications However there is no guarantee that interference does not occur in a particular installation To determine if this printer is causing harmful interference to radio or television reception turn the printer off and on If this equipment does cause harmful interference to radio or television reception correct the interference by one or more of the...

Page 219: ...shielded interface cables A signed copy of the Declaration of Conformity for this product can be obtained from Xerox The CE mark applied to this product symbolizes the Xerox declaration of conformity with the following applicable Directives of the European Union as of the dates indicated December 12 2006 Low Voltage Directive 2006 95 EC December 15 2004 Electromagnetic Compatibility Directive 2004...

Page 220: ...WorkCentre 6505 Color Laser Multifunction Printer User Guide 220 Other Regulations Turkey RoHS Regulation In compliance with Article 7 d we hereby certify It is in compliance with the EEE Regulation EEE yönetmeliðine uygundur ...

Page 221: ...of the government such as FHA etc Bonds U S Savings Bonds may be photographed only for publicity purposes in connection with the campaign for the sale of such bonds Internal Revenue Stamps If it is necessary to reproduce a legal document on which there is a canceled revenue stamp this may be done provided the reproduction of the document is performed for lawful purposes Postage Stamps canceled or ...

Page 222: ...rdered by the head of such department or bureau Reproducing the following is also prohibited in certain states Automobile Licenses Drivers Licenses Automobile Certificates of Title The above list is not all inclusive and no liability is assumed for its completeness or accuracy In case of doubt consult your attorney Canada Parliament by stature has forbidden the reproduction of the following subjec...

Page 223: ... owner The above list is provided for your convenience and assistance but it is not all inclusive and no liability is assumed for its completeness or accuracy In case of doubt consult your solicitor Other Countries Copying certain documents may be illegal in your country Penalties of fine or imprisonment may be imposed on those found guilty of making such reproductions Currency notes Bank notes an...

Page 224: ...mpany A plug and jack used to connect this equipment to the premises wiring and telephone network must comply with the applicable FCC Part 68 rules and requirements adopted by the ACTA A compliant telephone cord and modular plug is provided with this product It is designed to be connected to a compatible modular jack that is also compliant See installation instructions for details You may safely c...

Page 225: ...ce center for repair or warranty information Contact information is contained in the Machine Status menu on the printer and in the back of the Troubleshooting section of the User Guide If the equipment is causing harm to the telephone network the Telephone Company may request you to disconnect the equipment until the problem is resolved Only a Xerox Service Representative or an authorized Xerox Se...

Page 226: ...Decision 1999 5 EC for pan European single terminal connection to the public switched telephone network PSTN However due to differences between the individual PSTNs provided in different countries the approval does not give an unconditional assurance of successful operation on every PSTN network terminal point In the event of a problem you should contact your authorized local dealer This product h...

Page 227: ...ide 227 Material Safety Data Sheets For Material Safety Data information regarding your WorkCentre 6505 printer go to North America www xerox com msds European Union www xerox com environment_europe For Customer Support Center phone numbers go to www xerox com office worldcontacts ...

Page 228: ...Regulatory Information WorkCentre 6505 Color Laser Multifunction Printer User Guide 228 ...

Page 229: ...cling and disposal information contact your local authorities This product may contain one or more Perchlorate containing devices such as batteries Special handling may apply For details see www dtsc ca gov hazardouswaste perchlorate North America Xerox operates an equipment take back and reuse recycle program Contact your Xerox sales representative 1 800 ASK XEROX to determine whether this Xerox ...

Page 230: ...se new equipment your local retailer may be required to take back your old equipment free of charge Please ask you retailer for information Professional or Business Environment In accordance with European legislation end of life electrical and electronic equipment subject to disposal must be managed within agreed procedures Prior to disposal please contact your local reseller or Xerox representati...

Page 231: ...ealth and the environment For more information about collection and recycling contact your local municipality your waste disposal service or the point of sale where you purchased the items Penalties may be applicable for incorrect disposal of this waste in accordance with national legislation For Business Users in the European Union If you wish to discard electrical and electronic equipment please...

Page 232: ...Recycling and Disposal WorkCentre 6505 Color Laser Multifunction Printer User Guide 232 ...

Reviews: