P a g e
|
27
5.
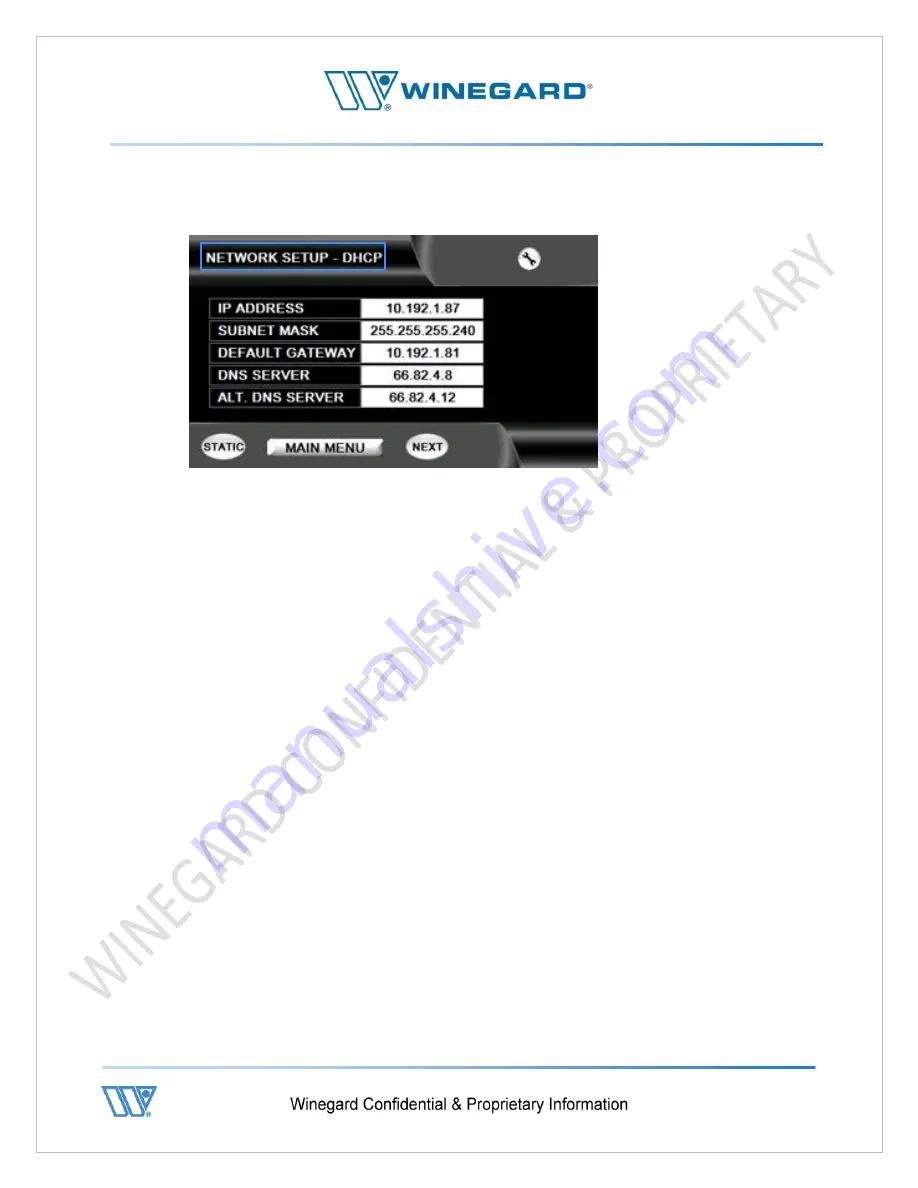
NETWORK SETUP screen -
At the top of the NETWORK SETUP screen the header section details if the Network
Adapter is currently in DHCP or STATIC mode.
6.
Versions 8.0.0.0 and later of the firmware allow configuration of the network
adapter from here. The Network Adapter can be placed in either DHCP or STATIC
mode and input of all network parameters such as IP, Mask, Gateway and DNS
address are available when in STATIC mode.
7.
The button at the bottom left hand corner of the screen is basically a toggle switch
which changes the Network Adapter from DHCP to STATIC, or vice versa.
8.
DHCP -
a)
If the modem, with which the controller is being configured, has DHCP enabled
then ensure first that the display at the top of this screen states NETWORK
SETUP - DHCP. If not, then tap on the “DHCP” button on the bottom left hand
corner of the screen.
b)
IP, Mask, Gateway and DNS information being distributed by the modem should
populate the main screen after a few seconds.
c)
Once DHCP data is present and verified, proceed to step 10.
9.
STATIC -
a)
If the modem, with which this controller is being configured, does not have
DHCP enabled then ensure first that the display at the top of this screen states
NETWORK SETUP - STATIC. If not, then tap on the “STATIC” button on the
bottom left hand corner of the screen.
b)
After the Network Adapter is changed to Static mode, IP data can be entered by
tapping on each line of information at a time.
c)
After the tap a numeric pad screen will appear allowing entry of the IP
information with a NEXT button available to exist out of the numeric pad for
each entry.
Summary of Contents for 2-WAY SATELLITE INTERNET SYSTEM
Page 10: ...P a g e 10 3 Open lids on both sides as shown below ...
Page 19: ...P a g e 19 ...
Page 56: ...P a g e 56 ...
Page 81: ...P a g e 81 9 4 Wiring Diagram User Supplied Device ...


