48
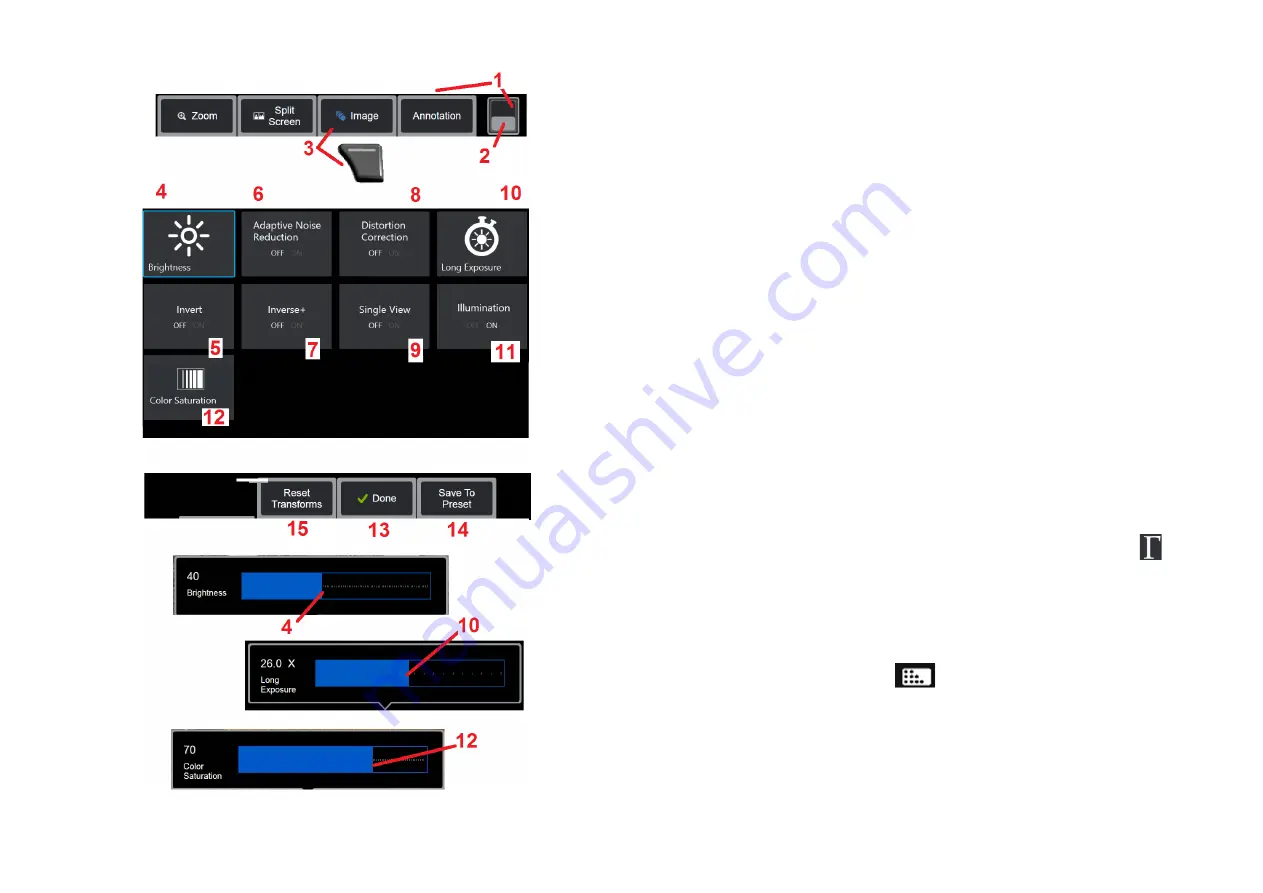
Image Transformation Settings
These settings, accessed by selecting the Image Menu, alter the appearance of
live images. (Some of these settings also affect frozen or recalled images.) At any
time, the values assigned to these twelve transformation settings can be saved as
a user-named Preset. When recalling a preset, all transformation settings will revert
to these assigned values.
(Click here to learn about working with Preset Image
Transformation Settings)
1
– Double tap this switch to hide or display the Soft Key Bar.
2
– Tap to switch between the Soft Key Bar’s top and bottom row.
3
– Tap on-screen
Image
button or press the corresponding key to display the
Image Menu.
4
– Tap the on-screen
Brightness
icon to adjust the displayed image. The adjustment
bar shown will then appear – drag it to the left or right. You can adjust the brightness
of live, frozen, and recalled images as well as recorded video. The brightness level
selected when an image is saved will be maintained when the image is recalled.
Note:
When viewing live images, adjusting the brightness means controlling exposure
time, camera gain, and light output at lower settings. When viewing still images or
recorded video, adjusting the brightness means controlling digital gain.
5
– Tap
Dark Boost
which is a live video processing function that digitally brightens
darker areas in scenes with bright foreground surfaces, or glare, without over-
exposing or degrading the contrast of more uniform scenes.
When turned ON,
appears at the top of the display.
6
– Tap to turn
Adaptive Noise Reduction
(ANR) ON or OFF. ANR works to reduce
the amount of noise (which appears as a grainy image) visible when the probe is
positioned in a dark area. The ANR setting (ON or OFF) applies only to live video. ANR
is automatically applied to reduce noise in all frozen and saved images, even when
the ANR setting is set to OFF. When turned ON,
appears at the top of the display.
Note:
Keep the probe still when capturing an image. Noise increases with probe
movement.


