


23
Connectivity Setup
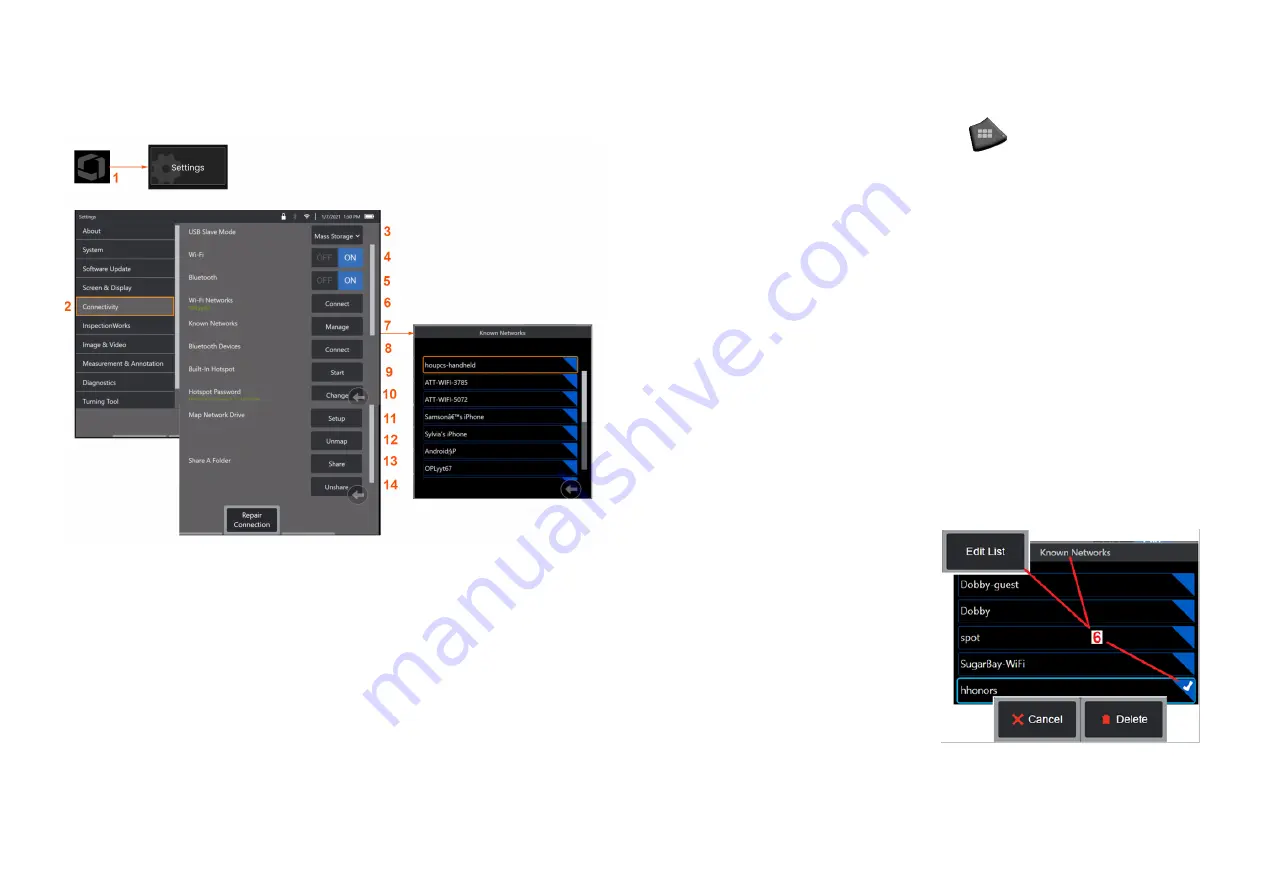
1
– Tap the on-screen Logo (or press the
hard key) to open the
Global Menu, then open the Settings Menu.
2
– Select to work with settings that control the connection of the MViQ to WiFi
networks and Bluetooth devices.
3
–
Making Wi-Fi / Bluetooth Connections
4
– Turn the WiFi connection ON or OFF. Once turned ON, the icon appears at
the top of the display screen.
5
–Turn the Bluetooth connection ON or OFF. Once turned ON, the icon shown
here appears at the top of the display screen. The icon is gray if Bluetooth is
ON or white if Bluetooth is ON and paired with a device. Then, select Connect to
display a list of available Bluetooth Devices to which the iQ can connect.
6
– Available Wifi Networks will be shown here. Select Connect to display a list
of available WiFi networks to which the instrument can connect.
7
–Tap the screen to select an already known network from this list. (Select
Manage Known Networks at any time to review the list of already-recognized
networks and/or Edit the list by removing networks to which you no longer wish
to automatically connect). Once Edit List is selected, tap the blue corner of any
network to delete it from the list.
8
– Select from a list of available bluetooth
devices.
9
– Selecting START to turn on the built-in
hotspot
10
–Select to change the built-in hotspot
password.
Mapping the Network Drive and Sharing
Folders
11
– If you choose to give the MViQ’s File
Manager access to a folder on a network-
connected computer, click on Setup (see
above) to open the network-mapping process shown here. Next, select Done
to confirm that the network connected PC has at least one folder identified for
sharing.


