03 Instruments and controls
03
}}
111
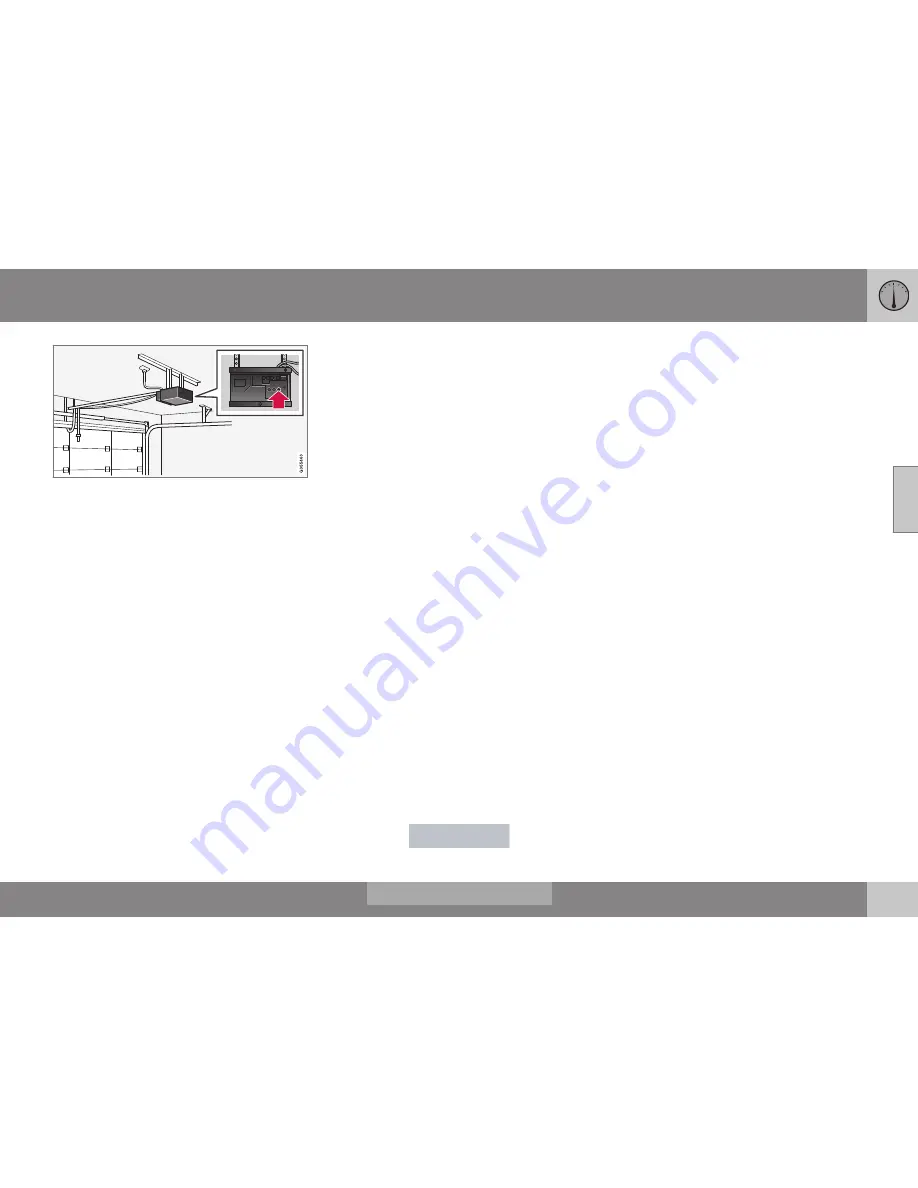
4. At the garage door opener receiver
(motor-head unit) in the garage, locate
the “learn” or “smart” button. This can
usually be found where the hanging
antenna wire is attached to the motor-
head unit.
5. Firmly press and release the “learn” or
“smart” button. (The name and color of
the button may vary by manufacturer.)
There are 30 seconds to initiate step 6.
6. Return to the vehicle and firmly press,
hold for two seconds and release the pro-
grammed HomeLink button. Repeat the
“press/hold/release” sequence a second
time, and, depending on the brand of the
garage door opener (or other rolling code
equipped device), repeat this sequence a
third time to complete the programming
process.
HomeLink should now activate your rolling
code equipped device.
Gate Operator/Canadian Programming
Canadian radio-frequency laws require trans-
mitter signals to “time-out” (or quit) after sev-
eral seconds of transmission – which may not
be long enough for HomeLink to pick up the
signal during programming. Similar to this
Canadian law, some U.S. gate operators are
designed to “time-out” in the same manner.
If you live in Canada or you are having diffi-
culties programming a gate operator or
garage door opener by using the “Program-
ming” procedures,
replace “Programming
HomeLink” step 2 with the following
:
•
Continue to press and hold the HomeLink
button while you
press and release -
every two seconds
(“cycle”) your hand-
held transmitter until the HomeLink indi-
cator light changes from a slow to a rap-
idly blinking light. Now you may release
both the HomeLink and hand-held trans-
mitter buttons.
Proceed with “Programming” step 3 to com-
plete.
Resetting HomeLink Buttons
Use the following procedure to reset (erase
programming) from the three HomeLink but-
tons (individual buttons cannot be reset but
can be “reprogrammed” as outlined in the fol-
lowing section):
1. Press and hold the two outer HomeLink
buttons until the indicator light begins to
flash.
2. Release both buttons.
> HomeLink is now in the training (or
learning) mode and can be pro-
grammed at any time beginning with
“Programming” - step 1.
Reprogramming a Single HomeLink
Button
To program a device to HomeLink using a
HomeLink button previously trained, follow
these steps:
1. Press and hold the desired HomeLink
button.
DO NOT
release the button.
2. The indicator light will begin to flash after
20 seconds. Without releasing the Home-
Link button, proceed with “Programming”
- step 1.
For questions or comments, contact Home-
Link at: www.homelink.com/
www.youtube.com/HomeLinkGentex or by
phoning the hotline at 1–800–355–3515.
This device complies with FCC rules part 15
and Industry Canada (IC) RSS-210. Operation
is subject to the following two conditions: (1)
This device may not cause harmful interfer-
ence, and (2) This device must accept any
interference that may be received including
interference that may cause undesired opera-
tion.
Summary of Contents for 2016 XC60
Page 1: ...WEB EDITION OWNER S MANUAL I n f o r ma t i o nP r o v i d e db y ...
Page 2: ...I n f o r ma t i o nP r o v i d e db y ...
Page 12: ...INTRODUCTION I n f o r ma t i o nP r o v i d e db y ...
Page 27: ...SAFETY I n f o r ma t i o nP r o v i d e db y ...
Page 65: ...INSTRUMENTS AND CONTROLS I n f o r ma t i o nP r o v i d e db y ...
Page 67: ...03 Instruments and controls 03 65 I n f o r ma t i o nP r o v i d e db y ...
Page 68: ... 03 Instruments and controls 03 66 I n f o r ma t i o nP r o v i d e db y ...
Page 126: ...CLIMATE I n f o r ma t i o nP r o v i d e db y ...
Page 139: ...LOADING AND STORAGE I n f o r ma t i o nP r o v i d e db y ...
Page 151: ...LOCKS AND ALARM I n f o r ma t i o nP r o v i d e db y ...
Page 175: ...DRIVER SUPPORT I n f o r ma t i o nP r o v i d e db y ...
Page 248: ...STARTING AND DRIVING I n f o r ma t i o nP r o v i d e db y ...
Page 290: ...WHEELS AND TIRES I n f o r ma t i o nP r o v i d e db y ...
Page 324: ...MAINTENANCE AND SERVICING I n f o r ma t i o nP r o v i d e db y ...
Page 369: ...SPECIFICATIONS I n f o r ma t i o nP r o v i d e db y ...
Page 371: ...11 Specifications 11 369 Location of labels I n f o r ma t i o nP r o v i d e db y ...
Page 396: ...12 Index 12 394 I n f o r ma t i o nP r o v i d e db y ...


