


VIPER user manual V1.0
99
Chapter 9. Web Viewer – Setup/Web Configuration
9.1. Web Configuration
You can remotely control and manage the NVR from your Internet. We strongly recommend this
function is only used for professional administrators who manages it from remote sites.
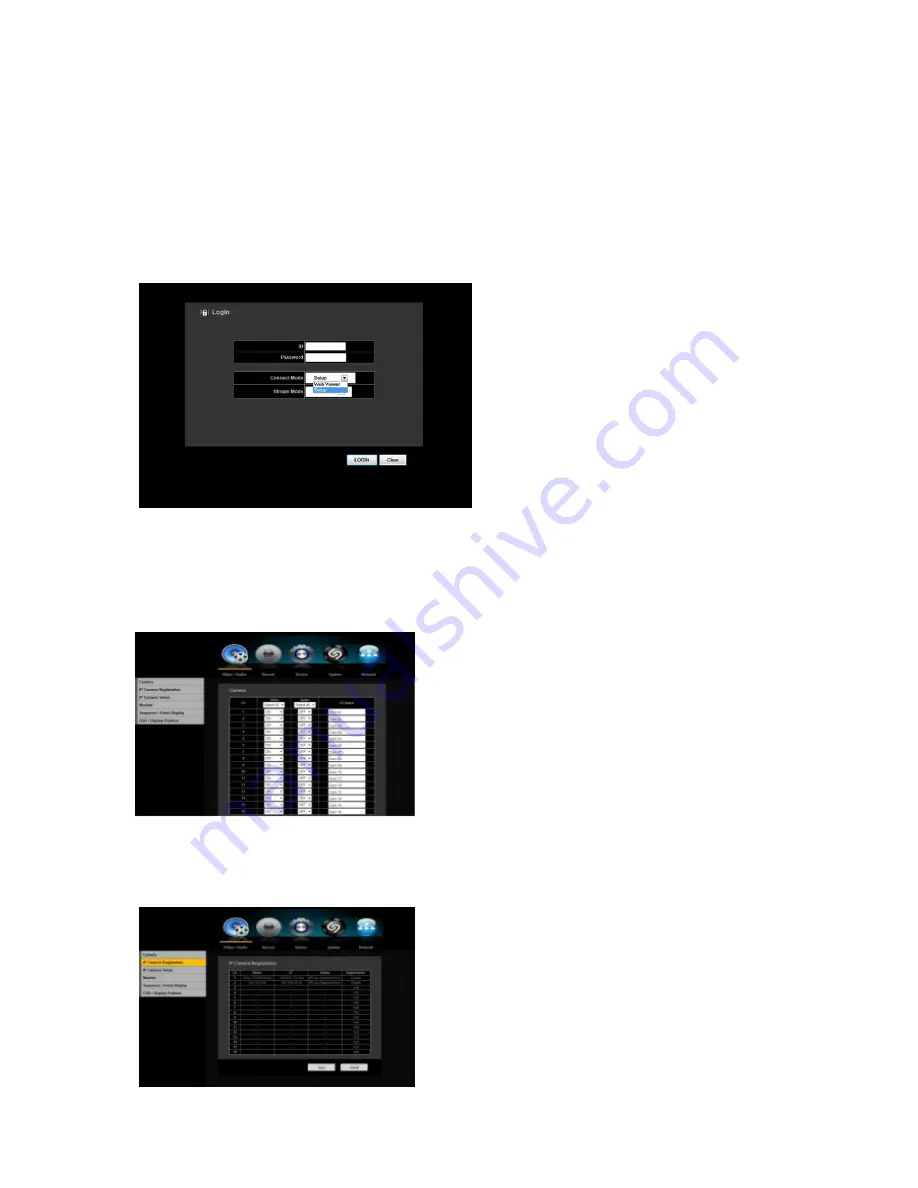
To control the NVR remotely, simply type in the
NVR IP address in the Internet browser. Once
you have entered the IP address, a Login
window will appear. To gain access, you will
need your ID and Password.
You will be given two options/functions under
Connect Mode:
Web Viewer or Setup
.
To view, simply click the LOGIN button. To
configure the NVR, click the down arrow button
in the Connect Mode to Setup (See two images
above).
9.1.1. Video/Audio
9.1.1.1. Camera
1) VIDEO: You may select the video ON, OFF,
COVERT 1 or COVERT 2.
2) AUDIO: You may select the audio ON or OFF
position.
3) TITLE/CH NAME: Create your own name/title for
each camera. If you skip this setup, camera # will be
displayed on the screen.
** For detailed information, please refer to the Main
Menu under Video/Audio
9.1.1.2. IP Camera Registration
You may register/add IP Cameras. Simply by clicking
the ADD button, it will automatically add the IP Camera.
** For detailed information, please refer to the Main
Menu under Video/Audio


