


VIPER user manual V1.0
95
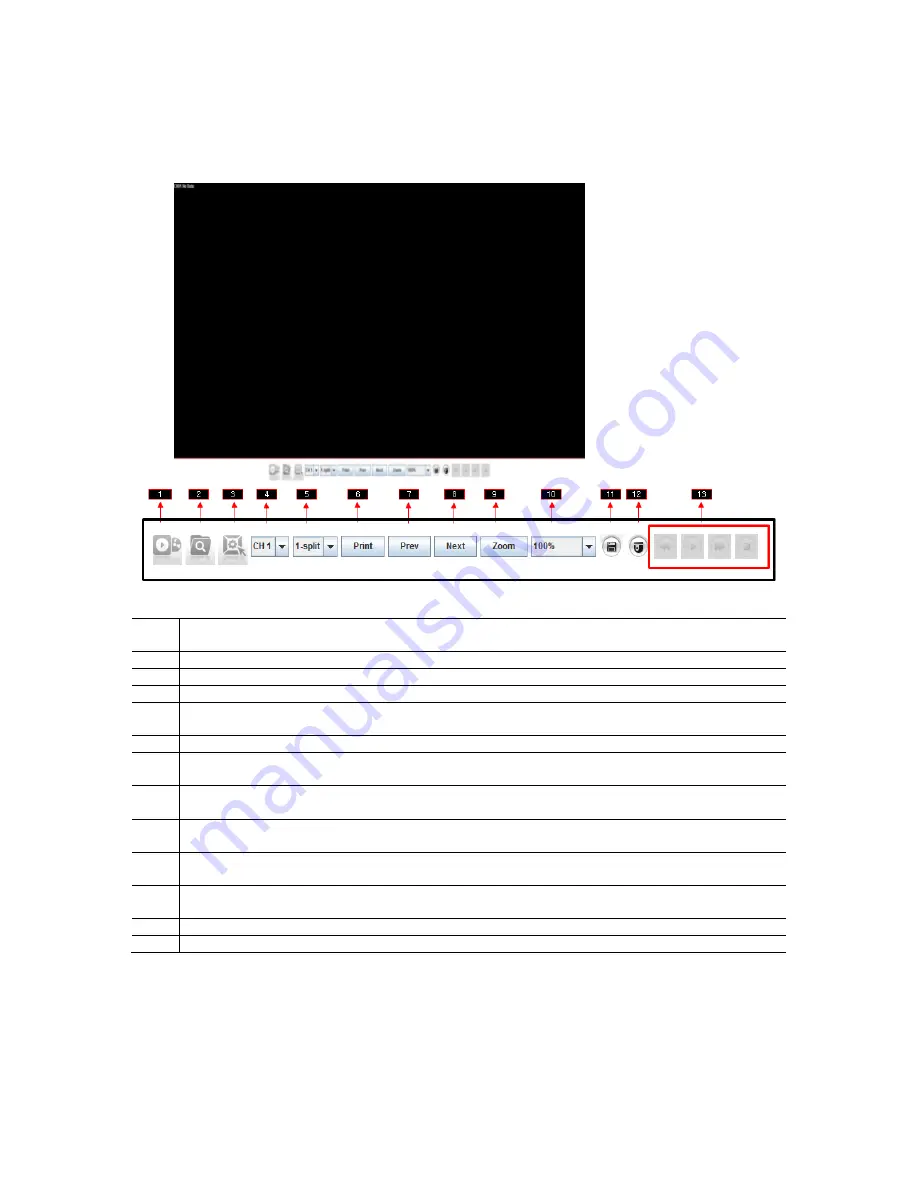
8.2.2. General Web Viewer Operation
When you connect to your NVR, you will see a screen as below.
1
Connect/Disconnect Button: Connect to NVR which is designated in Login pop-up window. To
disconnect or connect to other NVRs please click this button again.
2
Search Button: You will be able to search for data by calendar search.
3
Setup Button: Will allow you to setup you own personal NVR configuration
4
Channel Selection Button: You can choose any channel to display in full screen display mode
5
Multi Screen Button: You can set display mode in Full (1CH), 4CH(or 8CH or 16CH for specific
model)
6
Print Button: You will be able to print selected channel.
7
Previous Button: It will allow you to go back to previous channel or set of split mode
channels/multi screen mode.
8
Next Button: It will take you to the next channel or set of split mode channels/multi screen
mode.
9
Zoom Button: It will allow you to Zoom IN once a channel is selected. You many select how
much and where to Zoom IN.
10
Resolution Button: Able to select resolution and adjustments can only be done in single
channel mode.
11
Record Button: Allows you to enable recording on your NVR. Press it again and will disable
recording.
12
PTZ Control Button: You will be able to control your PTZ camera that’s connected to the NVR.
13
Playback Control Buttons: Rewind, Play, Fast Forward & Stop


