background image


3.8 Custom Names 

3.8.1 Custom Zone Names 

During the device enrollment process you also define the Location name where the device is installed. The location 
name is selected from a location list of Custom names - see Section 3.4.2, Part B, for Location List and instructions. 
Define the custom location names according to your specific needs and use them during the device enrollment. 
To define the Custom Location names, follow the instructions below. Additional guidance is provided in section 3.2. 

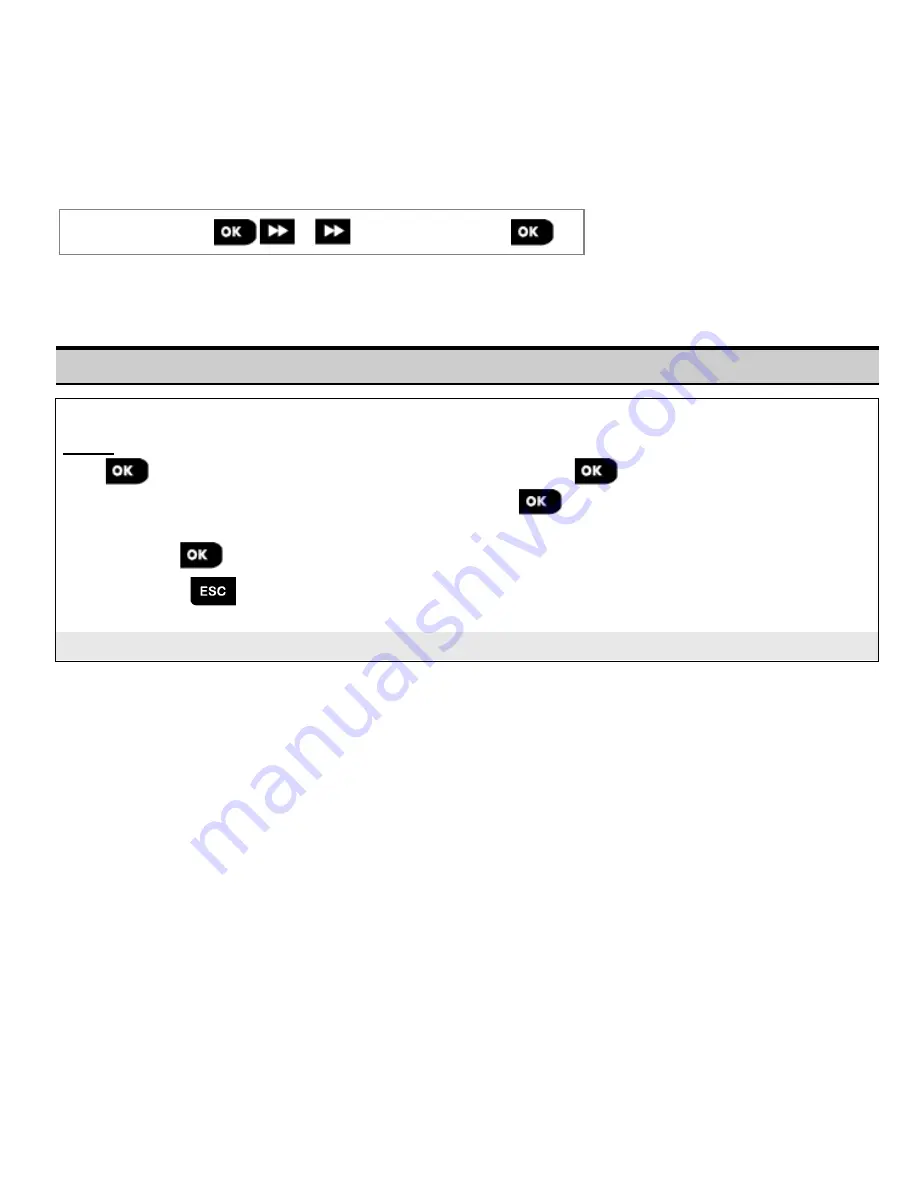
06:CUSTOM NAMES


⋅⋅⋅


CUST. ZONES NAME


Enter "

CUST.ZONES NAME

" (see guidance above), then refer to the table below which provides you with detailed 

explanations and programming instructions to edit the desired custom location. 

Note:  

All 31 location names can be edited. 

Configuration Instructions 


Enter the Custom Location names you wish to edit.  
To edit: 

Press 

to enter the "

CUST. ZONES NAME

" sub menu and then press 

 again to select the Location # you 

wish to edit, for example "

TEXT LOC. #01


Admin Office

. Press 

; the display shows the current Custom 

name, for example "

Admin Office

". To change the name, at the blinking cursor, enter the Location name you wish and 

at the end, press 

 to confirm.  

When done, press 

 to return. 

Note: 

To enter the Location name use the "String Editor" below.


IMPORTANT! 

The


editing of a custom zone name automatically deletes the original text and recorded voice name. Make 

sure to record a new voice name via the RECORD ZONE NAME menu (see next section). 

60 

D-306919 KP-250 PG2 Installer’s Guide


Summary of Contents for KP-250 PG2

Page 1: ...ide uide Keypad ad Installer s ler s Guide uide Keypad ad Installer s ler s Guide uide Keypad ad Installer s ler s Guide uide Keypad ad Installer s ler s Guide uide Keypad ad Installer s ler s Guide uide Keypad ad Installer s ler s Guide uide Keypad ad Installer s ler s Guide www visonic com K e y p a d I n s t a l l e r s G u i d e K P 2 5 0 P G 2 INSTALLER GUIDE ...

Page 2: ...ME 15 DISARM 16 Dialer to call telephone numbers for future use 17 EMERGENCY 18 FIRE ALARM 19 AC failure 20 low battery 21 Communication failure out of range of panel 22 System Trouble 23 Memory Alarm in partition or system 24 A message is waiting in the control panel 25 The system is in INSTALLER MODE or USER SETTINGS 26 Sabbath mode 27 Instructs the user to present the proximity tag at the posit...

Page 3: ...U v V 8 w W x X y Y z Z 9 Short press toggles between Insert and overwrite Long press Changes between lowercase letters a b c z and uppercase letters A B C Z Moves the digits cursor from left to right Long press for fast movement Moves the digits cursor from right to left Long press for fast movement Confirms and saves the edited string and reverts to previous menu Exiting the edit screen and move...

Page 4: ... Installer Mode 11 3 3 Setting Installer Codes 11 3 3 1 Identical Installer and Master Installer Codes 13 3 4 Zones Devices 13 3 4 1 General Guidance Zones Devices Menu Options 13 3 4 2 Adding New Wireless Devices or Wired Sensors 14 3 4 3 Deleting a Device 19 3 4 4 Modifying or Reviewing a Device 20 3 4 5 Replacing a Device 21 3 4 6 Configuring Soak Test Mode 22 3 4 7 Defining Configuration Defau...

Page 5: ...Broadband 54 3 7 PGM Output 56 3 7 1 General Guidance 56 3 7 2 Open Collector States 56 3 7 3 Output Configuration 56 3 7 4 I O Configuration 56 3 7 5 PGM Connection 58 3 7 6 Entering Daytime Limits 58 3 8 Custom Names 59 3 8 1 Custom Zone Names 60 3 8 2 Record Speech 62 3 8 3 Voice Box Mode 63 3 9 Diagnostics 63 3 9 1 General Guidance Diagnostics Flow Chart Menu Options 63 3 9 2 Testing Wireless ...

Page 6: ...ral Guidance 82 4 2 Conducting a Periodic Test 82 5 Handling System Troubles 87 6 Reading the Event Log 89 APPENDIX A Specifications 91 APPENDIX B Working with Partitions 92 B1 User Interface and Operation 92 B2 Common Areas 92 APPENDIX C Glossary 94 APPENDIX D Compliance with Standards 97 D 306919 KP 250 PG2 Installer s Guide 3 ...

Page 7: ... any of the installation procedures below remove the unit from its bracket by sliding the unit upward 2 1 Inserting Battery Open the battery cover and insert the 4 batteries according to the illustration on the battery cover CAUTION Risk of explosion if battery is replaced by an incorrect type Dispose of used battery according to manufacturer s instructions Figure 1 Battery Insertion 2 2 Desktop I...

Page 8: ...e under the 02 ZONES DEVICES option of the Installer Menu A flowchart of the procedure is provided below Step Action LCD Display 1 Enter the Installer Mode in the PowerMaster panel and select 02 ZONES DEVICES 02 ZONES DEVICES 2 Select ADD NEW DEVICES Option See Note ADD NEW DEVICES MODIFY DEVICES 3 Enroll the device by pressing the AUX button for about 5 seconds until the LED turns ON and then rel...

Page 9: ...on the ENROLL LED on the PowerMaster 33 G2 blinks slowly for one minute go to step 3 If a keypad already exists in the first location the ENROLL LED on the PowerMaster 33 G2 control panel lights steady for 10 seconds go to step 2 Note Pressing the ENROLL button takes the system out of any menu mode Installer Mode User Settings and Periodic Test 2 Press the ENROLL button again within the timeout pe...

Page 10: ...ion and setting Option and Default Setting Configuration Instructions TAMPERS disabled Define the active tamper Option settings disabled all tampers and battery cover SUPERVISION enable Define whether or not the control panel will monitor supervision messages sent by the keypad see Note Option settings enable or disable Note Every 5 minutes the keypad performs a communication test session with the...

Page 11: ...ng the proximity tag to the tag reader will return the device to normal display see section 3 5 6 Configuring Audible Visual User Interface refresh by code text by code clock by code overrides the disable enable setting above and the screen saver will turn on PIEZZO SIREN Define whether the internal sounder will sound or remain silent upon alarm Option settings off and on SQUAWK Define whether to ...

Page 12: ...AY there is an AC failure one of the enrolled KPs is not communicating to the panel for some reason or one of the enrolled KPs is in low battery state 3 1 1 Navigation The keypad s buttons are used for various functions when programming The following table provides a detailed description of the function or use of each button Button Definition Navigation Setting Function NEXT Use to move scroll for...

Page 13: ...ble 3 13 13 OPERATION MODE 3 14 OK to Exit Entering the Installer Mode menu 1 You can access the Installer Mode only when the system is disarmed The process described refers to the case where User permit is not required If User permit is required select the User Settings option and ask the Master User to enter his code and then scroll the User Settings menu and select the Installer Mode option las...

Page 14: ...step 3 To Change the Configuration of the Selected Option When entering the selected option the display shows the default or the previously selected setting marked with To change the configuration scroll the Options menu and select the setting you wish and press to confirm When done the display reverts to Step 3 3 2 3 Exiting the Installer Mode To exit the Installer Mode complete the following ste...

Page 15: ... code or Guard code 3 INSTALLER MODE NEW MASTER CODE 9999 NEW MASTER CODE 9999 ENTER CODE or or NEW INST CODE 8888 NEW INST CODE 8888 or or 01 INSTALL CODES NEW GUARD CODE 0000 NEW GUARD CODE 0000 Step 4 to step 2 Setting Installer Codes 1 Enter the Installer Menu and select the 01 INSTALL CODES option see section 3 2 2 Select the NEW MASTER CODE NEW INST CODE or NEW GUARD CODE Some panels may hav...

Page 16: ...other words undo the change to the temporary code so that the non Master Installer can still enter the system 3 4 Zones Devices 3 4 1 General Guidance Zones Devices Menu Options The ZONES DEVICES menu enables you to add new devices to the system to configure them and to delete them if required To select an option follow the instructions below Additional details and guidance are provided in section...

Page 17: ... on more than one system at one time Remember to verify panel and device compatibility 2 See enrollment by button or device ID below If enrollment is successful the display reads DEVICE ENROLLED or ID ACCEPTED and then shows the device details see 3 However if the enrollment fails the display will advise you the reason for failure for example ALREADY ENROLLED or NO FREE LOCATION If the enrolled de...

Page 18: ...ogramming menus Remember The system will indicate a NOT NETWORKD trouble until the 2 nd stage of all registered devices is completed Note The Soak Test on pre enrolled zones can be activated only when the zone is fully enrolled Enrollment by using the Enrollment button The panel is set to the Enrollment mode step 2 above and the device is enrolled using the Enroll button refer to the device inform...

Page 19: ...e type The list of available Zone Types and the explanation for each zone type is provided below Notes 1 As a shortcut press the 2 digit serial No of the Zone Type which takes you directly to its menu 2 The Zone Type default appears on the second row of the keypad display Chime setting 5 All zones are set to Chime OFF by default To configure the device to cause the panel to sound when disarmed a C...

Page 20: ...y time when the system is armed To configure the Exit Entry 1 time see section 3 14 Operation mode menu 13 OPERATION MOD 02 BS8243 SETUP or 03 DD243 SETUP or 05 EN50131 SETUP 08 ENTRY DELAY 1 Zxx ZONE TYPE 2 Exit Entry 2 Same as Exit Entry 1 but with a different delay time Used sometimes for entrances closer to the panel To configure the Exit and Entry 2 delays see section 3 14 Operation mode menu...

Page 21: ...e an alarm and is often used for non alarm applications For example a detector used only for sounding a chime Zxx ZONE TYPE 13 Fire A Fire zone is used for connecting the MC 302E magnetic contact with hard wired input to a wired smoke detector Zxx ZONE TYPE 17 Guard keybox Note Depending on the configuration this option may not be available A Guard keybox zone is usually connected to a metal safe ...

Page 22: ...e useful mainly to arm and disarm the system from inside the protected premises If you arm and disarm the system from outside without tripping any sensor such as using a keyfob it is preferred to use the other Zone Types 3 4 3 Deleting a Device Step 1 Step 2 Step 3 Select DELETE DEVICES Option 1 Select the respective device Group 2 Select exact device you wish to delete 3 02 ZONES DEVICES CONTACT ...

Page 23: ...S Z10 DEV SETTINGS Modifying or Reviewing a Device 1 Enter the Installer Menu select the 02 ZONES DEVICES option see section 3 2 and then select the MODIFY DEVICES option 2 Select the respective group of the device you wish to review or modify For example MOTION SENSORS 3 Scroll the Device Group identify by zone and or ID number the exact device you wish to modify or review for example Z10 Motion ...

Page 24: ...act device you wish to replace 3 Enroll the new device 4 K03 Keyfob ID No 300 0307 ENROLL NOW or ENTR ID 300 xxxx Replacing a Device 1 Enter the Installer Menu select the 02 ZONES DEVICES option see section 3 2 and then select the REPLACE DEVICES option 2 Select the respective group of the device you wish to replace For example KEYFOBS 3 Scroll the Device Group identify by zone and or ID number th...

Page 25: ...bling Soak Test mode 1 Enter the Installer Menu select the 02 ZONES DEVICES option see section 3 2 and then select the ADD TO SOAK TEST option 2 Select the respective Group of the device you wish to add the Soak Test For example MOTION SENSORS 3 Scroll to select the specific device zone number 4 Select between disable default or enable test 5 If set to enable you must set the duration of the Soak ...

Page 26: ...defaults for another group IMPORTANT Devices that were already enrolled in the alarm system before the defaults have been changed will not be affected by the new default settings To Define the Default parameters of a device Group complete the following steps Step 1 Step 2 Step 3 Select DEFINE DEFAULTS Option 1 Select the respective device Group 2 Select the Default Parameter 3 02 ZONES DEVICES CON...

Page 27: ...er of devices yet to be updated 3 4 9 KP 250 PG2 Display when PowerMaster Panel or other KP 250 is Active 2 When a PowerMaster panel is ACTIVE meaning that the PowerMaster panel is currently in the USER SETTINGS PERIODIC TEST INSTALLER MODE LIST OF EVENTS menu by the keypad for PM 10 30 or by other devices enrolled to KP 250 panel the following text appears on the KP 250 PG2 display BUSY CP IS ACT...

Page 28: ...missing device events 3 5 7 Miscellaneous Contains a variety of other configurable features and parameters related to the system 3 5 8 To enter the 03 CONTROL PANEL menu and to select and configure an option complete the following steps Step 1 Select 03 Control Panel INSTALLER MODE 03 CONTROL PANEL D 306919 KP 250 PG2 Installer s Guide 25 ...

Page 29: ... 5 5 03 EXIT DELAY 21 SWINGER STOP 31 PANIC ALARM 43 PANEL SIREN 05 QUICK ARM 22 CROSS ZONING 32 DURESS ALARM 44 SIREN TIME 06 BYPASS ARM Continues 33 INACTIVE ALRT 45 STROBE TIME 07 LATCHKEY ARM 34 TAMPER ALARM 46 SIREN ON LINE 09 ARMING KEY 35 AC FAIL RPRT Continues Continues 39 ALARM RESET 40 ABORT FIRE T Continues Arming Disarming Zone Behavior Alarms Troubles Sirens 26 D 306919 KP 250 PG2 Ins...

Page 30: ...try the user must disarm the KP 250 PG2 before the entry delay expires Slow rate warning beeps start sounding once the door is opened until the last 10 seconds of the delay during which the beeping rate increases The ENTRY DELAY 1 and ENTRY DELAY 2 options allow you to program the time length of these delays 02 ENTRY DELAY2 15 seconds Options 00 seconds 15 seconds 30 seconds 45 seconds 60 seconds ...

Page 31: ...ion Mode only 05 QUICK ARM off Define whether or not the user will be allowed to perform quick arming or not Once quick arming is permitted the KP 250 PG2 does not request a user code before it arms the system Options off and on default in USA 06 BYPASS ARM no bypass Define whether or not the user will be allowed to manually bypass individual zones or allow the system to perform automatic bypassin...

Page 32: ...and change its configuration refer to section 3 5 1 Option and default Configuration Instructions 21 SWINGER STOP after 1 alarm Define the number of times a zone is allowed to initiate an alarm within a single arming disarming period including tamper power failure events of detectors etc If the number of alarms from a specific zone exceeds the programmed number the KP 250 PG2 automatically bypasse...

Page 33: ...alarm message can be sent to the Monitoring Station if the user is forced to disarm the system under violence or menace To initiate a duress message the user must disarm the system using a duress code 2580 by default not applicable in UK To change the code enter the new 4 digit of the new Duress code at the position of the blinking cursor or enter 0000 to disable the duress function and then press...

Page 34: ...s canceled by the user Previously known as ALARM CANCEL Options not active default in USA in 1 5 15 60 minute s and in 4 hours Notes 1 In some PowerMaster variants this menu is displayed in the Operation Mode only 2 Since the Soak Test zone does not report an alarm event to the Monitoring Station the PowerMaster will not send a cancel alarm message to the Monitoring Station even if disarmed within...

Page 35: ...tions on and off 44 SIREN TIME 4 minutes Define the period of time the sirens will sound upon alarm Previously known as BELL TIME Options 1 90 seconds 3 4 8 10 15 20 minute s Note To comply with EN requirements the Siren Time must not exceed 15 minutes 45 STROBE TIME 20 minutes Define the length of time the strobe light will flash upon alarm Options 5 10 20 40 60 minutes 46 SIREN ON LINE disable o...

Page 36: ...is armed HOME The pushbuttons and provide selection of the corresponding partitions Pressing each button repeatedly will toggle between each option When Partitioning is enabled Options enable beeps H OFF when home h OFF exit home and disable beeps The volume level of the exit entry beeps can be modified by pressing the button on the keypad to increase the volume or by pressing the button to decrea...

Page 37: ...cy function 56 SCREEN SAVER off Certain regulations require that the system status display will not be exposed to unauthorized persons The Screen Saver option when activated replaces the system status indication on the LCD with idle text if no key is pressed during more than 30 seconds You can activate the Screen Saver option and determine whether the status display will resume following any key p...

Page 38: ...quirements class 6 30 60 must be selected 62 MISSING REPRT after 12 hours Define the time window for reception of supervision keep alive signals from the various wireless peripheral devices If any device does not report at least once within the selected time window a MISSING alert is initiated Previously known as SUPERVISION Options after 1 2 4 8 12 hour s and disabled Note To comply with EN requi...

Page 39: ...V NiMH Define which type of battery pack is used for the system to supply proper charge current Options 7 2V NiMH or 9 6V NiMH default in UK 93 SOAK PERIOD disable Define the period of time for the Soak Test Options disable default 7 days 14 days or 21 days Notes 1 If set to one of the above pre defined period of times to be operational Soak Test mode must also be set to enable test from the 02 ZO...

Page 40: ... 5 5 MOTION CAMERA Contains configurable features and parameters related to Motion Cameras for Video Alarm Verification and forwarding of image clips to the Monitoring Station and other remote subscribers via e mail and or MMS network 3 6 6 6 UP DOWNLOAD Contains configurable connection information access permission and security codes related to the Upload Download procedures via PSTN or GPRS 3 6 ...

Page 41: ...TRANS PROTOCOL NETWORK ROAMING 3 C S REPORTING 01 REPORT EVENTS 46 PSTN RETRIES 3 6 4 02 1st RPRT CHAN 47 GSM RETRIES These options are available only to the Master Installer 03 2nd RPRT CHAN 48 BB IP RETRIES 04 3rd RPRT CHAN 51 TEL AUTO TEST 05 DUAL RPRT 52 AUTO TEST TIME 11 RCVR1 ACCOUNT 53 COM FAIL RPRT 12 RCVR2 ACCOUNT 62 RECENT CLOSE 16 PSTN GSM RCV1 63 ZONE RESTORE 17 PSTN GSM RCV2 64 SYST I...

Page 42: ... EVENTS REPORTED EVENTS Private tel 1 SMS tel 1 See also Chapter 6 section B 12 in the KP 250 PG2 User s Guide Private tel 2 SMS tel 2 Private tel 3 SMS tel 3 Private tel 4 SMS tel 4 REDIAL ATTEMPTS SMS PERMISSION VOICE PRIVATE TEL ACKNOWLEDGE 5 MOTION CAMERA IMAGE FORWARD VIEW ON DEMAND 3 6 6 VIEW TIME WINDOW e mail 1 VIEW OTHER ALARM e mail 2 e mail 3 e mail 4 MMS tel 1 MMS tel 2 D 306919 KP 250...

Page 43: ...ANUAL IP RESET MODULE MANUAL IP RESET MODULE PLINK ON AC FAIL 3 6 2 Configuring PSTN landline phone Connection The PowerMaster panel includes a telephone dialer for reporting to Monitoring Stations using several optional Alarm Formats see section 3 6 4 option 41 and to Private Telephones see section 3 6 5 VOICE REPORT Here you configure necessary parameters related to the PSTN telephone line to wh...

Page 44: ... GPRS module is capable of communicating with the Monitoring station receiver by GPRS GSM Voice analog or SMS Channels Each of the channels can be separately enabled or disabled to allow or prohibit the module from using it for the event reporting If all channels are enabled the GSM GPRS module will always try GPRS first If fails it will try GSM voice If fails it will try any other possible method...

Page 45: ...pts to connect to a different network Select one of the following options NETWORK ROAMING Modem roam en Modem roam en The internal cellular modems algorithm for roaming is enabled roaming en enable Roam disable en Roaming is not allowed Only the Home network is enabled accepted en enable Manual roam en The panels algorithm selects the best cellular operator operator en enable Lock network The oper...

Page 46: ...on Fail reports The reporting of certain system function events such as Confirmed Alarm Recent Close Zone Restore and System Not Used 04 COMMUNICATION 3 C S REPORTING MENU you wish Enter 3 C S REPORTING select the menu you wish to configure see guidance above and in section 3 6 1 then refer to the table below which provides you with detailed explanations and configuration instructions for each opt...

Page 47: ...table Entering Hexadecimal Digits Digit 0 9 A B C Keying 0 9 0 1 2 Digit D E F Keying 3 4 5 16 PSTN GSM RCV1 The PowerMaster can be programmed to report the event messages defined in the Report Events option option 01 to two Alarm Format Receivers via PSTN telephone line and or GSM analog voice channel if equipped with GSM module using standard PSTN alarm formats i e SIA Contact ID and Scancom The...

Page 48: ... format please contact Visonic Enter the two telephone numbers including area code maximum 16 digits of the SMS Receiver 1 located at the 1 st Monitoring Station 26 SMS RCVR 1 and SMS Receiver 2 located at the 2nd Monitoring Station 27 SMS RCVR 2 27 SMS RCVR2 Master Installer only Note To enter the international prefix at the 1st digit key in 1 28 RCVR 1 DNS Defines the domain names of RCVR1 and R...

Page 49: ... or more then the exact hour of reporting can be selected with option 52 Options test OFF every 1 2 5 7 14 30 day s and every 5 hours 52 AUTO TST TIME 12 00 Enter the exact time auto test time during the day at which the Auto Test message if enabled in option 51 will be sent to the Monitoring Station Note If the AM PM format is used you can set the AM and the PM digits using the numbers on the key...

Page 50: ...isabled after 7 14 30 90 days 65 TWO WAY VOICE You can configure the two way voice channel settings of the control panel4 as follows Send 2 WV Code Define whether the system will send two way voice code to the Monitoring Station to turn the Monitoring Station from data communication to voice communication state by using pre selected SIA or Contact ID communication format only voice c s Select the ...

Page 51: ...ise the Monitoring Station will establish communication with the control panel after an event occurrence in the normal manner and not after one ring Ringback time 1 minute Options 1 3 5 10 minute s ambient level low Options low and high 66 24h ZONE RPRT both burglary Define whether 24 hour silent and audible zones will function as normal 24 hour zones or as panic zones Applicable in UK only Option...

Page 52: ...eported to each of the two Monitoring Stations The table below describes the available reporting options The minus symbol means but less except e g all alrt means all events except alerts The asterisk is a separator between event messages reported to Monitoring Station 1 C S 1 and event messages reported to Monitoring Station 2 C S 2 Available Reporting Options Events Reported to C S 1 Events repo...

Page 53: ...S network also with image clips captured by Motion Cameras models Next CAM PG2 Next K9 CAM PG2 and TOWER CAM PG2 The Monitoring Station can use the video clips for verification of Burglary alarms detected by the Motion Cameras The system can be configured to capture image clips also upon occurrence of Non Burglary alarms i e Fire Duress Emergency and Panic The server can then forward the images to...

Page 54: ...em and the same software The modem dials to the control panel and establishes a connection via PSTN using an agreed process When connection is established the installer or Master installer can access the panel using the UL DL access codes programmed in the PSTN UP DOWNLOAD menu see table below For further information refer to the PowerMaster Remote Programmer Software User s Guide Remote programmi...

Page 55: ...modes in DISARM only Define whether the downloading uploading can be performed in Disarm mode state only or in all modes i e Away Home Disarm Return Options in all modes or in DISARM only GPRS UP DOWNLOAD Configure the Upload Download functionality via GPRS The functionality is determined through a sub menu of the GPRS UP DOWNLOAD option as shown below To program Press to enter the GPRS UP DOWNLOA...

Page 56: ...rMaster will call back the PowerManage server using IP RCVR 1 IP RCVR 2 address as configured in Section 5 6 4 options 21 and 22 Note Caller ID 1 ID 2 must contain at least 6 digits otherwise the process will not work Return D 306919 KP 250 PG2 Installer s Guide 53 ...

Page 57: ...parameters IP ADDRESS 192 168 000 200 Enter the IP address of the Broadband Module SUBNET MASK 255 255 255 200 Enter the subnet mask used with the IP address DEFAULT GATEWAY 192 168 000 001 Enter the default gateway of the Broadband Module Note If DHCP CLIENT is set to DHCP ENABLE the entries for IP ADDRESS SUBNET MASK and DEFAULT GATEWAY will be ignored PLINK curr params Displays the current IP a...

Page 58: ...turned off if AC failure duration is longer than 10 minutes or active PowerLink will always be active Note Keeping the PowerLink communicator active during AC failure reduces battery backup time significantly D 306919 KP 250 PG2 Installer s Guide 55 ...

Page 59: ...d expander module When enabled the number of inputs and outputs is increased to 8 This option is enabled by default Step 1 Step 2 Step 3 Select 05 OUTPUTS menu Select Enable Expander menu KP 250 PG2 displays currently selected setting Press 05 OUTPUTS Enable Expander OPTIONS disable Step 4 Step 5 Select whether to enable or disable the expander Press to return to Enable Expander or and select OK t...

Page 60: ... 250 PG2 displays currently PIN 1 Press 05 OUTPUTS Set EXP I O PINS OPTIONS Zone Step 4 Step 5 Select either Zone or PGM to configure the I O type Press to return to Set EXP I O PINS or to take you to OK to Exit OPTIONS PGM OPTIONS PGM D 306919 KP 250 PG2 Installer s Guide 57 ...

Page 61: ... 3 7 6 Entering Daytime Limits 05 OUTPUS LOCKOUT TIME Enter the LOCKOUT TIME menu and enter the daytime limits through which the PGM device will turn off even when the associated sensors are triggered Step 1 Step 2 Step 3 Select 05 OUTPUTS menu Select LOCKOUT TIME Press OUTPUTS LOCKOUT TIME start time HH MM 11 00 Step 4 Step 5 Step 6 Enter the time at which you wish the lockout state to begin Pres...

Page 62: ...menu Select PGM Outputs menu Select PGM on Expander 05 OUTPUTS PGM Outputs PGM on Expander Step 4 Step 5 Step 6 Select PGM on HWExpndrs Select none or Expander IOV ID no 441 XXXX options Select NO EXISTING DEV or Pmm PGM PIN m options PGM on HWExpndrs NO EXISTING DEV or E0x Expander IOV ID NO 441 XXXX NO EXISTING DEV or Pmm PGM PIN m D 306919 KP 250 PG2 Installer s Guide 59 ...

Page 63: ...ions and programming instructions to edit the desired custom location Note All 31 location names can be edited Configuration Instructions Enter the Custom Location names you wish to edit To edit Press to enter the CUST ZONES NAME sub menu and then press again to select the Location you wish to edit for example TEXT LOC 01 Admin Office Press the display shows the current Custom name for example Adm...

Page 64: ... A B C Z 1 a A b B c C 2 Moves the digits cursor from left to right Long press for fast movement d D e E f F 3 Moves the digits cursor from right to left Long press for fast movement g G h H i I 4 Confirms and saves the edited string and reverts to previous menu j J k K l L 5 Exiting the edit screen and moves one level up to previous or top menu without saving the edit string m M n N o O 6 Clears ...

Page 65: ...nges to TALK NOW 0 A progress indicator will be displayed that is incremented each time by 25 as follows 0 25 50 75 100 At the end of the recording process the KP 250 PG2 will display the following RECORDING ENDED Release the button Note To check the recorded message press the button and listen to the playback through the PowerMaster 30 G2 control panel or external voice box To advance to the next...

Page 66: ... with the options Option and default Instructions VOICE BOX MODE VOICE BOX MIXED Define whether two way voice communication is to be sounded either via the external speakerphone VOICE BOX ONLY via the control panel NO VOICE BOX or via both VOICE BOX MIXED Options NO VOICE BOX VOICE BOX ONLY and VOICE BOX MIXED 3 9 Diagnostics 3 9 1 General Guidance Diagnostics Flow Chart Menu Options The DIAGNOSTI...

Page 67: ...nication of the Broadband Module with the PowerManage server 3 9 5 EXPANDER TEST PM 33 only View the catalog number and SW version of the enrolled HW IOV devices This is required in order to confirm successful SW upgrade of the HW IOV devices FIND ME PM 33 only Command any enrolled HW WL IOV device to sound a tone To enter the 07 DIAGNOSTICS menu and to select and configure an option complete the ...

Page 68: ...e to test the wireless devices attached to the panel You can test all devices one device at a time display devices status and review RF problems in case of any 07 DIAGNOSTICS WL DEVICES MENU you wish Enter the WL DEVICES menu select the type of test you wish to perform see guidance above and in section 3 9 1 and then refer to the table below which provides you with detailed explanations for each o...

Page 69: ...ndicated by the corresponding display for example TEST KEYFOBS XX press any key of the selected device to initiate the test While in the panic button test process indicated by the corresponding display for example TEST PANIC BT XX press a button on the pendant TEST ONE DEVICE You can select a specific device group you wish to test for example Motion Sensors Press to enter the TEST ONE DEVICE sub m...

Page 70: ... to scroll between the device s families OK to exit Select to terminate the diagnostics test 3 9 3 Testing the GSM module The KP 250 PG2 enables to test the GSM module integrated inside the panel 07 DIAGNOSTICS GSM GPRS PLEASE WAIT Enter the GSM GPRS menu and press to initiate the GSM diagnostic test Upon test completion the KP 250 PG2 will present the test result The following table presents the ...

Page 71: ...tered to PowerManage 3 9 4 Testing the SIM Number The PowerMaster enables to test the SIM number to ensure the SIM number was entered correctly in the control panel see section 3 6 7 and to coordinate with the operator 07 DIAGNOSTICS SIM NUMBER TEST Tst by IP RCVR 1 Enter the SIM NUMBER TEST menu select the IP server out of two used for the verification of the SIM and press The panel sends a test ...

Page 72: ...TEST ABORTED The diagnostic test is aborted as follows AC failure Broadband Module is set to OFF mode Broadband Module has not completed the power up procedure In this case the installer should wait a maximum of 30 seconds before re testing BROADBAND MODULE COM LOSS The RS 232 serial interface between the Broadband Module and the PowerMaster failed BROADBAND MODULE BBA RCVR IP MISS Receivers IP 1 ...

Page 73: ...meters or to delete all the PowerG devices that are enrolled in the system To obtain the relevant parameters defaults contact the PowerMaster dealer Reset factory default parameters as follows Step 1 Step 2 Enter 09 FACTORY DEFLT menu 1 Select leave KP250 or del all devices 2 09 FACTORY DEFLT 09 FACTORY DEFLT leave KP250 or 09 FACTORY DEFLT del all devices Step 3 Step 4 Press 3 Enter the Installer...

Page 74: ... the procedure press to return to 09 FACTORY DEFAULT or to take you to OK to Exit Notes 1 For KP 250 PG2 with 2 installer codes INSTALLER code and MASTER INSTALLER code only the master installer code enables to perform the factory default function 2 If the Soak Test is active performing factory default will restart the Soak Test D 306919 KP 250 PG2 Installer s Guide 71 ...

Page 75: ...L ID 123456 Control panel ID for PowerManage connectivity PYTHON VERSION FFFFFFFF GSM image transfer software version EE CAT SN J 702271 K18 022 Control panel default version KP250 SW VER 01 00 09 KP 250 PG2 keypad software version KP250 cat number 70245100 KP 250 PG2 keypad catalog number RSU VERSION JS702415 K01 034 Software upgrade communicator version BOOT VERSION JS702412 K01 022 Software upg...

Page 76: ...NO 441 XXXX E0y Expander IOV ID NO 441 YYYY JS vx x xx LOCAL KP 250 to Step 1 3 13 Partitioning 3 13 1 General Guidance Partitioning Menu This menu allows you to enable disable partitions in the system for further details see APPENDIX B D 306919 KP 250 PG2 Installer s Guide 73 ...

Page 77: ... Mode Menu This mode allows you to select an operation mode for the control panel according to specific compliance standards Each operation mode has its own configuration 3 14 2 Select Setting To select the desired operation mode complete the following steps Step 1 Step 2 Step 3 Step 4 Select 13 OPERATION MOD menu Enter 01 SELECT MODE Select between normal1 EN 50131 DD243 BS8243 Incert 1 and CP011...

Page 78: ...rol panel is disarmed DD243 An alarm initiated by another detector during the entry delay is not regarded as a confirmed alarm normal mode The control panel will report a confirmed alarm for the second alarm that is triggered from a different zone within the confirmation time There are no alarm restrictions during entry delay or for the delay zone 03 END EXIT MODE door fob only Define how the exit...

Page 79: ... alarm Following entry the user must disarm the control panel before the entry delay expires Slow rate warning beeps start sounding once the door is opened until the last 10 seconds of the delay during which the beeping rate increases Locations No 1 entry delay 1 and 2 entry delay 2 allow you to program the length of these delays 09 ENTRY DELAY 2 60 second Options 10 15 30 45 60 seconds 3 4 minute...

Page 80: ... 03 END EXIT MODE fob timer Define how the exit delay is terminated or restarted according to the following options fob timer By pressing the AUX button on the keyfob 11 or when the exit delay has expired whichever first restart reentry Exit delay restarts when the door is reopened during exit delay The restart occurs once only Restarting the exit delay is helpful if the user re enters immediately...

Page 81: ...once the door is opened until the last 10 seconds of the delay during which the beeping rate increases Locations No 1 entry delay 1 and 2 entry delay 2 allow you to program the length of these delays 09 ENTRY DELAY 2 60 seconds Options 10 15 30 45 60 seconds 3 4 minutes 10 ABORT TIME in 30 seconds The PowerMaster can be configured to provide a delay before reporting an alarm to the monitoring stat...

Page 82: ...s when the door is reopened during exit delay The restart occurs once only Restarting the exit delay is helpful if the user re enters immediately after going out to retrieve an item that was left behind door fob timer When the door is closed by pressing the AUX button on the keyfob1 or when the exit delay has expired whichever first 05 CONFIIRM ALARM in 60 minutes Define a specific time period tha...

Page 83: ...rt interval a special beep will sound to indicate no alarm transmission Options enable and disable 3 14 6 OTHERS SETUP or EN50131 SETUP 13 OPERATION MOD 05 OTHERS SETUP or EN50131 SETUP Enter the 05 OTHERS SETUP or EN50131 SETUP menu and press to configure its settings Option and default Configuration Instructions 01 DISARM OPTION anytime Certain regulations require that when the system is armed i...

Page 84: ...pecific doors and routes without causing an alarm Following entry the user must disarm the control panel before the entry delay expires Slow rate warning beeps start sounding once the door is opened until the last 10 seconds of the delay during which the beeping rate increases Locations No 1 entry delay 1 and 2 entry delay 2 allow you to program the length of these delays 09 ENTRY DELAY 2 15 secon...

Page 85: ...to abort the testing procedure press to continue the testing procedure or press to exit the testing procedure 4 2 Conducting a Periodic Test The KP 250 PG2 enables you to conduct the periodic test in four parts Siren Test Each siren of the system is automatically activated for 3 seconds outdoor sirens with low volume Temperature Light Sensor Test When Temperature Light Sensors are enrolled in the ...

Page 86: ...nds When the sirens test is complete the display reads SIREN TEST ENDED Press the or the button to confirm the test TEMP LIGHT The KP 250 PG2 reads the temperature and light intensity of the zone When testing all previous temperature and light results from sensors are cleared To display the temperature and light intensity of zones on the KP 250 PG2 press After 20 seconds the KP 250 PG2 displays th...

Page 87: ...e the server can send the email to the user s inbox 2 Because a burglary alarm is sent an alarm event must be configured for reporting events see sections 4 6 3 Configuring Events Reporting to Monitoring Stations and 4 6 4 Configuring Events Reporting to Private Users TEST ONE DEVICE Select a specific device group you wish to test For example Motion Sensors Press to enter the TEST ONE DEVICE sub m...

Page 88: ...the screen momentarily changes to ACTIVATE MW NOW and then returns to the selected setting 9b If you press the adjustment procedure ends Important The procedure mentioned above is for testing purposes only and does not change the detector settings The settings must be saved through the MODIFY DEVICES menu To test the shock detector 1 Press to enter the TEST ONE DEVICE sub menu and use to navigate ...

Page 89: ... to navigate to MOTION SENSORS 2 Press the following screens will appear Z01 Motion Sens location 3 Press continuously to select a different zone number 4 Press the following screen will appear Zxx ACTIVATE NOW 5 Activate the input of the detector the following screens will appear Zxx IS ACTIVATE OK SEND IMAGE 86 D 306919 KP 250 PG2 Installer s Guide ...

Page 90: ...ssage was sent but was not acknowledged 1 Check telephone cable connection 2 Check that correct telephone number has been dialed 3 Dial Monitoring Station to check whether or not events are received CPU LOW BATTERY The backup battery within the control panel is weak and must be replaced refer to the PowerMaster 10 30 G2 Installer s Guide section 7 3 or PowerMaster 33 G2 Installer s Guide section 5...

Page 91: ...ery MISSING A device or detector has not reported for some time to the control panel 1 Make sure the device is physically present 2 Check the display for device faults for example low battery 3 Use RF diagnostics to check the current signal strength and during the last 24 hours 4 Replace the battery 5 Replace the device NOT NETWORKED A device was not installed or not installed correctly or cannot ...

Page 92: ...ote PowerManage server When reading the event log events are shown in chronological order from the newest to the oldest Access to the event log is provided by clicking the button not through the installer s menu The reading and erasing process of the event log is shown in the following table Step 1 Step 2 Step 3 In normal operating mode 1 Enter Installer Code 2 Reviewing Events 3 00 00 READY PRESE...

Page 93: ...e Event Log 5 From anywhere within the event log press the button and then press 6 At this stage in the procedure clicking the button will take you to OK TO EXIT without erasing the event log Clicking the button will revert to CLEAR EVENT LOG Press the button to erase the event log 7 The system erases the event log and a success beep is heard 8 Press to revert to normal operating mode Clicking the...

Page 94: ...V Power source Battery 4 8VDC 6VDC Back light Blue keypad white display Operating Temperature 0 C to 55 C 32 F to 131 F Humidity Average relative humidity of approx 75 non condensing For 30 days per year relative humidity may vary from 85 to 95 non condensing Dimensions WxLxD 150x100x20mm 5 7 8 x 3 7 8 x 13 16 in Weight including battery and bracket 379 g 13 oz Mounting Wall mounted or desktop Col...

Page 95: ...o 2 or 3 partitions Table A1 summarizes the behavior of the different zone types in a common area Table A1 Common Area Definitions Common area zone types Definition Perimeter Acts as defined only after the last assigned partition is armed AWAY or HOME In case that one of the partitions is disarmed an alarm initiated from this zone is ignored for all assigned partitions Delay zones Delay zones will...

Page 96: ...ays armed Non alarm Always ignored There are no alarms for non alarm zone types Can be used for example to activate PGMs without alarms in all modes Outdoor Acts as defined only after the last assigned partition is armed HOME or AWAY Arming key Arming all assigned partitions Tamper Line Fail PSU Fail Panic Always armed Note A Soak Test of Common areas cannot be initiated when one of its partitions...

Page 97: ...installer will never designate a 24 hour zone or a fire zone as a chime zone because both zone types actuate an alarm if disturbed while the system is in the disarmed state Although one zone or more are designated as chime zones you can still enable or disable the chime function Communicators Refers to communication channel for example GSM Control Panel The control panel is a cabinet that incorpor...

Page 98: ...rol panel After transmission it stands by to sense further motion Non Alarm Zone Your installer can designate a zone for roles other than alarm For instance a motion detector installed in a dark stairway may be used to switch on lights automatically when someone crosses the dark area Another example is a wireless transmitter linked to a zone that controls a gate opening mechanism Quick Arming Armi...

Page 99: ...by number and name the control panel can report the zone status to the user and register in its memory all the events reported by the zone detector Instant and delay zones are on watch only when the control panel is armed and other 24 hour zones are on watch regardless of whether the system is armed or not Zone Type The zone type determines how the system handles alarms and other signals sent from...

Page 100: ...s product must not be co located or operated in conjunction with any other antenna or transmitter Le dispositif doit être placé à une distance d au moins 20 cm à partir de toutes les personnes au cours de son fonctionnement normal Les antennes utilisées pour ce produit ne doivent pas être situés ou exploités conjointement avec une autre antenne ou transmetteur The digital circuit of this device ha...

Page 101: ... loss or damage arising under this limited warranty THE MANUFACTURER S MAXIMUM LIABILITY IF ANY SHALL NOT IN ANY CASE EXCEED THE PURCHASE PRICE OF THE PRODUCT which shall be fixed as liquidated damages and not as a penalty and shall be the complete and exclusive remedy against the Manufacturer When accepting the delivery of the Product the Purchaser agrees to the said conditions of sale and warran...

Page 102: ... T u U v V 8 9 w W x X y Y z Z 9 Short press toggles between Insert and Overwrite Long press Changes between lowercase letters a b c z and uppercase letters A B C Z Moves the digits cursor from left to right Long press for fast movement Moves the digits cursor from right to left Long press for fast movement Confirms and saves the edited string and reverts to previous menu ESC Exiting the edit scre...

Page 103: ...r future use 28 AC ON 5 Play a message 17 EMERGENCY 29 Chime ON OFF status 6 PGM off 18 FIRE ALARM 30 System Trouble 7 PowerMaster Mute speaker 19 AC failure 31 ARM AWAY 8 Chime ON OFF 20 Low battery 32 Escape 9 PGM control 21 Communication failure out of range of panel 33 Previous 10 Event log enroll button 22 System Trouble 34 Info OK 11 Instant 23 Memory Alarm in partition or system 35 Next 12 ...

Page 104: ...r s Guid staller s Guide Keypad Installer s Guide Keypad Installer s Guide Keypad Guide Keypad Installer s Guide Keypad Installer s Guide Keypad Installe Keypad Installer s Guide Keypad Installer s Guide Keypad Installer s Guid staller s Guide Keypad Installer s Guide Keypad Installer s Guide Keypad Guide Keypad Installer s Guide Keypad Installer s Guide Keypad Installe Keypad Installer s Guide Ke...

Reviews: