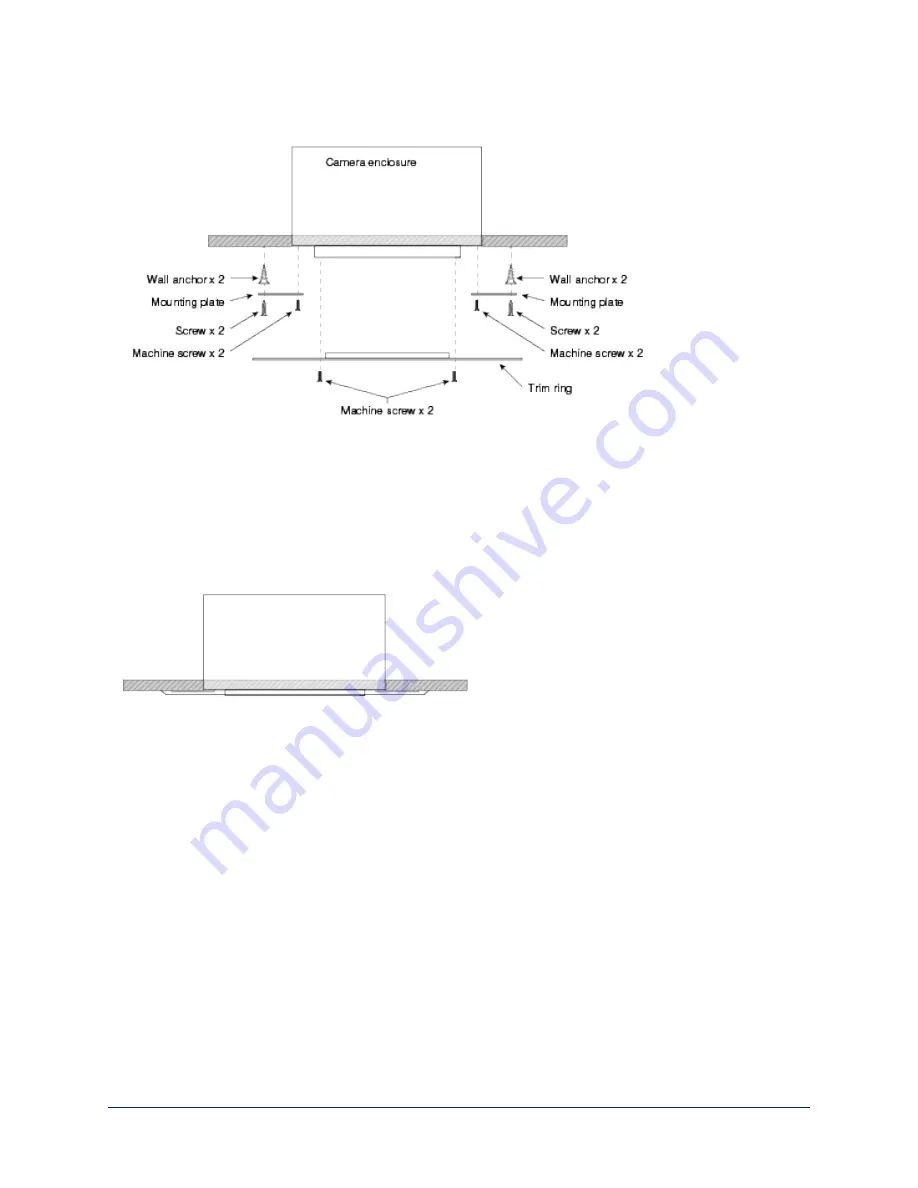
Completing the Installation in a Hard Ceiling
1. Attach the mounting plates to the camera with the black machine screws.
2. Lift the camera into place and mark the locations to drill into the ceiling.
3. Drill the holes and install the screw anchors.
4. Connect the camera cable to the camera, routing it through a conduit box if required.
5. Lift the camera into place and secure it with the 1 1/4 in. screws.
6. Attach the trim ring to the camera's bezel ring with the white machine screws.
7. Connect the camera cable to the PoE+ injector or the OneLINK device, as applicable.
Powering Up the Camera
Connect camera power.
The camera will wake up and initialize. This will take a few seconds. When the camera is initialized and
ready, its status light is blue. At this point, it is ready to accept control information.
Note
Wait until the camera finishes initializing before trying to operate or control it.
12
Integrator's Complete Guide to the DocCAM 20 HDBT Ceiling-Mounted Document Camera


