background image

Quick Start Guide

GV-PTZ010D / GV-PT110D Camera

© 2010 GeoVision Inc. All rights reserved.

Thank you for purchasing GV-PTZ010D / GV-PT110D Camera. This guide is designed to 

assist the new user in getting immediate results from the GV-PTZ010D / GV-PT110D 

Camera. For advanced information on how to use the GV-PTZ010D / GV-PT110D Camera, 

please refer to

 GV-IPCam H.264 User's Manual 

on Software DVD.

1

Introduction

Welcome to the 

GV-PTZ010D / GV-PT110D Camera Quick Start Guide

. In 

the following sections, you will learn about the basic installations and 

configurations of the GV-PTZ010D and GV-PT110D. For a detailed user’s 

manual, see 

GV-IPCam H.264 User’s Manual

 on the software CD.

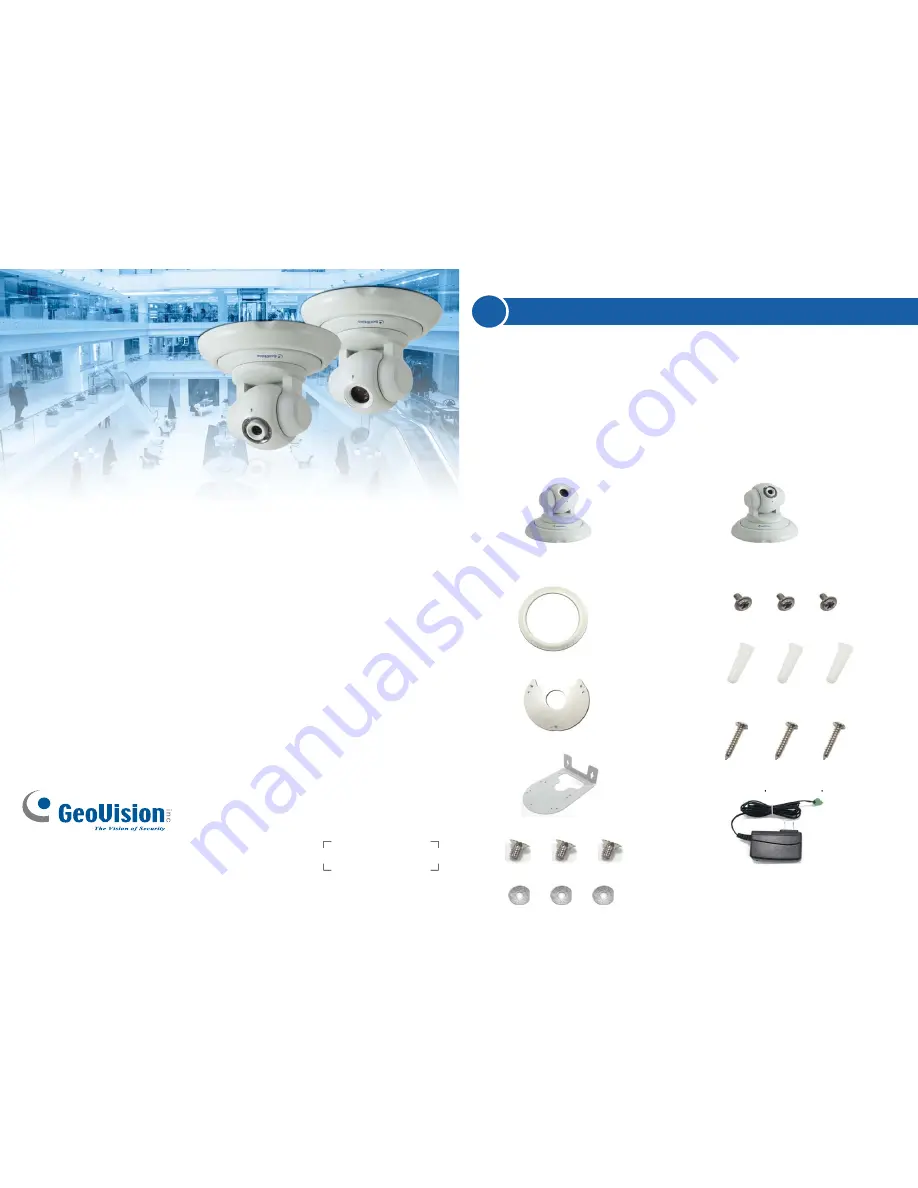
Packing List

•  GV-PTZ010D / GV-PT110D camera

• Mounting cover

•  Wall mount bracket

• Round screws

• Screw anchors

• Washers

•  DC 12V power adaptor

•  GV-PTZ010D / GV-PT110D

software CD

GV-PTZ010D

GV-PT110D

or

2010/10

English

ICH264V106-PTZ-QG-A

• Mounting base

• Short screws

• Long screws

Summary of Contents for GV-PT110D

Page 1: ...nual on Software DVD 1 Introduction Welcome to the GV PTZ010D GV PT110D Camera Quick Start Guide In the following sections you will learn about the basic installations and configurations of the GV PTZ010D and GV PT110D For a detailed user s manual see GV IPCam H 264 User s Manual on the software CD Packing List GV PTZ010D GV PT110D camera Mounting cover Wall mount bracket Round screws Screw anchor...

Page 2: ... Ceiling Mount 1 Use the mounting base to make 3 marks on the wall for screw anchors 5 Put on the mounting cover To fit the installation environment you can cut the parts indicated by arrows to make an opening for wires and cables 2 Drill the marks and insert 3 screw anchors 3 Attach the mounting base with the PTZ PT camera with 3 short screws 4 Fix the mounting base now with the PTZ PT camera att...

Page 3: ...unting cover attach the mounting base to the camera and then put on the mounting cover See steps 3 and 5 in the Ceiling Mount section Attach the wall mount bracket with the PTZ PT camera using 3 round screws 2 Drill the marks and insert 2 screw anchors 3 Insert the long screws and leave enough distance approximately 2 mm to hang the wall mount bracket later 4 Hang the wall mount bracket on the scr...

Page 4: ...s off when system error occurs Turns green when the power is on and turns off when the power is off Manually rotates this ring left or right to adjust focus Turns on to illuminate a surveillance area by infrared light to produce clearer images during the night For details see 9 1 1 Video Settings in the GV IPCam H 264 User s Manual on the software CD Records the sounds Resets to default factory se...

Page 5: ...ry settings see 10 Restoring to Default Settings in the Quick Start Guide System Requirement Connect GV PTZ010D GV PT110D camera with a standard network cable and the supplied power adaptor Alternatively you can connect a Power over Ethernet PoE adaptor and the power will be supplied over the network cable Connecting the Cables Designed for use on the network assign an IP address to make the GV PT...

Page 6: ...tion Remote Config Show Camera Name and Image Enhance Displays the PTZ Control Panel or Visual PTZ Enables the I O Control Panel and Visual Automation Displays the camera information video settings audio data rate I O device status images captured upon alarm and GPS location of the camera Also allows you to adjust image quality and install the program from the hard drive Name Play Stop Microphone ...

Page 7: ...the camera and the view Adjusts the sharpness of the camera view Brings up these functions Auto focus PTZ speed maximum number of preset points image quality Preset point Sequence Auto Pan digital zoom and camera default loading Opens and closes the number pad Name Exit Pan Tilt Control Home Zoom In Out Focus In Out Option Show Preset No 1 2 3 4 5 6 7 Buttons on the PTZ PT control panel For detail...

Page 8: ...t number which has been set previously To stop a Preset movement click the Home button or click any of the Pan Tilt Control buttons 1 On the PTZ PT control panel use Pan Tilt Control buttons to move the camera to a desired point in live view 2 To save this Preset point click the Option button select Preset Set and select the desired Preset number 3 A confirmation message appears Click Yes 4 To con...

Page 9: ...select the staying time at a Preset point 8 Use the Speed drop down list to select the speed 9 To configure another Sequence repeat steps 4 to 8 and select a different Index number 10 Click Save to complete the settings 8 Configuring a Sequence You can also configure the GV PTZ010D GV PT110D camera to perform a Sequence which links up more than two Preset points to form a series of movements Up to...

Page 10: ...ton to start the upgrade Important 1 While the firmware is being updated WARNING The interruption of power supply during updating causes not only update failures but also damages to the camera In this case please contact your sales representative and send your device back to GeoVision for repair 2 Do not turn the power off within 10 minutes after the firmware is updated 3 If you use the IP Device ...

Page 11: ...ake about 25 seconds 5 When default loading is complete the camera will pan and tilt to its full range and return to the home point Directly on the Camera 1 On the left menu of Web interface select Management and select Tools The Additional Tools dialog appears 2 Click the Load Default button in the System Settings section Using the Web Interface Default button Network LEDs Note To restore camera ...

Page 12: ...9F No 246 Sec 1 Neihu Rd Neihu District Taipei Taiwan Tel 886 2 8797 8376 Fax 886 2 8797 8335 support geovision com tw http www geovision com tw ...

Reviews: