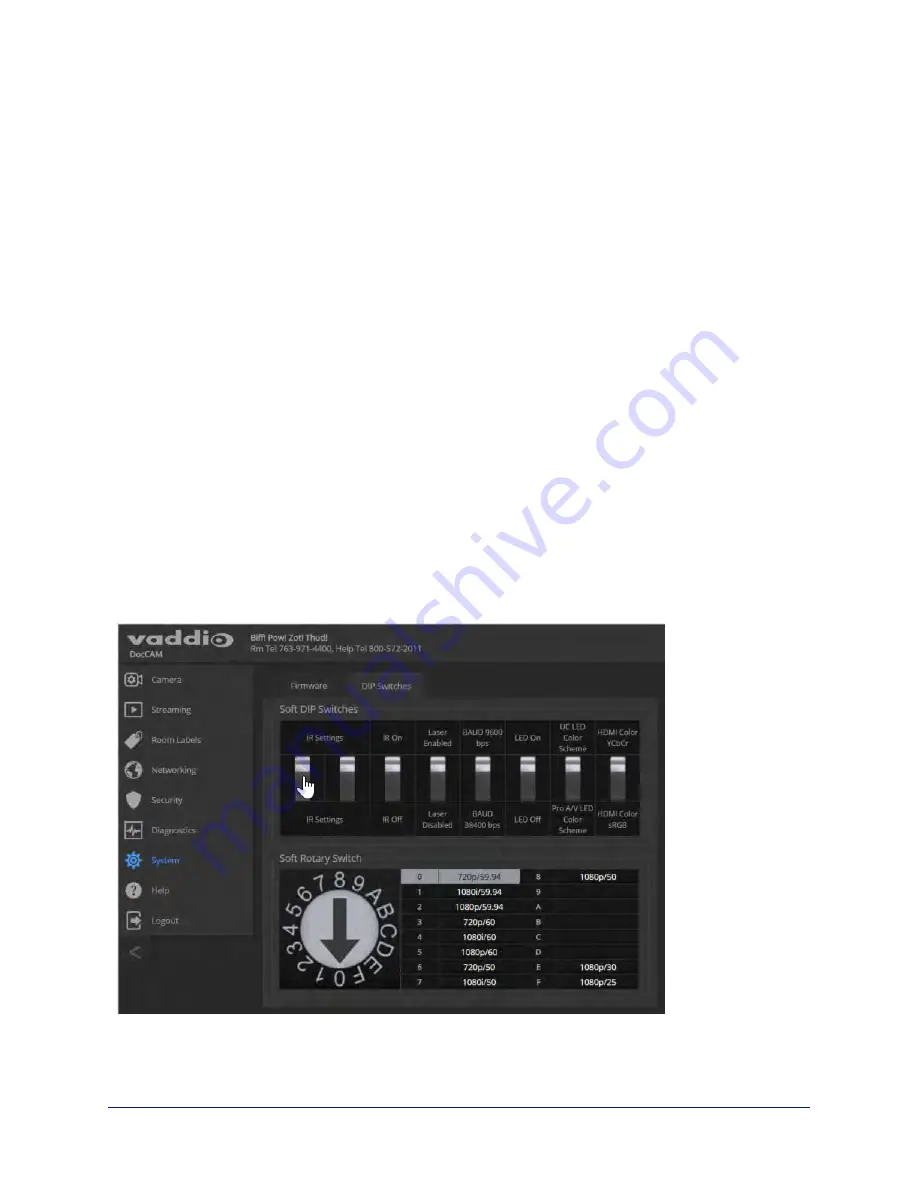
Other Switch Settings
S
YSTEM PAGE
, DIP S
WITCHES TAB
Set the remaining aspects of camera configuration using the soft DIP switches.
To set how the camera responds to the remote:
By default, the camera responds to the remote as camera 1. To change this, set the two leftmost soft DIP
switches (switch 1 and switch 2):
n
Switch 1 and switch 2 up: Camera 1
n
Switch 1 down, switch 2 up: Camera 2
n
Switch 1 and switch 2 down: Camera 3
To enable or disable the laser pointer:
By default, the laser pointer is enabled. To disable it, use the soft DIP switch for Laser Enabled/Laser
Disabled.
To change the baud rate for RS-232 communication:
By default, the camera is set to 9600 baud. To change to 38400 baud, use the soft DIP switch for baud rate.
To enable or disable the indicator light:
By default, the indicator light is on. Use the LED On/LED Off soft DIP switch to change the state of the
indicator light.
To set the LED color scheme:
The LED color scheme is set to UC by default, to follow the standard for conferencing cameras. The
UC/Pro AV soft DIP switch allows you to change it to the pro A/V (broadcast) color scheme; but at this
time, they are functionally identical on this camera.
To set the HDMI color space:
By default, the HDMI color space is YCbCr; use the soft DIP switch for HDMI Color Space if you need to
change it to sRGB.
26
Integrator's Complete Guide to the DocCAM 20 HDBT Ceiling-Mounted Document Camera


