background image


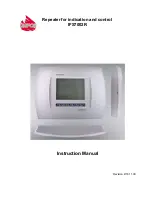
Repeater for indication and control 

IFS7002R


Instruction Manual 


Revision 2/16.11.09 

Summary of Contents for IFS7002R

Page 1: ...Repeater for indication and control IFS7002R Instruction Manual Revision 2 16 11 09...

Page 2: ...he keypad 7 Fire Condition 7 1 Description 7 2 Indication 7 3 Using the keypad 7 4 Example 8 Fault Condition 8 1 Description 8 2 Indication 8 3 Using the keypad 8 4 Example 9 Information and Control M...

Page 3: ...4 Menu New Passwords 10 4 4 1 Menu Level 2 10 4 4 2 Menu Level 3 10 4 4 3 Menu Options 10 4 5 Function Default Parameters 11 Saving the parameters 12 Labor protection requirements 13 Installation and...

Page 4: ...p to 31 Indicating fire condition and or fault condition from each zone or fire detector from the connected to it remote panels Full range of commands available for sending to the remote fire control...

Page 5: ...ion stage II Suppressing the local sounder Displaying text messages from inputs Displaying program data for the repeater Displaying the status of the addressable devices in the loops of the fire contr...

Page 6: ...Fire condition Fault Mode without fatal error Test and Disabled component see item 9 In this condition displays information about the remote panel and connected fire panels and control data are enter...

Page 7: ...ation Button Reset Fire Fire condition Level 2 To exit the Fire condition Button Fire condition stage II Fire condition phase Fire condition stage I Levels 1 and 2 To force transition to phase Fire co...

Page 8: ...Control Mode Levels 1 and 2 To exit a function without saving changes in the parameter the command will not be executed To exit the current menu and to move to an upper hierarchy menu SetUp Mode Level...

Page 9: ...r will be deleted SetUp Mode Level 3 Buttons with digits characters and symbols Information and Control Mode Levels 1 and 2 To insert a symbol to the left of the cursor SetUp Mode Level 3 5 4 Menu nav...

Page 10: ...by pressing button If no number under the cursor button delete number in front the cursor 11 Insert digit omitted The cursor moves to the position where you will insert digit with buttons and Enter f...

Page 11: ...e Rep Remove Panel 7 Fire condition 7 1 Description The repeater enters Fire condition after a fire detector has been activated in one of zones of the Fire control panel panels connected with it The r...

Page 12: ...l number of devices in fire condition pos 8 fig 2 The panel itself is subdivided into three text fields each providing two lines The upper two line field displays information on the first device that...

Page 13: ...umber of the device in Fire alarm Fire alarm loop The device address in the loop Zone number Text message for the respective device Faults total 00000 0000 Outputs in fault 00000 Disables total 000 Di...

Page 14: ...transition from Fire condition stage I to Fire condition stage II If the panel is in Information and Control Mode and meanwhile there is a fire event the button will display the information for the f...

Page 15: ...ct Building 2 Point 2 001 4 Loop 01 Zone 002 Addr 002 Object Building 4 Point 1 002 Faults total 00000 0000 Outputs in fault 00000 Disables total 000 Disables outputs 000 Suppressed message for a fire...

Page 16: ...istered Fault in remote panel Fatal system error Fault in a processor programme Fault in the communication with the fire control panel Fault in the real time clock Fault in the external memory In conn...

Page 17: ...hort circuited ground wire Fault in the loops supply Fault in external devices supply Low power supply low backup battery during fault in the mains supply Fault condition is indicated by LEDs indicato...

Page 18: ...see section 9 2 1 8 3 Using the keypad None of the buttons is active upon fatal fault condition For all other fault conditions 2 buttons are being supported Button Access Level Action Description Stop...

Page 19: ...el s Disables total no Failed outputs no Disabled outputs no Active buttons Stop Alarm and Menu Suppression of local sounder on the repeater button Stop Alarm single pressing Local sounder in Building...

Page 20: ...ault condition with the exception of the screen for fatal error Test Mode and Disabled component The screens visualized on the display are organized in a tree structure containing subordinate menus Ap...

Page 21: ...d go to higher level menu Level 3 Change Levels 1 and 2 To change an element to its next permissible Level 3 Move Down Levels 1 and 2 Next elements if any are available from the left window Level 3 Mo...

Page 22: ...etUp Access Level 3 This instruction manual describes the menus related to the control and setup of the repeater When choosing a fire control panel to be setup the menus and functions comply with the...

Page 23: ...4 1 1 Repeater configuration 9 4 1 2 Network 9 4 1 3 1 Repeater parameters 9 4 1 3 Choice Rep Rem panel 9 4 1 4 CAN local parameters 9 4 1 3 2 1 CAN object 9 4 1 3 2 2 Local Network 9 4 1 3 2 Total LA...

Page 24: ...zed if the fault condition is in an addressable fire detector Text message for the device visualized if the fault condition is in an addressable device Buttons and situated in the right panel section...

Page 25: ...the right part of the heading line for example v16 11 09 9 4 1 3 Menu Repeater parameters Use the menu if the repeater is connected to PC or to view the parameters of the established CAN network The...

Page 26: ...ork with fire control panels and other repeaters Menu Local Network contains the following subordinate menus 9 4 1 3 2 1 Menu CAN Local Parameters displays information about CAN setups of the repeater...

Page 27: ...left bottom part of the display shows note message Data no saved The changes which were made will be accepted via pressing of button after that the message Data no saved is cleared 9 4 2 Menu System F...

Page 28: ...Input the first symbol exp 2 from date 21 08 11 Press the button and cursor moves one position right exp 21 08 11 Input the second symbol exp 1 from date 21 and etc until entering correct date If you...

Page 29: ...function to display the following screen Active buttons are Button Enter Button Cancel Button Exit Using the keypad Start check button Enter The repeater s LEDs illuminate The local sounder produces...

Page 30: ...on If no number under the cursor button delete number in front the cursor Insert digit omitted The cursor move to the position where will be insurted the missing digit with buttons Left and Right Inse...

Page 31: ...figuration 10 4 1 New passwords 10 4 4 Default parameters 10 4 5 CAN local parameters 10 4 2 2 2 CAN objects 10 4 2 2 3 Add new CAN object 10 4 2 2 3 1 Del CAN object 10 4 2 2 3 2 List Change CAN obje...

Page 32: ...meter changing is started follow buttons are active Marker shows the current parameter the parameter for correction The pointer may be visualized as A cursor indicating the position where a symbol wil...

Page 33: ...ton means that the figure 1 is in combination with punctuation marks 1 s after the last pressing the cursor moves to the next position to the right If you press another button during this 1 second the...

Page 34: ...thout making any changes Use the additional digit keypad to Insert digits when the LED Num is illuminated Move the cursor via buttons 4 and 6 analogically to buttons and when the LED Num is extinguish...

Page 35: ...button each time you press it the parameter value changes to the next acceptable value Setup parameters in this screen are Parameter Value Description Local network On Off Local Network parameter has...

Page 36: ...ons 10 4 3 2 Level 2 10 4 4 1 Level 3 10 4 4 2 Options 10 4 4 3 The parameter selected to be edited is displayed in inversive colours Edit the parameters with button If buttons with digits are availab...

Page 37: ...e Menu CAN Local parameters Menu CAN Objects 10 4 2 2 1 Menu CAN Name SetUp 10 Local Network 10 4 2 2 CAN local object name 10 4 2 2 1 Network 10 4 2 1 Repeater parameters 10 4 2 Checks 10 4 3 Repeate...

Page 38: ...3 1 Del CAN object 10 4 2 2 3 2 List Change CAN object 10 4 2 2 3 3 Display 10 4 3 1 Buttons 10 4 3 2 Level 2 10 4 4 1 Level 3 10 4 4 2 Options 10 4 4 3 The screen serves for entry of CAN parameters a...

Page 39: ...panels After this number is reached the respective fire control panel is regarded as suspended temporarily from CAN network and a signal is released for a Fault condition of the type Connection failur...

Page 40: ...y the devices connected in the network The other obligatory parameter is the address It is the factual parameter used by the software for data exchange in the network Each device should be assigned a...

Page 41: ...nge CAN object 10 4 2 2 3 3 Display 10 4 3 1 Buttons 10 4 3 2 Level 2 10 4 4 1 Level 3 10 4 4 2 Options 10 4 4 3 Enter the name of the added CAN object in submenu Name CAN Object Example Building 1 Up...

Page 42: ...on points the way of connection If the connection is direct the objects are connected to the same CAN in the field address of the repeater The default value is 0 In the case of connection that connect...

Page 43: ...ulst Info Yes Send Faults Commands Yes Send Faults Info Yes Receive Fire Commands Yes Mode DAY REP ActInp 0000 16 37 37 Wed 24 Aug 2011 Communication Options Object Lists Archive CAN local object name...

Page 44: ...CAN local name object Building 1 Receive SetUp Requests Yes Send SetUp Requests Yes Receive Init Requests Yes Send Init Requests Yes Receive Sys Disables Requests Yes Send Sys Disables Requests Yes R...

Page 45: ...2 CAN local object name 10 4 2 2 1 Network 10 4 2 1 Repeater parameters 10 4 2 Checks 10 4 3 Repeater configuration 10 4 1 New passwords 10 4 4 Default parameters 10 4 5 CAN local parameters 10 4 2 2...

Page 46: ...marked object with button After pressing it the marked object is automatically deleted Example In the local network to the remote panel Security are connected 3 objects Building 1 CAN address 2 Buildi...

Page 47: ...4 2 2 2 CAN objects 10 4 2 2 3 Add new CAN object 10 4 2 2 3 1 Del CAN object 10 4 2 2 3 2 Review Change CAN object 10 4 2 2 3 3 Display 10 4 3 1 Buttons 10 4 3 2 Level 2 10 4 4 1 Level 3 10 4 4 2 Opt...

Page 48: ...AN local parameters 10 4 2 2 2 CAN objects 10 4 2 2 3 Add new CAN object 10 4 2 2 3 1 Del CAN object 10 4 2 2 3 2 Review Change CAN object 10 4 2 2 3 3 Display 10 4 3 1 Buttons 10 4 3 2 Level 2 10 4 4...

Page 49: ...Change CAN object 10 4 2 2 3 3 Display 10 4 3 1 Buttons 10 4 3 2 Level 2 10 4 4 1 Level 3 10 4 4 2 Options 10 4 4 3 Enter the menu to display When a random button is pressed except for buttons and a...

Page 50: ...e the following If the check performed at the third point and the fourth point is checked and if it is successful the function is exited automatically In case the performed check at point three is uns...

Page 51: ...r Access Level 2 Enter the menu and a screen where you can edit the first password for Access Level 2 appears To enter or edit a password use the digit buttons when you press a button the digit is ins...

Page 52: ...is displayed when the repeater is in Fire condition and served to suppress enable outputs in the connected Fire control panel Addressable outputs activated by the inputs can not be suppressed To use t...

Page 53: ...asswords 10 4 4 Default parameters 10 4 5 CAN local parameters 10 4 2 2 2 CAN objects 10 4 2 2 3 Add new CAN object 10 4 2 2 3 1 Del CAN object 10 4 2 2 3 2 Review Change CAN object 10 4 2 2 3 3 Displ...

Page 54: ...are set to Access Level 2 passwords Password 1 1111 Password 2 2222 Password 3 3333 Password 4 4444 Password 5 5555 Password 6 6666 Password 7 7777 Password 8 8888 Password 9 9999 Password 10 1010 Acc...

Page 55: ...onger it is recommended the connecting wire to be screened 13 3 Power supply connection Connect the feeding cables to terminal POWER Appendix 3 observing the polarity feeding 24V DC feeding cable 24V...

Page 56: ...The repeater shall be transported by vehicles in factory packing in the above stated environmental conditions and at sinusoidal vibrations with acceleration amplitude not more than 4 9m s2 in frequen...

Page 57: ...1 2 3 4 5 6 7 8 1 2 3 4 5 6 7 8 1 Common indicator for fire condition 2 Common indicator for fault condition 3 Indicator for System error 4 Indicator for Fault in power supply 5 Indicator for Disabled...

Page 58: ...d level 2 Disables Test zones Clock Mode Check of LEDs and buzzer Zones Devices Outputs Loop1 Loop2 Loop parameteres Device parameters Loop parameters Device parameters Zone choice Device Zone paramet...

Page 59: ...utputs List addressable outputs Panel outputs Devices list Zone set free Delete address Delete address range Add new address Add new address range To part 2 Text message Check Manual addressation Chec...

Page 60: ...ecks Initialization Inputs From part 1 Initialization Clean initialization Turn off the devices Readdressation Check Relay outputs Addressable outputs Controllable outputs Display Buttons Level 2 Leve...

Page 61: ...UniPOS Repeater IFS7002R Instruction Manual Page 61 Revision 2 16 11 09 Of 62 Appendix 3 RS232 Keyboard CAN Power _ L H GND CAN BUS termination RESET...

Page 62: ...Setup Repeater parameters Local network CAN local object name Security 2 2 2 Configuration panel parameters in menu Setup Repeater parameters Local network CAN local parameters Address of the repeate...

Reviews: