2-9
Preparation before Use
2
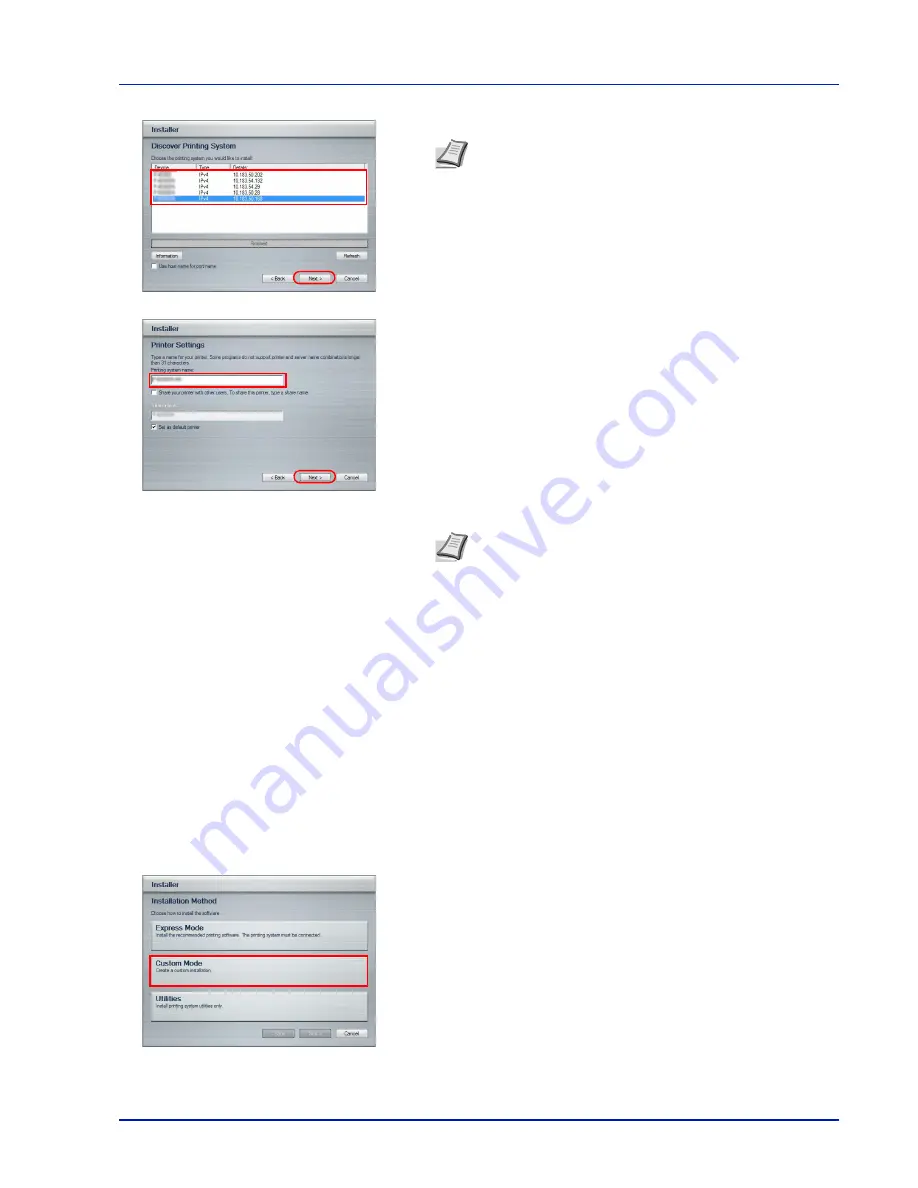
Select the print system to be installed and click
Next
.
3
You can customize the print system name in the installation settings
window. This will be the name displayed in the Printer window and in
the printer lists displayed in applications. Specify whether to share the
print system name or set the print system as an existing printer and
then click
Next
.
4
A window appears in which you can check the settings. Check the
settings carefully and then click
Install
.
5
A message appears saying that the printer has been installed
successfully. Click
Finish
to exit the printer installation wizard and
return the
Product Library
disc main menu.
If the device setup dialog box appears after you click
Finish
, you can
specify the settings for items such as optional features installed in the
print system. You can also specify the device settings after you exit
the installation. For details, refer to the
Printing System Driver User
Guide
on the
Product Library
disc.
This completes the printer driver installation procedure. Follow the
on-screen instructions to restart the system, if required.
Custom Mode
Use Custom Mode if you want to specify the printer port and select the software to be installed.
For example, if you do not want fonts installed on your computer to be replaced, select
Custom Mode
and deselect the
Fonts
checkbox in the utility tab.
1
Select
Custom Mode
.
2
Following the instructions in the install wizard window, select the
software packages to be installed and specify the port, etc.
For details, refer to the
Printing System Driver User Guide
on the
Product Library
disc.
Note
If the Found New Hardware Wizard appears, click
Cancel
. If a hardware installation warning message appears,
click
Continue
.
IMPORTANT
Step 3 only appears if the print system is
connected via a network. It does not appear if the print system is
connected via a USB.
Network connection is only on network compatible models.
Note
If the Windows security window appears, click
Install
this driver software anyway
.
Summary of Contents for P-4030D
Page 22: ...Machine Parts 1 6 ...
Page 60: ...Printing 3 8 ...
Page 71: ...4 11 Operation Panel Menu Map Sample Menu Map Printer Firmware version ...
Page 163: ...4 103 Operation Panel 5 Press or to select whether Thin Print is enabled ...
Page 194: ...Operation Panel 4 134 ...
Page 232: ...Document Box 5 38 ...
Page 238: ...Status Menu 6 6 ...
Page 272: ...Troubleshooting 8 24 ...
Page 311: ......


