


MAINTENANCE MANUAL
40
STE 85357
5)
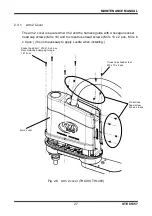
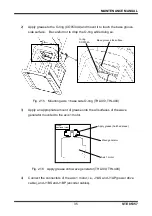
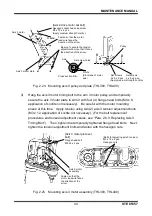
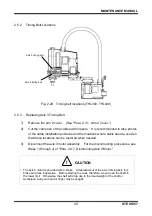
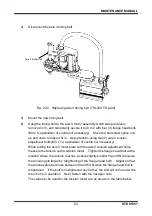
Secure the axis 2 motor with four (4) hexagon socket head cap screws (M4 x
12) and washers.
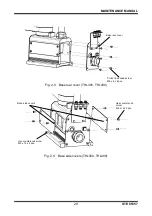
Fig. 2.20 Mounting axis 2 motor assembly (THL300, THL400)
!
CAUTION
• Do not forget to mount the O-ring.
If the O-ring is not mounted, grease will leak from the motor mounted surface.
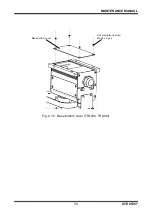
6)
Secure the harness guide and the support plate with one (1) hex countersunk
screw (M3 x 8, application of Loctite not necessary) and two (2) Cross
countersunk screw (M3 x 6).
7) After changing the axis 2 motor, move Arm 2 by hand and check that there is no
abnormal sound.
[Axis 2 drive motor set bolt]
Hexagon socket head cap screw
M4 x 12 x 4 pcs.
(Apply medium strength Loctite.)
Axis 2 Motor Cross Section Diagram
Install the O-ring as
shown in the figure.
Axis 2 motor assembly
Washer
Fasten so that the motor lead
wire faces the direction of the
arrow.
O-ring
CO0538A
Flange rabbet