Onscreen Display (OSD) Setup
The OSD setup feature allows the user to customize the on screen displays and the
STATUS
display.
Pressing
SETUP
,
INP
then
OSD
(button #
5
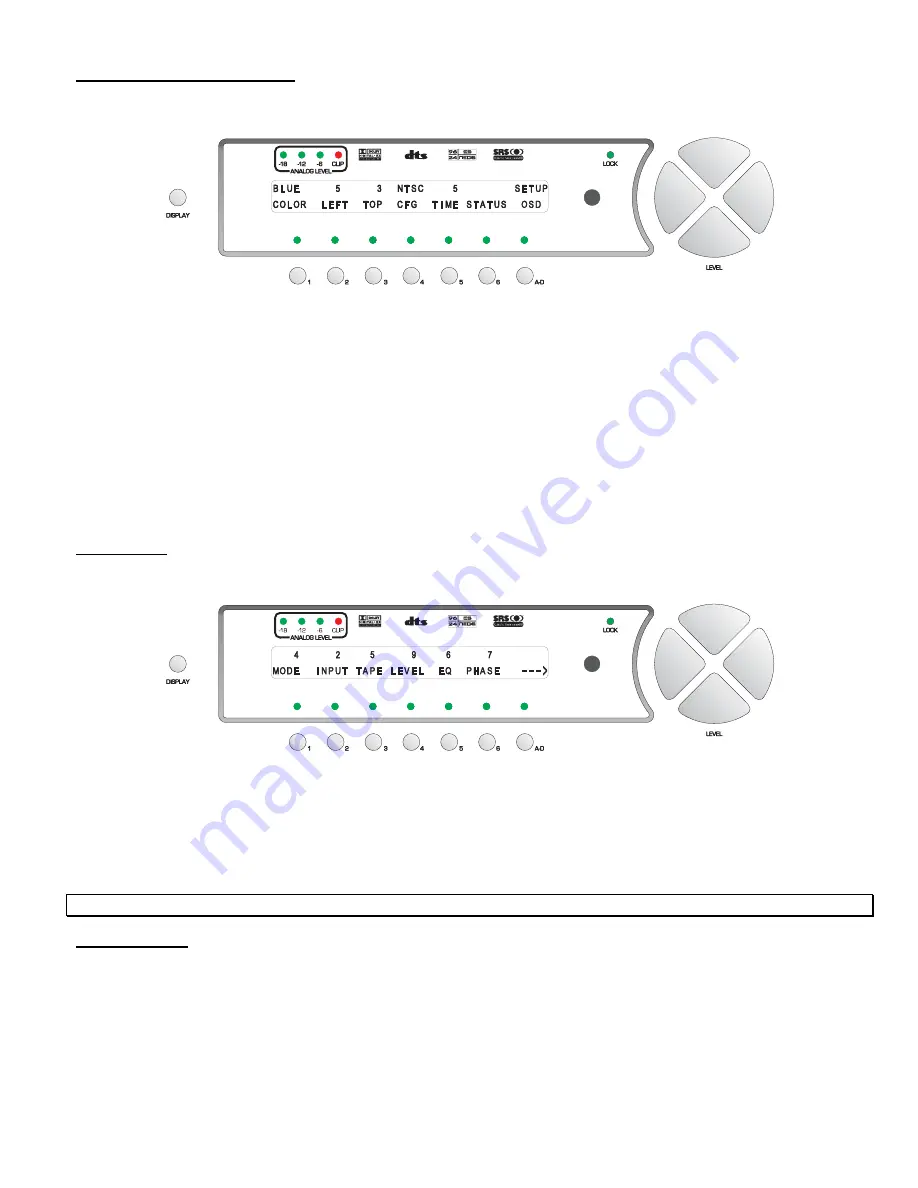
in figure 22) activates the OSD set up menu, shown in figure 39.
Figure 39 - Front Panel Display of the SETUP
/
INP
/
OSD Sub Menu
Button #
1
(
COLOR
) allows the user to select up to 7 different OSD background colors.
The entire OSD can be offset from the left and top edges of the screen (button #s
2
and
3
respectively) to
accommodate differences in monitors.
The configuration (
CFG
) feature can switch the Casablanca III’s OSD to accommodate either an
NTSC
or
PAL
monitor.
When a function button is pressed, its OSD will remain on the screen until the user is no longer in any function menu.
The display
TIME
(in seconds) setting allows the user to set the amount of time (delay) that the video monitor displays
the
INPUT SELECT
menu, when changing inputs. If the VFD is turned off (in the
SETUP
/
INP
Page 1
sub menu
(button #
6
in figure 22 – page 48) and any button is pressed, the VFD will revert to full brightness for the amount of
seconds in the
TIME
parameter. Setting the
TIME
value to
0
turns off the OSD for the currently selected input.
Status Setup
STATUS
(button #
6
) displays a 2 page sub menu, which allows the user to change the position of the Status screen
text on the video monitor only. This sub menu is shown in figure 40.
Figure 40 - Front Panel Display of the SETUP
/
INP
/
OSD
/
STATUS 1 Sub Menu
The items in the two
STATUS
sub menus are the only ones displayed in the OSD when the
STATUS
button on the
hand held remote is pressed. Changing any value to
0
will disable that item from being displayed in the OSD. The
value range is
0
through
10
. A value of
1
will display at the highest position vertically and
10
at the lowest.
Press the
A-D
button to go to the second
STATUS
setup page and change the OSD positions of
SOURCE
and
SRATE
(sample rate).
Note
: It is possible to have conflicting results if more than one item is displayed on the same line.
VFD Brightness
Each
INPUT SELECT
button can have a different VFD brightness assigned to it. Pressing button #
6
in figure 22
(page 48) allows the user to change the default brightness from
OFF
to
FULL
(brightest) in four steps. Any changes
made to this parameter are reflected the next time that
INPUT SELECT
button is pressed. If this value is set to
OFF
,
and the VFD is off, pressing any button except
DISPLAY
will automatically brighten the VFD to the maximum level. If
the button pressed is not another
INPUT SELECT
or function button, then the VFD will revert back to its default
brightness in
X
seconds.
X
represents the
TIME
parameter value in the
SETUP
/
INP Page 1
/
OSD
sub menu. If the
VFD is on but not set to
FULL
, pressing any button other than another
INPUT SELECT
button will allow the VFD to
remain at its default brightness, with the exception of pressing the
DISPLAY
button which will always override the
default VFD brightness setting. The VFD override takes precedent.
59
Summary of Contents for Casablanca III
Page 23: ...13 Setup Menus and Pages Figure 14 Setup Menus and Pages ...
Page 25: ...15 STEP BY STEP SETUP GUIDE ...
Page 34: ...24 Setup Flowcharts A P Flowchart A Setup Subwoofer s ...
Page 35: ...Flowchart B Front Left Right Configuration 25 ...
Page 36: ...Flowchart C Front Center Configuration 26 ...
Page 37: ...Flowchart D Left Right Surround Configuration 27 ...
Page 38: ...Flowchart E Surround Center Configuration 28 ...
Page 39: ...Flowchart F Sides Configuration 29 ...
Page 40: ...Flowchart G Setup Speaker Levels 30 ...
Page 41: ...Flowchart H Setup Speaker Delays 31 ...
Page 42: ...Flowchart I Setup Dolby Digital 32 ...
Page 43: ...Flowchart J Setup DTS 33 ...
Page 44: ...Flowchart K Setup Circle Surround 34 ...
Page 45: ...Flowchart L Copy Input Speaker Parameters 35 ...
Page 46: ...Flowchart M Setup Default Mode 36 ...
Page 47: ...Flowchart N Setup Post Process 37 ...
Page 48: ...Flowchart O Map Input Jacks 38 ...
Page 49: ...Flowchart P Setup Analog Input Levels 39 ...
Page 88: ...REMOTE CONTROL 78 ...
Page 114: ...APPENDIXES 104 ...


