Snappi System User Manual
Document No: 053-05 v29
Page 54 of 75
December 2015
Snappi System User Manual.doc
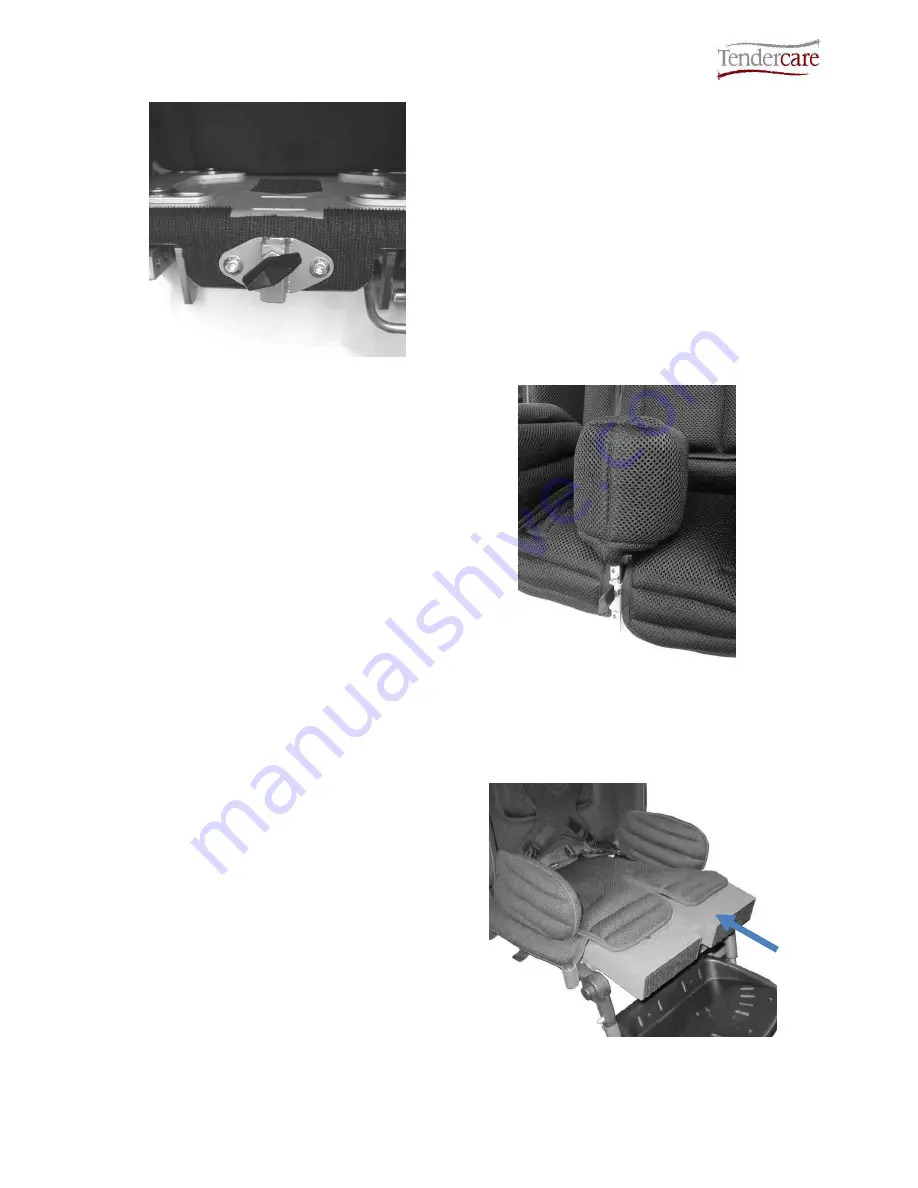
Fig 6.9.2
To fit the pommel to the seat:
If the Snappi was supplied with a pommel at
the time of purchase the mounting bracket will
already be fitted. If not, you will need to attach
the mounting bracket into the two holes on the
front of the seat.(See Fig 6.9.2)
To do this, position the mounting bracket on
the front of the seat and put the M6 x 16
socket buttons (screws) through the 2 holes in
the mounting bracket and through the 2 holes
in the seat. Put a washer and a dome nut on
the end of each socket button and tighten.
Slide the vertical stem of the pommel into
the slot, with the body of the pommel
sitting over the seat.
Screw the wing nut into the centre hole of
the mounting bracket and tighten to
secure the pommel.
Adjust the height of the pommel as
required to clear any seat pads and the
cover.
To change the height, loosen the wing
nut, adjust to the required position, and
then retighten.
Fig 6.9.3
IMPORTANT: The pommel must not to be used to prevent the occupant sliding
forward.
6.10: Ramped Seat Pad:
The ramped seat pad is supplied to fit the
maximum seat depth and width. Depending
on the occupants specific requirements the
seat settings will likely be set differently to
this.
If the seat is set narrower or shallower than
the pad, simply cut the pad down to the
required size using a sharp Stanley knife or
hack saw blade. Please note when reducing
the width, cut equal amounts from both
sides of the pad so the pommel cut out
remains central.
Fig 6.10.1


