High-capacity Input Feeder (HCIF)
120
13
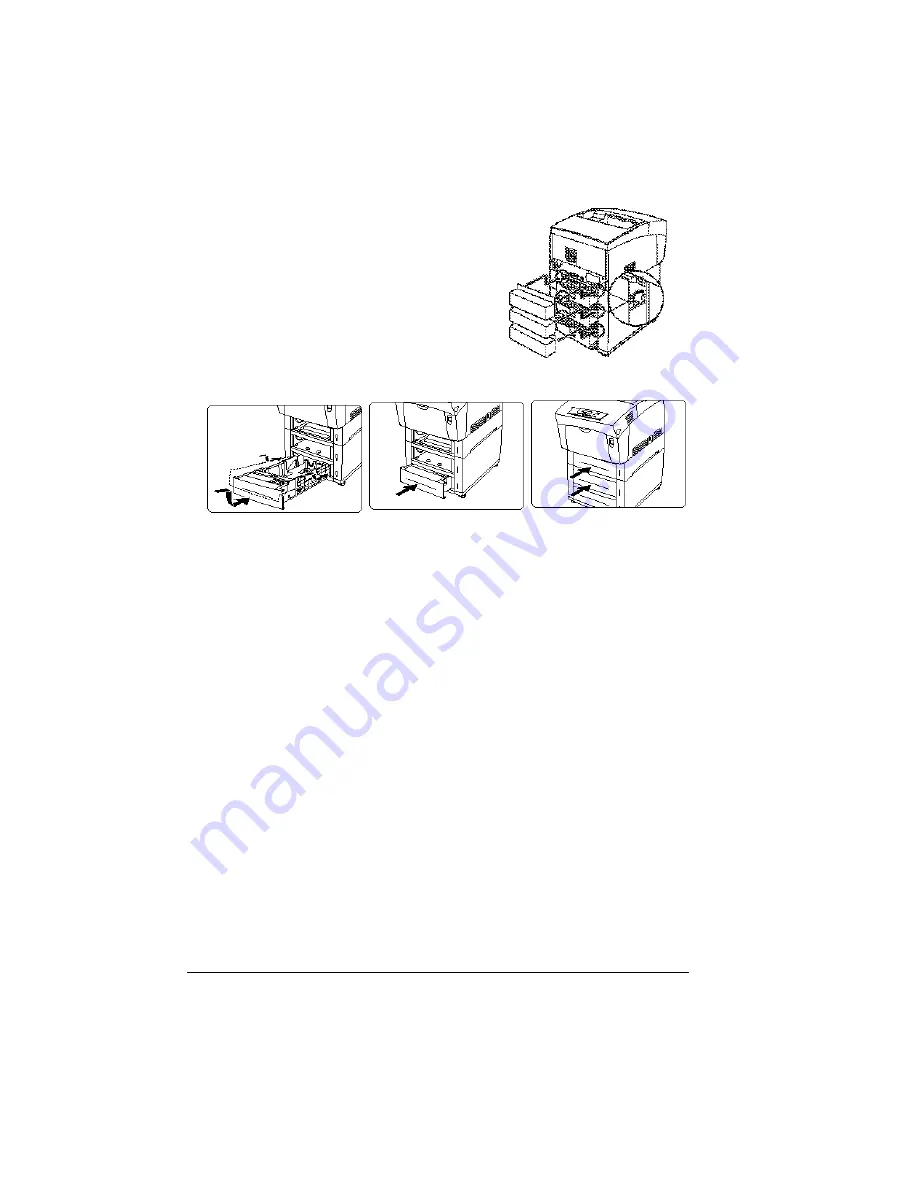
Install all three media tray covers (see inset for location.
14
Install the media trays.
If you need to move the printer with the HCIF attached, unlock the casters
and then move the unit.
15
Plug the printer in and turn it on.
2?
In compliance with UL guidelines, “The appliance inlet is consid-
ered to be the main disconnect device.”
16
Readjust the printer’s color side-to-side registration, if necessary.
Media Trays
The printer comes with a a 100-sheet multipurpose tray (tray 1) and a
500-sheet media tray (the standard upper tray—tray 2). The optional
high-capacity input feeder has two 500-sheet media trays (trays 5 and 6).
Additional trays may be purchased. These trays provide three main benefits:
n
Expanded flexibility to switch media size, color, and type without having to
unload and load media.
n
Increased media-feed capacity.
Keep replacement trays close by, so you can easily change media by slipping
one tray out and another in.
Summary of Contents for Xpress T8016
Page 1: ...User Guide Xpress T8016 Color Laser Printer TALLY May 2004 ...
Page 6: ...Contents iv ...
Page 7: ...1 Printer Overview ...
Page 13: ...2 Replacing Consumables ...
Page 33: ...3 Using Media ...
Page 62: ...Duplexing 56 ...
Page 63: ...4 Maintaining the Printer ...
Page 70: ...Cleaning 64 7 Close the cover 8 Turn on the printer ...
Page 71: ...5 Troubleshooting ...
Page 114: ...Additional Assistance 108 ...
Page 115: ...6 Installing Other Accessories ...
Page 128: ...Tray Cover 122 4 Attach the tray cover back onto the upper media tray ...
Page 129: ...7 Color Printing ...
Page 132: ...Color Registration 126 ...
Page 133: ...8 Storage Deinstallation Shipping and Packing ...
Page 146: ...Packing the Printer 140 ...
Page 147: ...A Technical Specifications ...
Page 174: ...Index 168 ...


