Replacing the Fuser Unit
15
3
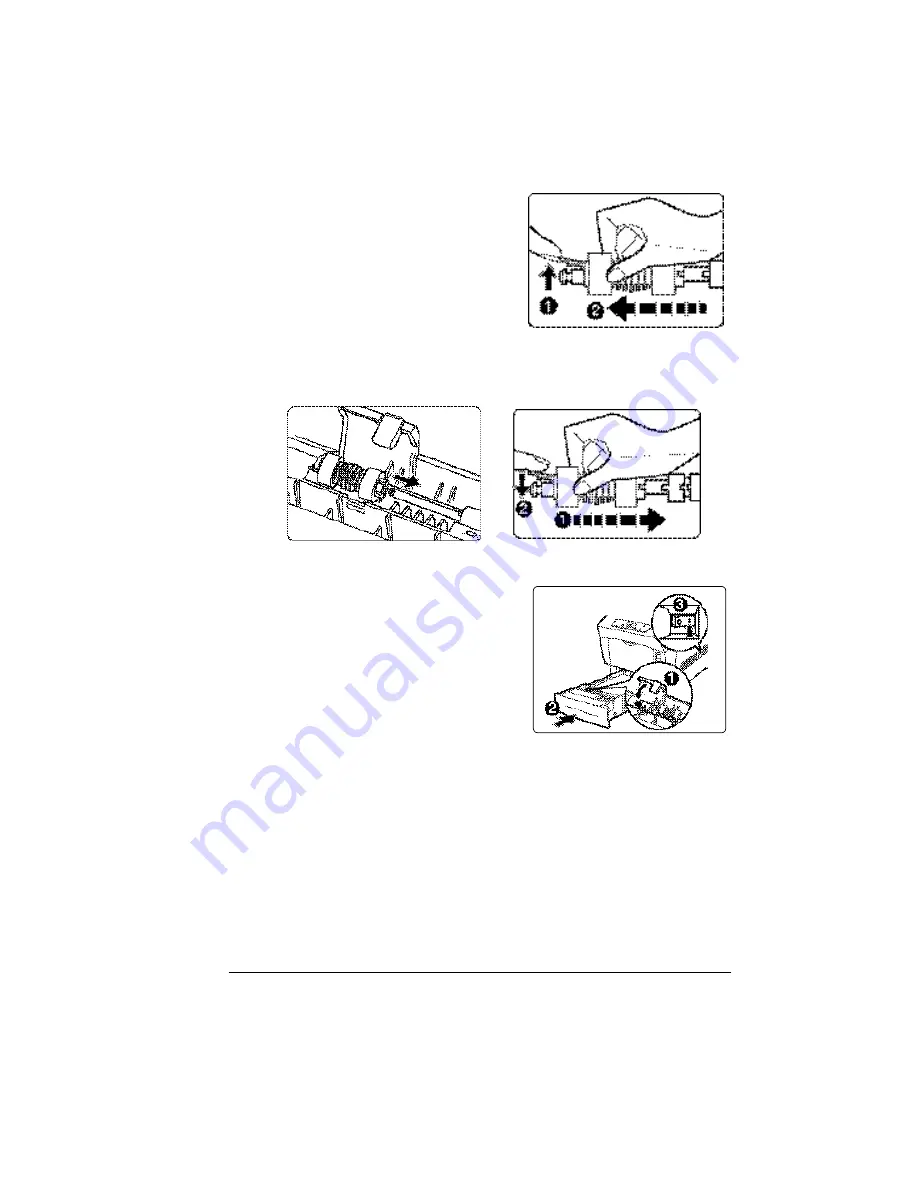
Lift the clip at the end of the media
feed rollers
•
, and remove the
media feed rollers
‚
.
4
Align the new media feed rollers’ axis with the shaft in the media tray as
illustrated and slide the shaft through the roller until the clip locks into the
groove at the end of the shaft.
5
Close the media feed rollers cover
•
.
6
Hold the media tray with both hands,
align it with the opening in the printer
and gently insert it.
7
Push the media tray completely back
into the printer.
‚
8
If you have a high-capacity input
feeder (HCIF), repeat steps 1–8 for
each media tray.
9
Turn the printer on.
ƒ
10
For both the fuser and the media feed rollers, in the Operator Control/
Consumables/Item Replaced/Fuser menu, choose
Yes
to reset the
consumables usage monitoring system.
2?
You must manually reset the consumables usage monitoring
system to ensure accurate consumables monitoring.
Summary of Contents for Xpress T8016
Page 1: ...User Guide Xpress T8016 Color Laser Printer TALLY May 2004 ...
Page 6: ...Contents iv ...
Page 7: ...1 Printer Overview ...
Page 13: ...2 Replacing Consumables ...
Page 33: ...3 Using Media ...
Page 62: ...Duplexing 56 ...
Page 63: ...4 Maintaining the Printer ...
Page 70: ...Cleaning 64 7 Close the cover 8 Turn on the printer ...
Page 71: ...5 Troubleshooting ...
Page 114: ...Additional Assistance 108 ...
Page 115: ...6 Installing Other Accessories ...
Page 128: ...Tray Cover 122 4 Attach the tray cover back onto the upper media tray ...
Page 129: ...7 Color Printing ...
Page 132: ...Color Registration 126 ...
Page 133: ...8 Storage Deinstallation Shipping and Packing ...
Page 146: ...Packing the Printer 140 ...
Page 147: ...A Technical Specifications ...
Page 174: ...Index 168 ...


