Standalone DVR – Jupiter Series
14
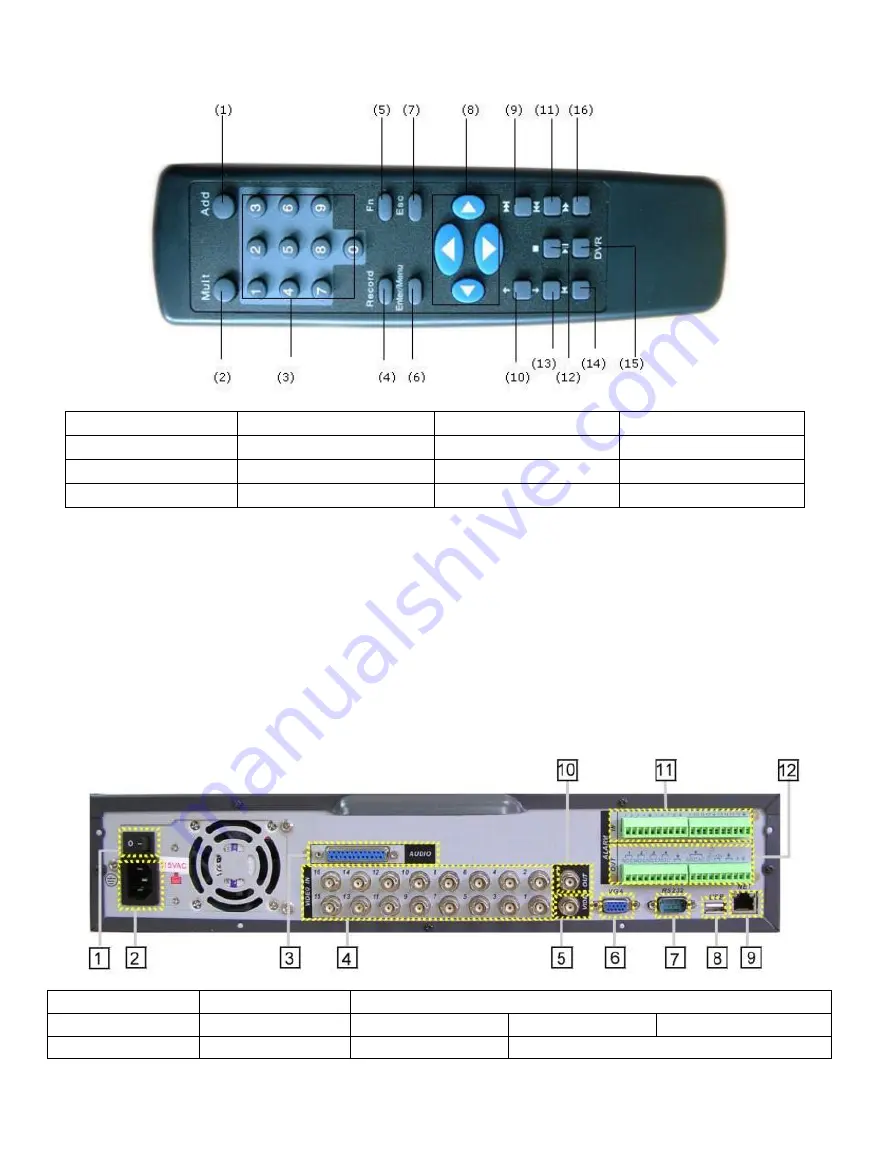
2.3 Remote controller Introduction
1. Remote Address
2. Multi-window Shifting
3. Number Keys
4. Record Mode Setup
5. Function Key
6. Confirm/Menu Key
7. Cancel Key
8. Direction Keys
9. Jump Forward
10. Play Previous Section
11. Rewind
12. Stop
13. Play Next Section
14. Slow Play
15. Play / Pause
16. Fast Forward
2.4 Using a USB mouse
2.4.1 Connect a USB mouse to the USB port at either the front or real panel.
2.4.2 Functioning the USB mouse (take the right hander for example):
Click the left key on the mouse and a dialog box pop up for inputting password.
Default “888888”
Click ENTER to enter the GUI OSD menu
Double-click the left key to save the settings and exit the menu
Click the right key to cancel the setting and exit the menu
2.5 Rear Panel
1. Power Switch
2. Power Plug
3. Audio Input and Output, Video Loop-out and Matrix (optional).
4. Video Input
5. Video Output-2
6. VGA Output
7. RS-232 Port
8. Rear USB Port
9. RJ-45 Port
10. Video Output-1 11. Alarm Input
12. Alarm Output and RS-485 Jack
Summary of Contents for Jupiter 30450711S
Page 15: ...Standalone DVR Jupiter Series 15 2 6 Application Diagram...
Page 29: ...Standalone DVR Jupiter Series 29 Figure 4 16 Figure 4 17 Figure 4 18...
Page 33: ...Standalone DVR Jupiter Series 33 Figure 4 21 Figure 4 22 Figure 4 23 Figure 4 24...
Page 87: ...Standalone DVR Jupiter Series 87 Figure 6 39 Figure 6 40 Figure 6 41 Figure 6 42...


