Wise Package Studio Reference
165
Test Expert
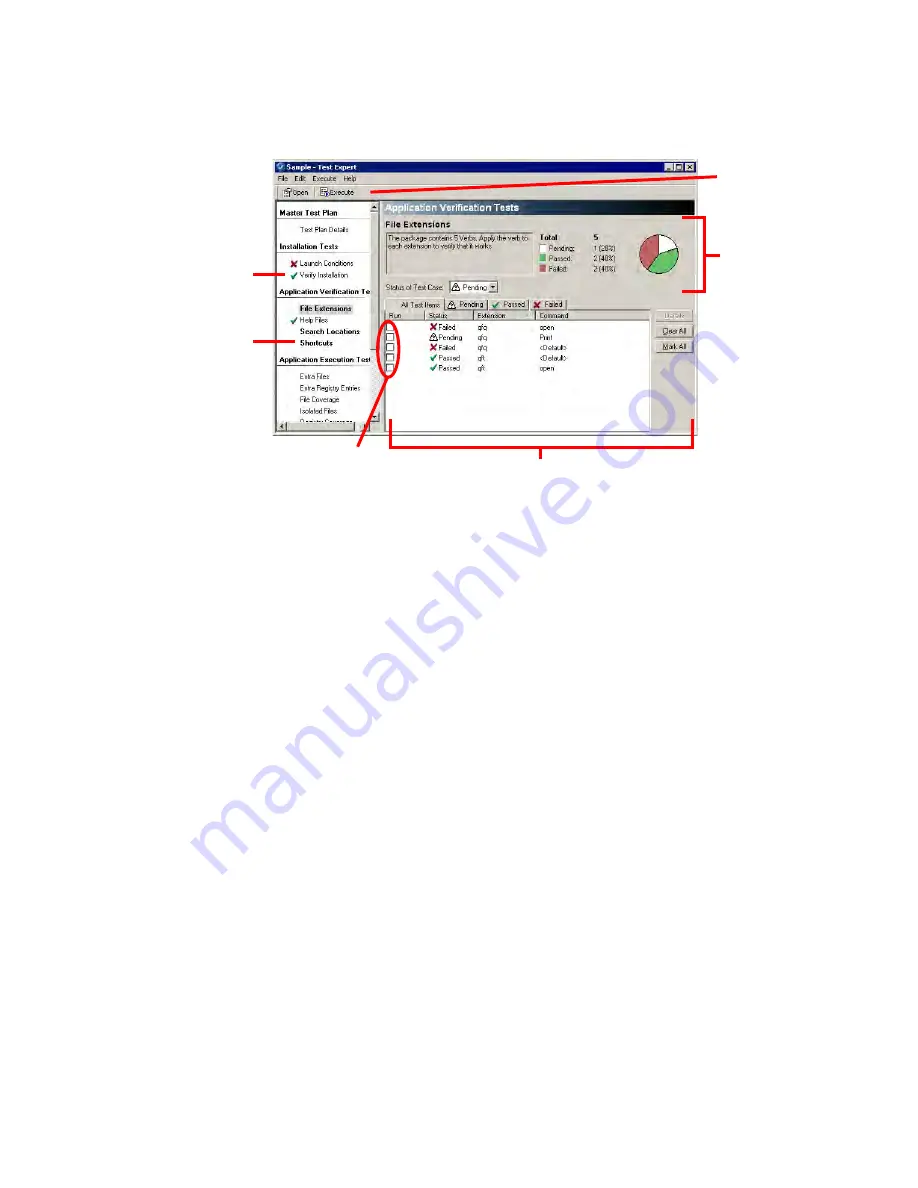
Test case view in Test Expert
Running a Test Case
¾
Quality Assurance module only.
This procedure contains general guidelines for running generated test cases. Each type
of test case is more fully explained in its own topic. Running a test case if you have a
group open is slightly different.
See
About Testing Groups of Packages
.
To run a test case
1. Prepare the testing computer. Depending on what you are testing, this might
include:
Installing the application.
Uninstalling the application.
Setting display or other options to match or fail launch conditions.
2. Select a test case.
3. If a Run column with check boxes appears in the lower-right pane, mark the test
items to run. All check boxes are marked by default.
4. To start the test, click one of the buttons at the top of the window: Install, Uninstall,
Execute, or Run. Not all buttons appear for all tests; only relevant buttons appear.
For a description of each test case, see
Test Case Reference
on page 172.
5. After test execution, set the status of test items to Pass or Fail. Some tests set this
automatically. Then set the overall status of the test case to Pass or Fail.
See
Setting Test Statuses and Details
on page 166.
Bold test names indicate the
test has not been run or had
its status changed.
List of Test Items contains all the individual test items
that make up the selected test case. Double-click a test
item to see its details.
Statistics area
summarizes the
test items for the
currently displayed
test case.
Buttons. Use the
buttons that
appear here to
start tests.
Test Case. When you select
a test case, its test items
appear in the lower-right
pane.
Run check boxes. For application
verification tests, mark these check boxes to
specify which tests to run and click Execute.


