


Chapter 4 — Managing Network Attached Storage
Managing Storage Pools
September 2017
User Guide
—
Spectra Verde Array
70
M
ANAGING
S
TORAGE
P
OOLS
After
creating
one
or
more
storage
pools,
use
the
instructions
in
this
section
to
expand
or
delete
a
pool.
Expand a Storage Pool
You
can
resize
an
existing
storage
pool
to
include
more
physical
drives
present
in
the
array.
This
is
useful
if
you
just
purchased
and
installed
additional
drives.
Use
the
following
steps
to
expand
a
storage
pool.
1.
From
the
menu
bar,
select
Configuration > NAS > Pools
,
or
click
the
Pools
pane
on
the
Dashboard.
The
NAS
Pools
screen
displays
(see
2.
From
the
list
of
existing
storage
pools,
select
the
storage
pool
you
want
to
expand,
and
then
select
Action > Expand
.
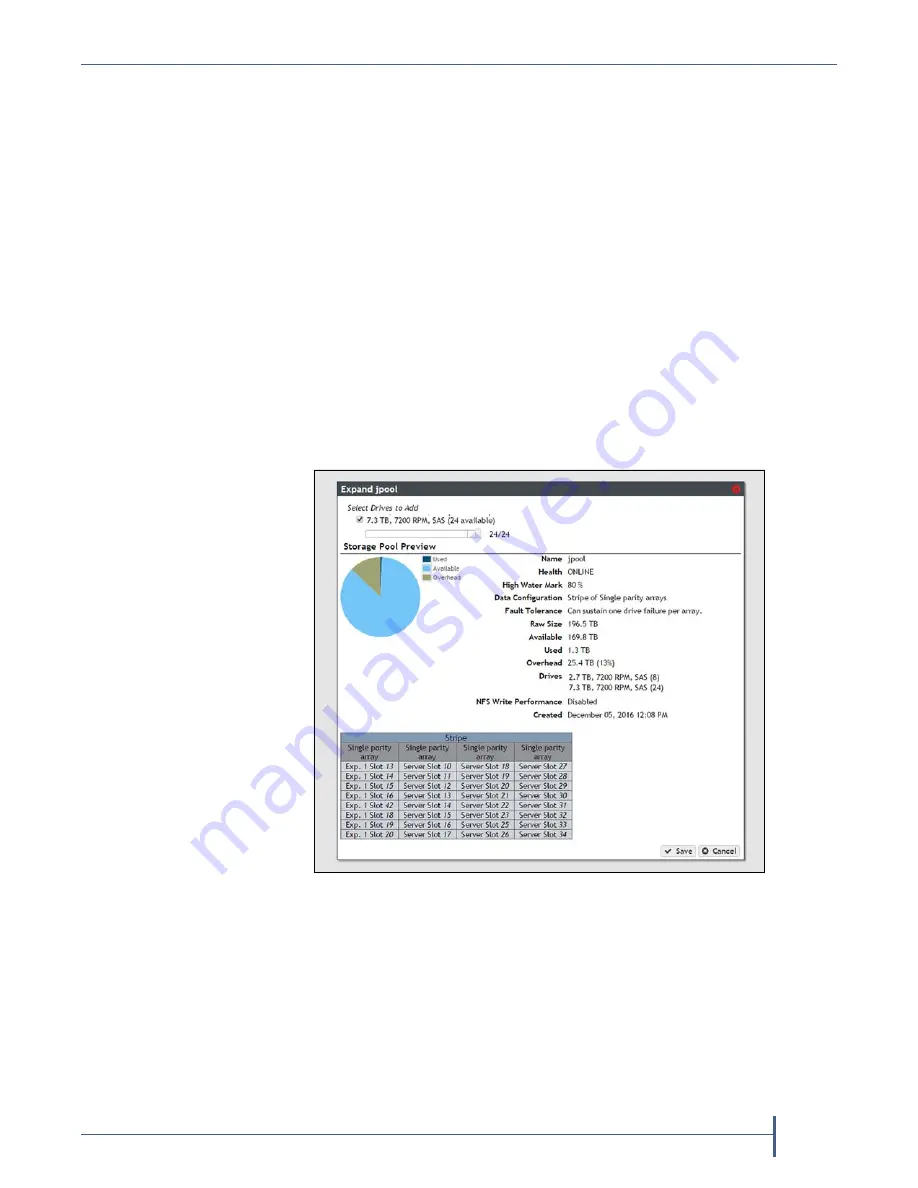
The
Expand
Pool
screen
displays
options
for
adding
additional
drives
to
the
storage
pool.
3.
Select
the
check
box
next
to
the
type
of
drive
you
want
to
add
to
the
storage
pool.
By
default,
the
check
box
for
any
drive
type
present
in
the
array
is
automatically
selected.
Spectra
Logic
recommends
that
you
avoid
mixing
drive
types
in
a
pool.
4.
Use
the
slider
to
increase
the
number
of
drives
to
use
in
the
storage
pool.
As
you
make
changes,
the
graphics
beneath
the
slider
update
to
show
the
impact
your
changes
have
on
the
storage
pool.
5.
When
you
are
satisfied
with
the
new
configuration,
click
Save
.
Figure 39
The Expand Pool screen.