background image

10-6

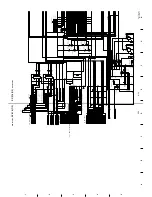
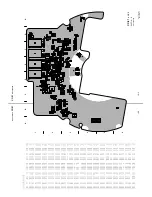
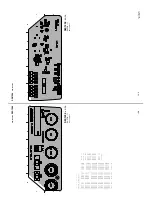
BRC-300/300P

BR

U-300/300P

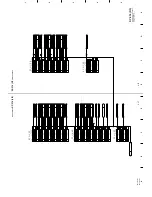
10-6

SY-314  

BRC-300/300P

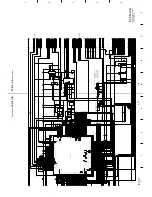
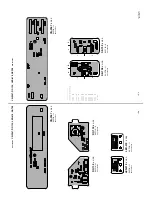
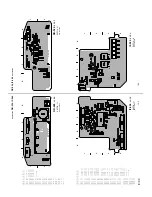
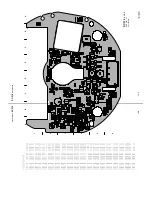
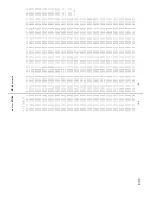
BRC-300/300P

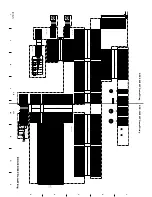
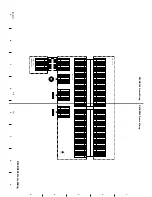
  SY-314

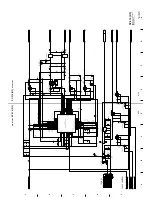
SY-314 

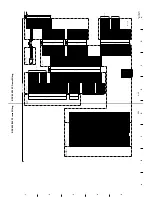
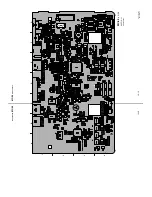
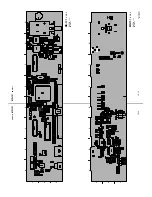
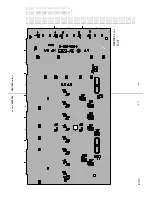
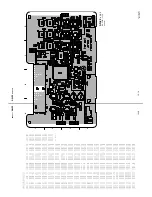
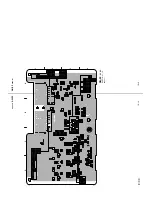
-A SIDE-

SUFFIX: -11

BRC-300/300P

C1001

C1002

C1003

C1004

C1006

C1007

C1008

C1009

C1010

C1011

C1014

C1015

C1016

C1017

C1020

C1021

C1022 C1024 C1026 C1027

C1028

C1029

C1033 C1034

C1035

C1036

C1037

C1038

C1039

C1040

C1041

C1042

C1043

C1044

C1045

C1046

C1047

C1048

C1049

C1050

C1051

C1052

C1053

C1054

C1055

C1056

C1057

C1058

C1059

C1063

C1067

C1068

C1069

C1070

C1071 C1072 C1073

C1074

C1075

C1076

C1077

C1503

C1504

C1505

C1506

C1507

C1509

C1515

C1516

C1517

C1520

C1522

C1523

C1524

C1525

C1526

C1527

C1528

C1529

C1530

C1536

C1542

C1543

C1544

C1545

C1546

C1547

C1548

C1549

C1550

D1004

D1005

D1006

D1007

D1008

D1009

D1010

D1013

D1501

D1502

D1503

IC1001

IC1004

IC1005

IC1006

IC1007

IC1008

IC1009

IC1010

IC1012

IC1013

IC1018

IC1501

IC1502

IC1503

IC1504

L1001

L1003

L1004

L1501

L1502

L1503

L1504

L1505

L1506

L1507

L1508

L1509

L1510

L1511

L1512

L1802

L1803

Q1001

Q1002

Q1003

Q1004

Q1502

Q1503

Q1504

Q1505

Q1506

Q1507

Q1512

R1001

R1002 
R1003R1004

R1005

R1006

R1007

R1008

R1009

R1010

R1011

R1012

R1015

R1016

R1017

R1018

R1019

R1020

R1021

R1022

R1023

R1026

R1027

R1028

R1029

R1030

R1037 R1039 R1041 R1044

R1056

R1057

R1058

R1060

R1061

R1064

R1066

R1068
R1069

R1070

R1072

R1074

R1075

R1077

R1078

R1079

R1084

R1085

R1086

R1087

R1096

R1106

R1108

R1113

R1115

R1117

R1120

R1121 R1122

R1123

R1124 R1125

R1126

R1127

R1128

R1133

R1138 R1140

R1147

R1148

R1149 R1150 R1151

R1152

R1153

R1154

R1155

R1156

R1157

R1161

R1162

R1163

R1164

R1165

R1166

R1170

R1171

R1172

R1173

R1176

R1177

R1178

R1179

R1180

R1181

R1182

R1183

R1184

R1185

R1192

R1193

R1197

R1503

R1504 R1505

R1506

R1507

R1509

R1510

R1511

R1512

R1514

R1518

R1519

R1520

R1522

R1524

R1525

R1528

R1529

R1530

R1532

R1533

R1534

R1536

R1537

R1538

R1539

R1540

R1541

R1547 R1548

R1549

R1550

R1556

R1557

T1501

X1001

AB

CD

E

F

G

H

1

2

3

4

5

6

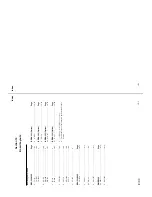
—————————————————————

SY-314 (1-862-820-11)

—————————————————————

C1001

D5

C1002

C5

C1003

C5

C1004

D5

C1005

*

D6

C1006

C5

C1007

B5

C1008

D5

C1009

C5

C1010

B5

C1011

B5

C1012

*

D5

C1013

*

E6

C1014

B5

C1015

B5

C1016

F6

C1017

F6

C1018

*

B5

C1019

*

B4

C1020

B4

C1021

B5

C1022

B4

C1023

*

G6

C1024

B4

C1025

*

G6

C1026

B4

C1027

B4

C1028

B3

C1029

B3

C1030

*

B6

C1031

*

C3

C1032

*

B6

C1033

B4

C1034

B4

C1035

A3

C1036

A3

C1037

A4

C1038

A4

C1039

A3

C1040

A3

C1041

B4

C1042

B4

C1043

B4

C1044

B4

C1045

B4

C1046

B4

C1047

A3

C1048

A3

C1049

A3

C1050

B4

C1051

A3

C1052

A3

C1053

A3

C1054

A2

C1055

A4

C1056

A2

C1057

A2

C1058

A4

C1059

A4

C1060

*

A4

C1061

*

A4

C1062

*

A4

C1063

A4

C1064

*

C4

C1065

*

C4

C1066

*

C4

C1067

A4

C1068

H4

C1069

H4

C1070

B4

C1071

H4

C1072

H4

C1073

H4

C1074

H4

C1075

B4

C1076

B4

C1077

B4

C1078

*

B5

C1079

*

A3

C1080

*

D5

C1081

*

D5

C1082

*

D5

C1083

*

D5

C1084

*

D5

C1085

*

B5

C1086

*

B5

C1087

*

B5

C1088

*

C3

C1089

*

C3

C1090

*

C3

C1091

*

C3

C1092

*

B3

C1093

*

B3

C1501

*

C3

C1502

*

C3

C1503

E2

C1504

B3

C1505

E2

C1506

C3

C1507

B3

C1508

*

E3

C1509

C3

C1510

*

E4

C1511

*

E4

C1512

*

E4

C1513

*

E3

C1514

*

E3

C1515

E4

C1516

F2

C1517

F2

C1518

*

E4

C1519

*

E4

C1520

E4

C1521

*

E4

C1522

E4

C1523

E4

C1524

E2

C1525

F5

C1526

E4

C1527

E4

C1528

F5

C1529

E4

C1530

E4

C1531

*

E4

C1532

*

E4

C1533

*

E4

C1534

*

E4

C1535

*

E4

C1536

C3

C1537

*

D4

C1538

*

E5

C1539

*

E5

C1540

*

E5

C1541

*

E5

C1542

E5

C1543

E5

C1544

E5

C1545

D4

C1546

D5

C1547

C4

C1548

C5

C1549

C4

C1550

C5

CL1001

*

H4

CL1002

*

H4

CL1003

*

H4

CL1004

*

H4

CL1005

*

H4

CL1006

*

C4

CL1007

*

C4

CL1008

*

H4

CL1009

*

D6

CL1010

*

E6

CL1011

*

E6

CL1012

*

D6

CL1017

*

E5

CL1018

*

D6

CL1019

*

D6

CL1020

*

D5

CL1021

*

E6

CL1022

*

E6

CL1023

*

E6

CL1024

*

B3

CL1025

*

B3

CL1026

*

B3

CL1027

*

B4

CL1028

*

B4

CL1501

*

F6

CL1502

*

E4

CL1503

*

D4

CL1504

*

E4

CL1505

*

E4

CL1803

*

A2

CN1001

*

F4

CN1002

*

H3

CN1003

*

C5

CN1501

*

C2

CN1801

*

A4

CN1802

*

A3

CN1803

*

A2

CN1804

*

B2

CN1805

*

G2

D1001

*

B5

D1002

*

B4

D1003

*

B4

D1004

B5

D1005

B4

D1006

B4

D1007

C6

D1008

F6

D1009

C6

D1010

F6

D1011

*

F6

D1012

*

B6

D1013

A2

D1501

F5

D1502

D5

D1503

D5

F1501

*

C3

F1502

*

C3

F1503

*

C3

F1504

*

C3

FB1001

*

B2

FB1002

*

B2

FB1003

*

B2

FB1004

*

B2

FB1005

*

A2

FB1006

*

A2

FB1007

*

A2

IC1001

D6

IC1002

*

D6

IC1003

*

E6

IC1004

B5

IC1005

B5

IC1006

G5

IC1007

B5

IC1008

A4

IC1009

A2

IC1010

A3

IC1011

*

A4

IC1012

A4

IC1013

A4

IC1014

*

C4

IC1015

*

C4

IC1016

*

C4

IC1017

*

B5

IC1018

B4

IC1019

*

B3

IC1501

G4

IC1502

E4

IC1503

C4

IC1504

C5

L1001

B5

L1002

*

B6

L1003

B4

L1004

D5

L1501

E3

L1502

F5

L1503

E4

L1504

E4

L1505

E4

L1506

E5

L1507

E5

L1508

E5

L1509

C4

L1510

C5

L1511

C4

L1512

C5

L1802

B2

L1803

F2

Q1001

C6

Q1002

F6

Q1003

C6

Q1004

F6

Q1501

*

C3

Q1502

C3

Q1503

C3

Q1504

E3

Q1505

E2

Q1506

C3

Q1507

C3

Q1508

*

E4

Q1509

*

D5

Q1510

*

E4

Q1511

*

E4

Q1512

D4

R1001

C5

R1002

C5

Summary of Contents for BRC-300

Page 1: ...ion Revised 1 3CCD COLOR VIDEO CAMERA BRC 300 BRC 300P OPTICAL MULTIPLEX UNIT BRU 300 BRU 300P ANALOG RGB COMPONENT CARD BRBK 301 SDI CARD BRBK 302 OPTICAL MULTIPLEX CARD BRBK 303 DV CARD BRBK 304 REMOTE CONTROL UNIT RM BR300 ...

Page 2: ...ux personnes compétentes en charge de l entretien Afin de réduire les risques de décharge électrique d incendie ou de blessure n effectuer que les réparations indiquées dans le mode d emploi à moins d être qualifié pour en effectuer d autres Pour toute réparation faire appel à une personne compétente uniquement BRC 300 300P RM BR300 WARNING This unit has no AC power switch When installing the unit...

Page 3: ...inet Lower 1 4 1 3 4 Base Plate 1 5 1 3 5 Blank Panel 1 6 1 4 Removing Reattaching the Outer Panels BRU 300 300P 1 6 1 4 1 Cover Panel 1 6 1 4 2 Blank Panel 1 7 1 5 Removing Reattaching the Outer Assembly RM BR300 1 7 1 5 1 Outer Upper Assembly 1 7 1 6 Writing the Firmware 1 8 1 6 1 Firmware Writing Program 1 8 1 6 2 BRC 300 300P 1 11 1 6 3 BRU 300 300P 1 14 1 6 4 RM BR300 1 15 1 7 Switch Settings...

Page 4: ...n 2 9 2 1 8 Pan Motor 2 10 2 1 9 Combined Flexible Flat Cable 2 11 2 2 BRC 300 300P PC Boards 2 12 2 2 1 CC 91 Board 2 12 2 2 2 CN 2547 Board 2 13 2 2 3 DC 130 Board 2 14 2 2 4 DD 208 Board 2 14 2 2 5 DR 526 Board 2 15 2 2 6 IF 110 Board 2 15 2 2 7 IF 944 Board and VC 343 Board 2 16 2 2 8 LED 418 Board 2 18 2 2 9 SE 758 Board 2 18 2 2 10 SW 1204 Board 2 19 2 2 11 SY 314 Board 2 20 2 3 BRU 300 300P...

Page 5: ...y Compensation 3 28 3 2 17 LV Reference Data Setting 3 28 3 2 18 Auto White Balance Adjustment 3 29 3 2 19 Color Reproduction Adjustment 3 29 3 2 20 White Balance Check 3 31 3 3 BRC 300 300P Video Output System Adjustment 3 32 3 3 1 Tools Equipment 3 32 3 3 2 Connection Diagram 3 32 3 3 3 Internal Color Bar Adjustment 3 32 3 3 4 SC Frequency Adjustment 3 33 3 4 BRU 300 300P Electrical Alignment 3 ...

Page 6: ...ication Trouble 4 21 4 4 4 Trouble when Connecting the Optional Card 4 22 4 5 RM BR300 4 23 4 5 1 Trouble when Power on the Unit 4 23 4 5 2 Communication Trouble 4 24 4 6 Optional Cards 4 26 4 6 1 BRBK 301 4 26 4 6 2 BRBK 302 4 30 4 6 3 BRBK 303 4 32 4 6 4 BRBK 304 4 34 5 Circuit Description 5 1 BRC 300 300P Circuit Description 5 1 5 1 1 Camera Block 5 1 5 1 2 IF 944 Board 5 1 5 1 3 CC 91 Board 5 ...

Page 7: ...ams BRC 300 300P Overall 8 1 BRU 300 300P Overall 8 4 RM BR300 Overall 8 5 BRBK 301 AN 22 8 6 BRBK 302 SD 50 8 7 BRBK 303 MX 107 8 7 BRBK 304 DV 33 8 8 9 Schematic Diagrams AN 22 BRBK 301 9 2 CC 91 BRC 300 300P 9 4 CN 2547 BRC 300 300P 9 8 CN 2548 BRU 300 300P 9 9 DR 526 BRC 300 300P 9 10 DV 33 BRBK 304 9 11 IF 944 BRC 300 300P 9 17 MC 66 BRU 300 300P 9 19 MD 131 RM BR300 9 26 MX 107 BRBK 303 9 28...

Page 8: ...RC 300 300P 10 2 CN 2547 BRC 300 300P 10 4 DC 130 BRC 300 300P 10 4 LED 418 BRC 300 300P 10 4 SE 758 BRC 300 300P 10 4 DR 526 BRC 300 300P 10 5 IF 944 BRC 300 300P 10 5 SY 314 BRC 300 300P 10 6 SW 1204 BRC 300 300P 10 8 MC 66 BRU 300 300P 10 9 CN 2548 BRU 300 300P 10 12 LE 281 BRU 300 300P 10 13 SW 1207 BRU 300 300P 10 13 MD 131 RM BR300 10 14 SW 1205 RM BR300 10 16 AN 22 BRBK 301 10 18 SD 50 BRBK...

Page 9: ...ration and installation of BRC 300 300P Part number 3 854 212 1X English 3 854 212 2X French 3 854 212 3X Spanish 3 854 212 4X German BRC 300P only BRU 300 300P Operating Instructions Supplied with the BRU 300 300P This manual is necessary for application and operation and installation of BRU 300 300P Part number 3 854 214 0X BRBK 301 Operating Instructions Supplied with the BRBK 301 This manual e...

Page 10: ... the time of issue of this manual are listed in the service manual for each unit The service manual contains a complete list of all semiconductors and their ID Nos and thus should be used together with the CD ROM Part number 9 968 546 XX Trademarks Trademarks and registered trademarks used in this manual are as follows MS DOS Windows and Windows NT are the registered trademark of Microsoft Corpora...

Page 11: ...e Parts Describes the exploded views the mechanical parts list and the electrical parts list Section 7 Semiconductor Pin Assignments This section contains information on semiconductors used for each unit It includes a complete list of the semiconductors and their ID Nos for retrieving information on Semiconductor Pin Assignments CD ROM which is available separately Please refer to this section tog...

Page 12: ......

Page 13: ...ards 1 1 1 BRC 300 1 1 2 BRU 300 1 1 3 RM BR300 IF 110 board LED 418 board IF 944 board DR 526 board DD 208 board SE 758 board VC 343 board CN 2547 board DC 130 board CC 91 board SW 1204 board SY 314 board CN 2548 board SW 1207 board MC 66 board LE 281 board SW 1205 board MD 131 board ...

Page 14: ...it is recom mended to use the soldering iron having a temperature regulator The ordinary soldering iron can be used but the iron tip has to be applied to the solder joint for a slightly longer time The printed pattern copper foil may peel away if the heated tip is applied for too long so be careful 1 3 Removing Reattaching the Cabinets BRC 300 300P 1 3 1 Side Rear Assembly and Side Front Assembly ...

Page 15: ...bly Installation 4 Reattach the side rear assembly and the side front assembly in the reverse order of removal 1 3 2 Camera Cabinet Upper Assembly Removal 1 Remove the side rear assembly and the side front assembly Refer to steps 1 to 3 in Section 1 3 1 2 Turn the lens upward 3 Release the two hooks of the camera cabinet front using a flat head screwdriver as shown in the figure and remove the cam...

Page 16: ...era cabinet front attach the tapes A to a new camera cabinet front 7 Reattach the side rear assembly and side front assem bly Refer to step 4 in Section 1 3 1 1 3 3 Camera Cabinet Lower Removal 1 Remove the side rear assembly and the side front assembly Refer to steps 1 to 3 in Section 1 3 1 2 Remove the camera cabinet upper assembly Refer to steps 2 to 5 in Section 1 3 2 3 Remove the two screws a...

Page 17: ...ate then secure it with the four screws 4 Turn the lens upward 5 Release the two hooks of the camera cabinet lower from the pins of the camera assembly and remove the camera cabinet lower Installation 6 Reattach the camera cabinet lower in the reverse order from steps 3 to 5 7 Reassemble the unit in the reverse order from steps 1 and 2 Hooks Holes Pins Camera cabinet lower ...

Page 18: ...Installation 2 Reattach the blank panel and secure it with the two screws with stopper When reinstalling the optional board insert the board along the board rails slowly and secure it with the two screws with stopper 1 4 Removing Reattaching the Outer Panels BRU 300 300P 1 4 1 Cover Panel Removal 1 Remove the four screws 2 Remove the cover panel in the direction of the arrow while opening its righ...

Page 19: ...ard along the board rails slowly and secure it with the two screws with stopper 1 5 Removing Reattaching the Outer Assembly RM BR300 1 5 1 Outer Upper Assembly Removal 1 Remove the seven screws 2 Remove the outer upper assembly upward while gently pushing the rubber part on the joystick control ler in the directions of the arrows 3 Disconnect the flexible flat cables from the connectors CN5001 CN5...

Page 20: ...L web site of an MPU manufacturer Follow the instructions on the website to download the program This URL is as of May 2004 http www eu renesas com products mpumcu tool cgi_bin fdtreq cgi Installation Procedure 1 Double click the downloaded file 2 Until the message Additional Information Applica tion is displayed on the window repeat that click Next button while checking the contents which appeare...

Page 21: ...n After the installation the message Installation Completed appears on the window 8 Click Finish button Setup 1 Start the installed firmware writing program The warning window appears 2 Click OK button on the warning window to display the Welcome window 3 Check the checkbox of Create a new workspace and click OK button 4 Enter Cyclone into the text box of Workspace Name and click OK button ...

Page 22: ...d click Next button 6 Select a port in Select port and click Next button 7 Enter 25 0000 into the text box of Enter the CPU crystal frequency for the selected device and click Next button 8 Select BOOT Mode in Select Connection and click Next button 9 Click Finish button ...

Page 23: ...thout the extension board Firmware file cyclone mot n To get the firmware contact your local Sony Sales Office Service Center Connection Diagram Writing Procedure 1 Remove the blank panel or the optional board Refer to Section 1 3 5 2 Connect the equipment and tools referring to Connec tion Diagram 3 Set the switch S003 on the EX 947 board to WRITE When the EX 947 board is not connected remove the...

Page 24: ...m of the window m If the message Connection failed appears check the connections power supply and switch settings If an error message appears return to step 2 7 On the toolbar select File Open An S Record 8 Select the firmware cyclone mot and click Open button 9 On the toolbar select Device Download Active File The writing operation starts automatically ...

Page 25: ... on the color monitor When not using the EX 947 board 7 Reset the switch S1003 1 on the SY 314 board to OFF 8 Turn on the power of the BRC 300 300P while pressing the switch S1004 on the SY 314 board n Press the switch until the message Doing Super Reset appears on the color monitor 9 Check that the message End of Super Reset Please Restart is displayed and turn off the power of all the equipment ...

Page 26: ... the MC 66 board to OFF 8 Turn on the power switch of the BRU 300 300P while pressing the switch S4801 on the CN 2548 board n Press the switch until the message Doing Super Reset appears on the color monitor 9 Check that the message End of Super Reset Please Restart is displayed and turn off the power of all the equipment 10 Perform 3 4 BRU 300 300P Electrical Alignment 1 6 3 BRU 300 300P Firmware...

Page 27: ...Diagram Writing Procedure 1 Remove the outer upper assembly Refer to Section 1 5 1 2 Connect the equipment and tools referring to Connec tion Diagram 3 Set the switch S5006 2 on the MD 131 board to ON 4 Turn on the power of each equipment 5 Write the firmware referring to step 5 in Section 1 6 2 n Selecting firmware file is controller mot 6 Turn off the power switch of the RM BR300 7 Reset the swi...

Page 28: ...s of the factory use switches SW 1204 Board Ref No Name Description Factory setting S2201 IR SELECT Selects a camera number when one remote commander 1 is used for multiple cameras S2202 75 Z termination switch 75 Z termination ON OFF switch for the EXT SYNC IN ON connector S2201 S2202 SW 1204 BOARD SIDE A ...

Page 29: ...t this to ON only when writing the OFF firmware without the EX 947 board 2 JTAG SELECT Factory use OFF 3 OPE ADJ MODE SELECT Switches operation modes Normal Normal mode Adjustment OFF n Set this to ON only when adjusting without the EX 947 board ON Adjustment mode OFF Normal mode 4 Factory use OFF S1004 SUPER RESET When the power is turned on while this switch is pressed the menu settings and adju...

Page 30: ...801 FACTORY RESET When the power is turned on while this switch is pressed the menu settings and adjustment values are initialized S4802 ADJ NO Selects a menu in the adjustment mode S4803 DATA UP Increments an adjustment value in the adjustment mode S4804 DATA DOWN Decrements an adjustment value in the adjustment mode S4801 S4802 S4803 S4804 CN 2548 BOARD SIDE A ...

Page 31: ...NTSC S3501 1 MPU WRITING Set this to ON only when writing the OFF firmware without the EX 947 board 2 JTAG SELECT Factory use OFF 3 OPE ADJ MODE SELECT Switches operation modes of the unit Normal mode normal adjustment OFF ON Adjustment mode OFF Normal mode 4 LOOP BACK TEST MODE Set this to ON when performing an OFF adjustment S3001 S3501 MC 66 BOARD SIDE A ...

Page 32: ...232C 2 9600bps 38400bps Sets communication baud rate OFF 9600 bps ON 38400 bps OFF 9600 bps 3 Camera address setting switch Sets a camera address 0 All OFF 4 5 6 Factory use OFF Camera address setting Camera addresses 0 1 2 3 4 5 6 7 S4901 3 OFF ON OFF ON OFF ON OFF ON S4901 4 OFF OFF ON ON OFF OFF ON ON S4901 5 OFF OFF OFF OFF ON ON ON ON S4901 SW 1207 BOARD SIDE A ...

Page 33: ... 9600bps 38400bps Sets communication baud rate OFF 9600 bps ON 38400 bps OFF 9600 bps 3 Not used OFF 4 Not used OFF S5004 TALLY CONTACT Selects the function of the TALLY CONTACT CONTACT connector TALLY S5005 MODE SELECT Set this switch according to the VISCA 0 correspondence camera to be connected S5006 1 ENABLE ON OFF Factory use OFF 2 CPU WR MODE Set this to ON only when writing the OFF firmware...

Page 34: ...ing S8001 Free Lock Change this switch when performing the VCO free running adjustment Setting for adjustment 1 7 5 BRBK 304 n Never change the settings of the factory use switches DV 33 Board Ref No Bit Name Description Factory setting S001 1 to 8 Factory use all OFF S8001 SD 50 BOARD SIDE A S001 DV 33 BOARD SIDE B 1 2 O N 3 4 5 6 7 8 Knob position ...

Page 35: ...link is an important part for ensuring safety Replacement with parts other than those designated will result in fire hazards and electric hazards Therefore be sure to use only designated parts BRC 300 300P Board Ref No Part No Description SY 314 F1501 1 533 998 11 F1502 On chip fuse 1 0 A 125V F1503 1 533 483 11 F1504 On chip fuse 1 6 A 125V BRU 300 300P Board Ref No Part No Description MC 66 F400...

Page 36: ...able BRU 300P EXT SYNC IN or EXT SYNC OUT BNC 75 Z MALE 1 569 370 12 S VIDEO OUT S video cable CAMERA Optical fiber cable CCFC M100 VISCA RS 232C IN VISCA RS 232C cable cross type 1 590 879 31 VISCA RS 232C OUT VISCA RS 422 Connector plug 9P supplied accessory 1 818 103 11 and wire AWG No 28 to 18 cable length max about 1 2 km RM BR300 DC IN 12 V ADAPTOR AC supplied accessory 1 468 626 52 VISCA RS...

Page 37: ...2 EXT SYNC IN External video sync signal EXT SYNC OUT 0 3 V p p 75 Z sync negative BRU 300 300P Black burst or composite sync 3 SDI OUT Serial digital interface Complies with SMPTE259 S Video Connector 4 S VIDEO OUT S video signal Y 1 0 V p p 75 Z unbalanced sync negative C NTSC PAL 0 286 0 3 V p p 75 Z unbalanced Optical Connectors 5 OPTICAL LC duplex fiber connector BRBK 303 Multi mode 850 nm SF...

Page 38: ...omposite video signal Y C S video signal DV OUT 6 pin i LINK IEEE1394 External view Pin No Signal 1 Not used 2 GND 3 TPB _ 4 TPB 5 TPA _ 6 TPA 1 2 3 4 5 6 7 8 9 8 VISCA RS 422 9 pin Contact Terminal Block External view Pin No Signal 1 RXD OUT _ 2 RXD OUT 3 TXD OUT _ 4 TXD OUT 5 GND 6 RXD IN _ 7 RXD IN 8 TXD IN _ 9 TXD IN RM BR300 300P only Not used 9 TALLY CONTACT 9 pin Contact Terminal Block Exte...

Page 39: ... perform the BRBK 301 electrical alignment Section 3 5 1 11 Service Action After Board Replacement Repair Perform the following adjustment or function check after board replacement repair for a unit 1 11 1 BRC 300 300P CC 91 Board After replacing or repairing the CC 91 board perform the BRC 300 300P video output system adjustment Section 3 3 SY 314 Board After replacing this board or MPU IC1019 1 ...

Page 40: ... board perform the BRBK 302 electrical alignment Section 3 6 1 11 6 BRBK 303 MX 107 Board After repairing the MX 107 board perform the BRBK 303 output video check Section 3 7 1 11 7 BRBK 304 DV 33 Board After repairing the DV 33 board perform the BRBK 304 output video check Section 3 8 ...

Page 41: ...inet lower Refer to steps 3 to 5 in Section 1 3 3 4 Remove the SE plate Refer to steps 2 to 4 in Section 2 2 9 5 Remove the screw and remove the plate T4 holder T3 two wave washers and holder T2 from the shaft R of the camera assembly 6 Pull out the pin from the shaft R and remove the drive gear T Section 2 Replacement of Main Parts 7 Loosen the two screws and remove the holder T1 8 Remove the har...

Page 42: ...the shaft holder 11 Form the flexible flat cable straight as shown in the figure 12 Remove the four screws and remove the bearing holder T and two ball bearings PSW 2 x 6 Flexible flat cable Shaft holder PSW2 6 x 6 PSW2 6 x 6 Ball bearing Ball bearing Bearing holder T ...

Page 43: ...upper assembly Refer to steps 2 to 5 in Section 1 3 2 3 Remove the camera cabinet lower Refer to steps 3 to 5 in Section 1 3 3 4 Remove the SE plate Refer to steps 2 to 4 in Section 2 2 9 5 Remove the camera assembly Refer to steps 5 to 13 in Section 2 1 1 6 Remove the shield chassis Refer to step 6 in Section 2 2 6 7 Remove the IF 110 board Refer to steps 7 and 8 in Section 2 2 6 8 Remove the DD ...

Page 44: ...S board Installation 15 Reassemble the camera assembly in the reverse order from steps 7 to 14 m Replace the CD flexible cushions with new ones When reattach the CCD covers to the prism assem bly pay attention not to mistake the orientation of the CCD covers When reattaching the three heat sinks to the board chassis insert each heat sink into each hole Void between the prism assembly and CCD cover...

Page 45: ... 110 board Refer to steps 7 and 8 in Section 2 2 6 8 Remove the DD 208 board Refer to steps 5 and 6 in Section 2 2 4 9 Remove the VC 343 board Refer to steps 7 to 10 in Section 2 2 7 10 Remove the LED 418 board Refer to steps 3 and 4 in Section 2 2 8 11 Remove the prism assembly Refer to steps 11 and 12 in Section 2 1 2 12 Remove the five screws and remove the board chassis from the lens chassis a...

Page 46: ...y in the direction of the arrow 7 Remove the ferrite core from the harness shown in the figure Installation 8 Reattach the CN chassis assembly in the reverse order from steps 5 to 7 9 Reassemble the unit in the reverse order from steps 1 to 4 9 mm 28 mm Tape 1 15 mm 15 mm Tape 2 Tape 1 Tape 2 Video lens Installation 15 Affix the tape 1 and tape 2 to a new video lens n For the tape 1 and tape 2 cut...

Page 47: ...ase B SE plate 5 Remove the worm base B gear press spring and two holders W3 from the worm gear assembly tilt Installation 6 Reattach the worm base B gear press spring and two holders W3 to a new worm gear assembly tilt n Reattach the worm gear assembly tilt to the worm base B with the holders W3 installed as shown in the figure 7 Reattach the worm gear assembly tilt in the reverse order from step...

Page 48: ...t motor in the reverse order from steps 3 to 5 m Pay attention not mix up the screws PSW SRW2 5 x 6 and the screws PSW2 6 x 6 Replace the tapes A with new ones 7 Reassemble the unit in the reverse order from steps 1 and 2 Tapes A 2 1 6 Tilt Motor Removing 1 Remove the side rear assembly and side front assem bly Refer to steps 1 to 3 in Section 1 3 1 2 Remove the DR 526 board Refer to steps 2 and 3...

Page 49: ...2 2 11 3 Release one end of the gear press spring from the hook of the base cabinet assembly 4 Remove the screw and remove the plate T4 holder T3 two wave washers and holder T2 from the shaft of the base cabinet assembly 5 Pull out the pin from the shaft of the base cabinet assembly and remove the drive gear T 6 Remove the two screws and remove the worm base B from the base cabinet assembly 7 Remo...

Page 50: ...h the pan motor in the reverse order from steps 3 and 4 n Pay attention not mix up the screws PSW SRW2 5 x 6 and the screws PSW2 6 x 6 6 Reassemble the unit in the reverse order from steps 1 and 2 Installation 8 Reattach the worm base B gear press spring and two holders W3 to a new worm gear assembly pan n Reattach the worm gear assembly pan to the worm base B with the holders W3 installed as show...

Page 51: ... 4 to 6 in Section 2 2 1 5 Remove the pan motor Refer to step 3 in Section 2 1 7 6 Remove the side rear assembly and side front assem bly Refer to steps 1 to 3 in Section 1 3 1 7 Remove the camera cabinet upper assembly Refer to steps 2 to 5 in Section 1 3 2 8 Remove the camera cabinet lower Refer to steps 3 to 5 in Section 1 3 3 9 Remove the SE plate Refer to steps 2 to 4 in Section 2 2 9 10 Remo...

Page 52: ...screws and disconnect the flexible flat cables from the connectors CN805 CN806 on the CC 91 board then remove the EXP chassis assembly 15 Remove the three screws and remove the tilt chassis assembly 16 Remove the ferrite bead from the combined flexible flat cable 17 Remove the tape A and remove the combined flexible flat cable from the pan FFC cover Installation 18 Reattach the combined flexible f...

Page 53: ...rse order from steps 1 to 3 PSW 2 6 x 6 CN801 CN807 PSW 2 6 x 6 PSW2 6 x 6 CC 91 board 2 2 2 CN 2547 Board Removing 1 Remove the base plate Refer to Section 1 3 4 2 Remove the blank panel Refer to Section 1 3 5 3 Remove the EXP chassis assembly Refer to step 4 in Section 2 2 1 4 Remove the two screws and disconnect the flexible flat cables from the connectors CN2902 CN2903 CN2904 CN2905 on the CN ...

Page 54: ...ock electrical alignment Refer to Section 3 2 9 Reassemble the unit in the reverse order from steps 1 to 4 BTP2 x 6 B2 x 3 DD 208 board CN001 Flexible flat cable 2 2 3 DC 130 Board Removing 1 Remove the base plate Refer to Section 1 3 4 2 Remove the SY 314 board Refer to steps 2 to 4 in Section 2 2 11 3 Remove the blank panel Refer to Section 1 3 5 4 Remove the EXP chassis assembly and CC 91 board...

Page 55: ... board in the reverse order from steps 2 to 5 7 Reattach the side rear assembly and side front assem bly Refer to step 4 in Section 1 3 1 PSW2 6 x 6 PSW2 6 x 6 DR 526 board DR plate CN2501 CN2503 CN2502 2 2 6 IF 110 Board Removing 1 Remove the side rear assembly and side front assem bly Refer to steps 1 to 3 in Section 1 3 1 2 Remove the camera cabinet upper assembly Refer to steps 2 to 5 in Secti...

Page 56: ...ect the flexible flat cables from the connectors CN051 CN052 on the VC 343 board 8 Disconnect the connector on the CD 389 board flexible card board 9 Remove the two screws 7 Disconnect the flexible flat cables from the connectors CN201 CN301 CN302 on the IF 110 board 8 Remove the two screws and remove the IF 110 board from the camera assembly Installation 9 Reinstall the IF 110 board to the camera...

Page 57: ...2002 on the IF 944 board 13 Disconnect the flexible flat cables from the connectors CN801 CN802 on the VC 343 board 14 Remove the screw and remove the VC 343 board Installation 15 Reinstall the IF 944 board and VC 343 board to the camera assembly in the reverse order from steps 7 to 14 m Attach the VC 343 board to the PC board spacer as shown in the figure Connect the CN 2680 board to the connecto...

Page 58: ...CN2151 on the SE 758 board 2 2 8 LED 418 Board Removing 1 Remove the side rear assembly and side front assem bly Refer to steps 1 to 3 in Section 1 3 1 2 Remove the camera cabinet upper assembly Refer to steps 2 to 5 in Section 1 3 2 3 Disconnect the harness from the connector CN2101 on the LED 418 board 4 Remove the screw and remove the LED 418 board Installation 5 Reinstall the LED 418 board in ...

Page 59: ...4 board is not a specific service part it must be replaced together with the whole CN chassis assembly The CN chassis assembly includes the DC 130 board Removing 1 Remove the base plate Refer to Section 1 3 4 2 Remove the SY 314 board Refer to steps 2 to 4 in Section 2 2 11 3 Remove the blank panel Refer to Section 1 3 5 4 Remove the EXP chassis assembly and CC 91 board Refer to steps 4 to 6 in Se...

Page 60: ... pins of the external connectors 11 Reassemble the unit in the reverse order from steps 1 to 6 2 2 11 SY 314 Board Removing 1 Remove the base plate Refer to Section 1 3 4 2 Remove the three tapes A fixing the flexible flat cables and harnesses 3 Disconnect the flexible flat cables and harnesses from the connectors CN1001 CN1002 CN1501 CN1801 CN1802 CN1803 CN1804 CN1805 on the SY 314 board 4 Remove...

Page 61: ...e SY 314 board rearrange the harness connected to the connector CN1001 and paste the new tapes A as shown in the figure 6 Reattach the base plate Refer to Section 1 3 4 2 3 BRU 300 300P Main Parts 2 3 1 Switching Power Unit Removing 1 Remove the cover panel Refer to step 1 in Section 1 4 1 2 Disconnect the harnesses from the connectors TB1 TB2 on the switching power unit 3 Remove the tape A and op...

Page 62: ... reverse order from steps 2 to 4 6 Reattach the cover panel Refer to step 2 in Section 1 4 1 2 4 BRU 300 300P Boards 2 4 1 CN 2548 Board Removing 1 Remove the cover panel Refer to step 1 in Section 1 4 1 2 Disconnect the flexible flat cables from the connectors CN4801 CN4804 CN4805 CN4806 on the CN 2548 board 3 Remove the six screws and remove the slot assembly ...

Page 63: ...lation 6 Reinstall the CN 2548 board and slot assembly in the reverse order from steps 2 to 5 7 Reattach the cover panel Refer to step 2 in Section 1 4 1 2 4 2 LE 281 Board Removing 1 Remove the cover panel Refer to step 1 in Section 1 4 1 2 Remove the four hooks on the front panel and remove the front panel 3 Remove the screw and remove the LE 281 board 4 Disconnect the harness from the connector...

Page 64: ...Remove the twelve screws and remove the rear panel 5 Set the AC inlet to the outside of the chassis 6 Disconnect the harnesses from the connectors CN3503 CN4001 on the MC 66 board 7 Remove the five screws and remove the MC 66 board 8 Disconnect the flexible flat cable from the connector CN4951 on the MC 66 board 9 Remove the screw and remove the SW 1207 board 10 Remove the screw and remove the DIP...

Page 65: ...the joystick controller in the reverse order of steps 2 and 3 5 Reattach the outer upper assembly Refer to step 3 in Section 1 5 1 2 6 RM BR300 PC Boards 2 6 1 MD 131 Board Removing 1 Remove the outer upper assembly Refer to steps 1 and 2 in Section 1 5 1 2 Disconnect the harness from the connector CN5004 on the MD 131 board 3 Remove the four screws and remove the MD 131 board 4 Remove the slide k...

Page 66: ... upper assembly 3 Remove the two screws and remove the SW 1205 board n Be careful not to lose the buttons on the outer upper assembly 4 Remove the three knobs Installation 5 Reinstall the SW 1205 board in the reverse order from steps 2 to 4 6 Reattach the outer upper assembly Refer to step 3 in Section 1 5 1 SW 1205 board B3 x 5 Knobs Outer upper assembly ...

Page 67: ...on the power of the BRC 300 300P 2 Press the DATA SCREEN button of the SIRCS remote commander to display the main menu 3 Press the button of the SIRCS remote commander to move the cursor to ANALOG OUT 4 Press the HOME button of the SIRCS remote com mander to display the ANALOG OUT menu 5 Press the button of the SIRCS remote commander to change the setting 6 Press the DATA SCREEN button of the SIRC...

Page 68: ... source for test chart J 6080 621 A Clear chart J 6431 930 A Relay tool for Adjustment commander J 6080 806 A ND filter 0 4 J 6080 807 A ND filter 0 1 J 6080 808 A ND filter 1 0 For white balance check J 6432 430 A 1 FCB interface tool board J 6432 180 A 2 Extension harness 10P 10P J 6432 190 A 3 Extension harness 9P 9P J 6020 250 A Color bar chart For PTB 500 J 6027 100 A Color bar chart For PTB ...

Page 69: ...ce with the new micro processor 8 759 148 35 J 6080 875 A Siemens star For flange back check J 6080 058 A Color temperature correction filter C14 For auto white balance adjustment For white balance check Oscilloscope 75 Z terminator Frequency counter Digital voltmeter Vectorscope Waveform monitor Color monitor Personal computer Refer to Section 3 2 3 Control software FCB A control soft J 6432 770 ...

Page 70: ...cale Copy on a transparent sheet according to the screen size of the vectorscope to be used For NTSC model For PAL model B Y R Y Mg R YL G B Cy Burst positon B Y R Y Burst positon YL R G B Cy Mg 3 2 BRC 300 300P Camera Block Electrical Alignment ...

Page 71: ... J 6082 053 B Relay tool J 6431 930 A 75 Ω termination DC VIDEO RS232C Power supply DC 9 V Interface board J 6432 430 A Personal computer System Signal generator 3 0 0 1 V Duty 50 NTSC 60 Hz PAL 50 Hz IF 110 DD 208 CN402 10P _ 10P CN151 9P 9P CN403 LANC 3 2 2 Connection for Adjustment 3 2 BRC 300 300P Camera Block Electrical Alignment ...

Page 72: ...nstallation Double click setup exe from the File manager Explorer FCB S3000 Control Panel Operation 1 Turn on the power of the camera and start up the PC 2 Double click the FCB S3000 Control Panel icon 3 Perform adjustment by dragging the adjustment slider of the respective adjustment using the mouse You can also perform adjustment with the arrow mark keys when you click the adjustment slider with...

Page 73: ... from Sections 3 2 8 to 3 2 21 in order 2 Subject 1 Color bar chart Standard picture frame Adjust the picture frame as shown in the following figure if adjustments are performed using the color bar chart 2 White pattern Standard picture frame Remove the color bar chart from the pattern box and insert a clear chart in its place Do not perform zoom operations during this time 841 mm 1189 mm White Bl...

Page 74: ...and address will be displayed on the LCD of the adjusting remote commander as shown in the figure 3 Operate the adjusting remote commander as follows 1 Changing the page The page increases when the EDIT SEARCH button is pressed and decreases when the EDIT SEARCH _ button is pressed There are altogether 16 pages from 0 to F Hexadecimal 0 1 2 3 4 5 6 7 8 9 A B C D E F notation LCD Display 0 1 2 3 4 ...

Page 75: ...2 3 4 5 6 7 8 9 10 11 12 13 14 15 16 17 18 19 20 21 22 23 24 25 26 27 28 29 30 31 32 33 34 35 36 37 38 39 40 41 42 43 44 45 46 47 48 49 50 51 52 53 54 55 56 57 58 59 60 61 62 63 64 65 66 67 68 69 70 71 72 73 74 75 76 77 78 79 80 81 82 83 84 85 86 87 88 89 90 91 92 93 94 95 96 97 98 99 100 101 102 103 104 105 106 107 108 109 110 111 112 113 114 115 116 117 118 119 120 121 122 123 124 125 126 127 12...

Page 76: ...r Page Address Data Procedure 1 0 01 01 Set the data 2 0 10 00 Set the data 3 2 00 Set the following data 55 NTSC 51 PAL 4 2 01 Set the data and press PAUSE button 55 NTSC 51 PAL 5 2 02 Check that the data changes to 01 6 2 00 29 Set the data 7 2 01 29 Set the data and press PAUSE button 2 Date initialization of pages 8 and C m If Date initialization of pages 8 and C is performed all data of the p...

Page 77: ...ion of pages E F 1E and 1F is performed all data of the pages E F 1E and 1F will be initialized It is impossible to initialize a single page After initializing the data of pages E F 1E and 1F perform the all adjustments in Sections 3 2 8 and 3 2 21 again Adjusting page Adjusting address E 00 to FF F 10 to FF 1E 00 to C3 1F 00 to FF Initializing method Order Page Address Data Procedure 1 0 01 01 Se...

Page 78: ... _ _ _ _ _ _ xF 00 00 00 9B 00 00 32 00 01 2D _ _ _ _ _ _ Page A 0x 1x 2x 3x 4x 5x 6x 7x 8x 9x Ax Bx Cx Dx Ex Fx x0 00 00 00 1B 00 00 00 00 00 00 00 00 00 00 00 00 x1 00 06 00 1B 00 00 00 00 00 00 00 00 00 00 00 00 x2 00 11 00 1B 00 00 00 00 00 00 00 00 00 00 00 00 x3 00 01 00 1B 00 00 00 00 00 00 00 00 00 00 00 00 x4 10 11 1B 1B 00 00 00 00 00 00 00 00 00 00 00 00 x5 00 00 1B 1B 00 00 00 00 00 00...

Page 79: ... 80 80 9F 1F 00 1D 1A 40 74 00 00 38 00 xF FF 3E E0 14 65 73 EA 00 14 59 48 20 33 33 38 00 Page D 0x 1x 2x 3x 4x 5x 6x 7x 8x 9x Ax Bx Cx Dx Ex Fx x0 FF 00 00 00 00 00 00 00 00 00 02 03 08 00 00 07 x1 FF 00 00 00 00 00 00 00 00 00 01 01 05 00 00 02 x2 FF 00 00 00 00 00 00 00 00 00 00 20 05 01 00 01 x3 FF 01 00 00 00 00 00 00 00 00 00 00 00 01 0A 04 x4 FF 0C 00 00 00 00 00 00 00 00 00 00 00 00 00 0B...

Page 80: ... 24 00 54 5C 42 33 83 E8 6C 88 30 00 A2 xF 00 EC 3E C0 84 C8 39 46 2A AB 90 60 63 00 3D E1 Page F 0x 1x 2x 3x 4x 5x 6x 7x 8x 9x Ax Bx Cx Dx Ex Fx x0 FF 40 80 00 0A F0 11 00 00 00 00 60 D5 5B 40 1F x1 FF 80 80 22 19 FF EB 80 00 00 00 24 70 2F 50 1F x2 FF 4F 80 D4 07 00 53 80 00 00 00 30 50 08 00 50 x3 FF 80 80 27 DD 00 0A 80 00 00 00 21 77 00 06 10 x4 FF 90 FF 40 04 00 1E 80 80 00 00 17 00 00 00 30...

Page 81: ...10 01 _ _ _ _ xF 0C 48 02 00 A0 A0 00 00 8C FF 00 01 _ _ _ _ Page 1F 0x 1x 2x 3x 4x 5x 6x 7x 8x 9x Ax Bx Cx Dx Ex Fx x0 00 0C 22 30 28 08 00 00 7F 10 40 00 E0 96 50 FC x1 00 F8 1F 01 00 00 00 00 77 20 80 00 02 A1 34 04 x2 27 EA 05 00 28 02 C0 F0 31 2B 05 13 00 1F 28 0C x3 40 41 3C FF 84 00 60 F0 88 5A 10 00 02 40 10 12 x4 00 F8 0E 00 0A 02 00 10 02 77 20 F0 01 03 10 14 x5 10 00 44 3F 08 08 00 20 0...

Page 82: ..._ _ _ _ _ _ xF 00 00 00 9B 00 00 32 00 01 2D _ _ _ _ _ _ Page A 0x 1x 2x 3x 4x 5x 6x 7x 8x 9x Ax Bx Cx Dx Ex Fx x0 00 00 00 1B 00 00 00 00 00 00 00 00 00 00 00 00 x1 00 06 00 1B 00 00 00 00 00 00 00 00 00 00 00 00 x2 00 11 00 1B 00 00 00 00 00 00 00 00 00 00 00 00 x3 00 01 00 1B 00 00 00 00 00 00 00 00 00 00 00 00 x4 10 11 1B 1B 00 00 00 00 00 00 00 00 00 00 00 00 x5 00 00 1B 1B 00 00 00 00 00 00 ...

Page 83: ... 80 80 9F 1F 00 1D 1A 40 74 00 00 38 00 xF FF 3E E0 14 65 73 EA 00 14 59 48 20 33 33 38 00 Page D 0x 1x 2x 3x 4x 5x 6x 7x 8x 9x Ax Bx Cx Dx Ex Fx x0 FF 00 00 00 00 00 00 00 00 00 01 03 08 00 00 09 x1 FF 00 00 00 00 00 00 00 00 00 01 01 05 00 00 02 x2 FF 00 00 00 00 00 00 00 00 00 00 20 05 01 00 03 x3 FF 00 00 00 00 00 00 00 00 00 00 00 00 01 0A 04 x4 FF 0C 00 00 00 00 00 00 00 00 00 00 00 00 00 0B...

Page 84: ... 24 00 54 5C 42 33 83 E8 6C 88 30 00 A2 xF 00 EC 3E C0 84 C8 39 46 2A AB 90 60 63 00 3D E1 Page F 0x 1x 2x 3x 4x 5x 6x 7x 8x 9x Ax Bx Cx Dx Ex Fx x0 FF 40 80 00 0A F0 11 00 00 00 00 62 D5 5B 40 1F x1 FF 80 80 23 19 FF EB 80 00 00 00 24 70 2F 50 1F x2 FF 4F 80 2C 07 00 53 80 00 00 00 30 50 08 00 50 x3 FF 80 80 C2 DD 00 0A 80 00 00 00 21 77 00 06 10 x4 FF 90 FF 26 04 00 1E 80 80 00 00 1C 00 00 00 30...

Page 85: ...10 01 _ _ _ _ xF 0C 48 02 00 A0 A0 00 00 8C FF 00 01 _ _ _ _ Page 1F 0x 1x 2x 3x 4x 5x 6x 7x 8x 9x Ax Bx Cx Dx Ex Fx x0 00 0C 22 30 28 08 00 00 7F 10 40 00 E2 96 50 FC x1 00 F8 1F 01 00 00 00 00 77 20 80 00 02 A1 34 04 x2 27 EA 05 00 28 02 C0 F0 31 2B 05 16 00 1F 28 0C x3 40 41 3C FF 84 00 60 F0 88 5A 10 01 32 40 10 12 x4 00 F8 0E 00 0A 02 00 10 02 77 20 20 01 03 10 14 x5 10 00 44 3F 08 08 00 20 0...

Page 86: ...pecification f 3 F 10 Press PAUSE button 4 0 01 00 Set the data 3 2 BRC 300 300P Camera Block Electrical Alignment Probe 75 Z terminator Oscilloscope Frequency counter 64 49 17 32 1 16 48 33 IC503 VC 343 board 3 2 9 Video System Adjustments m Perform this adjustments after performing 3 2 8 66 MHz 54 MHz Origin Oscillation Adjustment Check that the data of page 0 address 10 is 00 If not set data 00...

Page 87: ...nt Mode Camera Subject Arbitrary Measurement point DD 208 board pin 8 of CN151 75 Z terminated External trigger Pin 6 of CN151 Measuring instrument Oscilloscope Adjustment page C Adjustment addresses 26 27 Specifications Cr level A 714 14 mV NTSC A 700 14 mV PAL Cb level B 714 14 mV NTSC B 700 14 mV PAL Burst level C 286 6 mV NTSC C 300 6 mV PAL Adjusting procedure Order Page Address Data Procedur...

Page 88: ...PAUSE button Adjusting procedure Order Page Address Data Procedure 1 0 01 01 Set the data 2 6 94 16 Set the data 3 6 95 86 Set the data 4 6 01 6D Set the data and press PAUSE button 5 6 02 Check that the data changes to 01 n The adjustment data will be automatically input to page F addresses 13 to 18 6 6 01 00 Set the data and press PAUSE button Check procedure Order Page Address Data Procedure 1 ...

Page 89: ...he data and press PAUSE button 3 6 02 Check that the data changes to 01 n The adjustment data will be automatically input to page F addresses 70 to 7C 4 F 71 Check the data that the specification 1 is satisfied 5 F 72 Check the data that the specification 1 is satisfied 6 F 73 Check the data that the specification 1 is satisfied 7 F 74 Check the data that the specification 1 is satisfied 8 F 75 Ch...

Page 90: ...der Page Address Data Procedure 1 0 01 01 Set the data 2 6 01 13 Set the data and press PAUSE button 3 6 01 15 Set the data and press PAUSE button 4 6 02 Check that the data changes to 01 n The adjustment data will be automatically input to page F addresses 60 to 70 5 F 6F Check the data that the specification is satisfied Settings after adjustment Order Page Address Data Procedure 1 6 01 00 Set t...

Page 91: ...he data of page 0 address 10 must be 00 When the auto focus is ON the lens can be checked if it is focused or not by observing the data on the page 1 of the adjustment remote commander 1 Select page 0 address 03 and set data 0F 2 Page 1 shows the state of the focus 1 00 XX Odd Focused Even Unfocused Check procedure 1 Select page 6 address 40 and set data 01 2 Select page 6 address 41 and set data ...

Page 92: ...r performing 3 2 12 Flange Back Adjustment Control software settings DIGITAL ZOOM OFF FOCUS MANUAL Setting procedure 1 Adjust the zoom and the camera direction and set to the specified position 2 Mark the position of the picture frame on the monitor display and adjust the picture frame to this position with color bar chart in following adjustments using Color reproduction adjustment frame A B C D ...

Page 93: ... Settings after setting Order Page Address Data Procedure 1 6 01 00 Set the data and press PAUSE button 2 0 01 00 Set the data 3 2 15 MAX GAIN Adjustment Set the minimum illumination of subject If it is not consistent the image level required for taking subjects in low illuminance will not be obtained dark Subject Clear chart Color reproduction adjustment frame Adjustment page F Adjustment address...

Page 94: ...nsation Order Page Address Data Procedure 1 6 01 00 Set the data and press PAUSE button 2 6 30 00 Set the data 3 0 01 00 Set the data 3 2 17 LV Reference Data Setting Adjust the normal coefficient of the light value Subject Clear chart Color reproduction adjustment frame Measurement point Display data of page 1 Measuring instrument Adjustment remote commander Adjustment page F Adjustment addresses...

Page 95: ...01 01 Set the data 3 6 01 83 Set the data and press PAUSE button 4 6 01 81 Set the data and press PAUSE button 5 6 02 Check that the data changes to 01 n The adjustment data will be automatically input to page F addresses 40 to 43 Settings after adjustment Order Page Address Data Procedure 1 6 01 00 Set the data and press PAUSE button 2 0 01 00 Set the data 3 Remove the filter C14 3 2 19 Color Rep...

Page 96: ...the data so that the white level is the following level Fig 3 2 1 A 642 6 mV NTSC A 630 mV PAL 5 6 01 61 Set the data and press PAUSE button 6 6 02 Check that the data changes to 01 n The adjustment data will be automatically input to page F addresses 38 to 3B 7 Adjust the GAIN and PHASE of the vectorscope and adjust the burst luminance point to the burst position of the color reproduction frame F...

Page 97: ...Video terminal of AUDIO VIDEO jack 75 Z terminated Measuring instrument Vectorscope Specification Refer to Fig 3 2 3 and 3 2 4 m Perform this adjustment after performing 3 2 19 Color Reproduction Adjustment The data of page 0 address 10 must be 00 Control software setting DIGITAL ZOOM OFF Checking procedures a Indoor white balance check Order Page Address Data Procedure 1 Check that the lens is no...

Page 98: ...r about 20 minutes 5 Press the BACK LIGHT button of the SIRCS remote commander to output the color bar signal 6 Press the DATA SCREEN button of the SIRCS remote commander to display the ADJUST menu 7 Press the button of the SIRCS remote commander to display EVR_CAM no 002 data xxx 8 Adjust data using the button so that waveform level A on the waveform monitor satisfies the specifi cation Adjustmen...

Page 99: ...n Adjustment item Data of EVR_CAM no 001 Specification 3579545 5 Hz NTSC 4433618 5 Hz PAL 3 Press the BACK LIGHT button of the SIRCS remote commander to output a video signal 4 Check that the video signal is normal and turn off the power of all the equipment 5 When the EX 947 board is not connected return the switch S1003 3 on the SY 314 board to OFF and reattach the base plate Refer to Section 1 ...

Page 100: ...ustment item Data of EVR_BRU no 001 Specification 3579545 5 Hz NTSC 4433618 5 Hz PAL 7 Perform 3 4 4 Encoder Output Level Adjustment 3 4 BRU 300 300P Electrical Alignment 3 4 4 Encoder Output Level Adjustment n Before this adjustment perform 3 4 3 VCO Free Running Frequency Adjustment Adjustment Procedure 1 Press the ADJ switch S4802 on the CN 2548 board to display EVR_BRU no 002 data xxx 2 Adjust...

Page 101: ...itor 3CCD volor video camera BRC 300 300P n Select the camera according to the custmer s video system NTSC or PAL In case of the system is uncertain required for the adjustment in both systems NTSC BRC 300 PAL BRU 300P SIRCS remote commander Supplied with the BRC 300 300P Extension board EX 947 n The BRBK 301 electrical alignment can be performed without the EX 947 board BRC 300 300P 75 Z VIDEO OU...

Page 102: ...4 GND RGB SYNC connector pin 1 Adjustment item Data of EVR_ANA no 004 Specification A 75 1 IRE NTSC A 700 7 mV p p PAL A NTSC A PAL BRC 300 300P EX 947 board S002 ADJ OPE S002 3 5 3 RGB Component Video Output System Adjustment Preparations 1 Set the ANALOG OUT menu of the BRC 300 300P as follows referring to Section 3 1 2 OUTPUT 1 RGB SYNC RGB OUTPUT 2 VBS 2 Exit the menu and turn off the power of...

Page 103: ... 1 Adjustment item Data of EVR_ANA no 006 Specification Flat waveform NTSC Flat PAL Flat VBS OUT Adjustment 9 Press the button of the SIRCS remote commander five times to display EVR_ANA no 011 data xxx 10 Adjust data using the button of the SIRCS remote commander so that waveform level B on the oscilloscope satisfies the specification Test point RGB SYNC connector pin 6 GND RGB SYNC connector pin...

Page 104: ...e SIRCS remote commander so that waveform level B satisfies the specification Test point RGB SYNC connector pin 5 GND RGB SYNC connector pin 1 Adjustment item Data of EVR_ANA no 005 Specification B 75 1 IRE NTSC B 525 5 mV p p PAL B BRC 300 300P EX 947 board S002 ADJ OPE S002 3 5 BRBK 301 Electrical Alignment 3 5 4 YCbCr Composite Video Output System Adjustment n Before this adjustment perform 3 5...

Page 105: ...ata xxx 10 Adjust data using the button of the SIRCS remote commander so that waveform level D on the oscilloscope satisfies the specification Test point RGB SYNC connector pin 6 GND RGB SYNC connector pin 1 Adjustment item Data of EVR_ANA no 011 Specification D 75 1 IRE NTSC D 700 7 mV p p PAL 3 5 BRBK 301 Electrical Alignment SYNC Level Adjustment 1 Press the button of the SIRCS remote commander...

Page 106: ...ctrical Alignment After repairing the SD 50 board perform BRBK 302 electrical alignment 3 6 1 Tools Equipment Oscilloscope Frequency counter SDI waveform monitor Color monitor For SDI input 3CCD color video camera BRC 300 300P SIRCS remote commander Supplied with the BRC 300 300P Pattern box Extension board EX 947 3 6 BRBK 302 Electrical Alignment 3 6 2 Connection Diagram ...

Page 107: ...on the power of all the equipment and warm them up for about 20 minutes The indicator D8001 on the SD 50 board will be lit 4 Perform the adjustment checking the value of the frequency counter Test point TP8001 SD 50 board GND Body shell part of BNC connector Adjusting point 1RV8001 SD 50 board Specification 27000 27 kHz 5 Turn off the power of the BRC 300 300P 6 Reset the switch S8001 on the SD 50...

Page 108: ...re less than 0 200 UI 7 Press the BACK LIGHT button of the SIRCS remote commander to output a video signal from the SDI OUT connector of BRBK 302 8 Shoot the pattern box by the BRC 300 300P and check that the video signal is normal 3 6 4 Output Video Check n Before this check perform 3 6 3 VCO Free running Frequency Adjustment Check Procedure 1 Set the switch S002 on the EX 947 board to ADJ 2 Turn...

Page 109: ...mera BRC 300 300P SIRCS remote commander Supplied with the BRC 300 300P Optical multiplex unit BRU 300 300P Optical fiber cable CCFC M100 Extension board EX 947 3 7 2 Output Video Check Check Procedure 1 Connect the equipment and tools as shown in the figure 2 Turn on the power of all the equipment except the BRU 300 300P 3 Turn on the power switch of the BRU 300 300P 4 Check that a picture is dis...

Page 110: ...re 1 Connect the equipment and tools as shown in the figure and turn on the power of all the equipment 2 Display the VIDEO OUT of the VTR on the color monitor and check that shooting images are correctly output 3 Check that the images are correctry recorded by the VTR 4 Display the VIDEO OUT of the BRC 300 300P on the color monitor 5 Press the DATA SCREEN button on the SIRCS remote commander to di...

Page 111: ...ed and communication error appears on the monitor 4 18 c 3 The power indicator lights but no image is output from the VIDEO OUT or S VIDEO OUT 4 19 connector c 4 The power indicator lights but the video output sync is abnormal 4 20 c 5 No operation is available with RS 232C RS 422 interface 4 21 c 6 The power indicator lights but the optional card does not function 4 22 RM BR300 d 1 The LED does n...

Page 112: ...Yes Connect the AC adapter and supply AC power Check whether 12 V is output from the adapter s DC IN jack Replace the AC adapter if necessary Does 12 V exist in pins 1 to 4 on the SY board Yes No No Is the pin 107 level of IC1019 set to H on the SY board No Yes Replace the fuses F1501 to F1504 on the SY board and check the power supply system SY board failure X1001 or the peripheral circuit Replac...

Page 113: ...Y board No Yes SY board failure IC1502 to IC1504 Q1501 Q1508 Q1509 Q1512 or the peripheral circuit Replace the defective parts or the SY board SY board failure Q1506 Q1507 or the peripheral circuit Replace the defective parts or the SY board SY board failure Q1502 Q1503 or the peripheral circuit Replace the defective parts or the SY board SY board failure IC1502 Q1510 Q1511 or the peripheral circu...

Page 114: ...1019 on the SY board when the TILT motor rotates Yes No Does the unit correctoly operate after the PAN TILT reset Yes End No Do PAN TILT mechanical blocks operate normally Yes Check the PAN TILT mechanical units to identify the defective part No Does the clock 3 3 V TTL level exist in pins 12 13 of CN1002 on the SY board Yes SY board failure IC1019 or the peripheral circuit Replace the defective p...

Page 115: ...rd and DR board FFC between DR board and SE board SE board PH2152 2153 or the peripheral circuit Check above in order from the top to identify the defective part One of the following is defective FFC between CN1802 SY board and CN803 CC board CC board PH002 PH003 or the peripheral circuit Check above in order from the top to identify the defective part SY board failure IC1019 or the peripheral cir...

Page 116: ...1 pins 1 2 and IC2502 pins 9 10 on the DR board 3 3 V clock or H 3 3 V in the rotation direction Yes One of the following is defective FFC between SY board and DR board SY board IC1019 or the peripheral circuit Check above in order from he top to identify the defective part No Does 3 3 V exist in pins 1 2 4 5 of IC2502 on the DR board Yes No Are the pins 3 6 8 levels of IC2502 set to H 5 V on the ...

Page 117: ...e SY board Yes No SY board failure Q1502 Q1503 or the peripheral circuit Replace the defective parts or the SY board One of the following is defective R1174 R1175 or the peripheral circuit FFC between CN1801 SY board and CN802 CC board FFC between CN801 CC board and CN2003 IF 944 board Check above in order from the top to identify the defective part FFC Flexible flat cable a 5 4 2 2 Image System T...

Page 118: ... exist in pin 2 of IC2006 and 3 3 V in pin 2 of IC2007 on the IF 944 board Yes No No Is the pin 32 level of IC2002 set to H on the IF 944 board No Yes IF 944 board failure IC2008 or the peripheral circuit Replace the defective parts or the IF 944 board IF 944 board failure IC2006 IC2007 or the peripheral circuit Replace the defective parts or the IF 944 board Camera block failure Go to b 1 No Is t...

Page 119: ... Yes Yes Is the color bar signal output to VIDEO OUT S VIDEO OUT referring to steps 1 to 5 in section 3 3 3 No Yes Are video signals output from pins 61 to 82 of IC007 on the CC board Yes No CC board failure IC007 or the peripheral circuit Replace the defective parts or the CC board One of the following is defective FFC between CC board and SW board VIDEO OUT S VIDEO OUT connector SW board Check a...

Page 120: ...ELECT switch on the rear panel set correctly Yes Set the IR SELECT switch on the rear panel to the setting of the CAMERA SELECT button of the remote commander to be used SY board failure IC1006 IC1007 or the peripheral circuit Replace the defective parts or the SY board No SW board failure IC2201 or the peripheral circuit Replace the defective parts or the CN chassis assembly Check the light recei...

Page 121: ...or check functions with the EXT SYNC IN connector open When no problem is found check the input system No Yes No Is the pin 11 level of IC014 set to L INT on the CC board Is the pin 11 level of IC014 set to H EXT on the CC board Yes CC board failure IC009 IC010 or the peripheral circuit Replace the defective parts or the CC board CC board failure IC009 IC010 or the peripheral circuit Replace the d...

Page 122: ...etween the device and the unit No Do communication signals exist in the VISCA RS 422C connector Yes Properly connect the cable between the device and the unit One of the following is defective FFC between SW board and CC board IC601 to IC606 IC609 or the peripheral circuit on the CC board Check above in order from the top to identify the defective part One of the following is defective FFC between...

Page 123: ... sync signals output normally from CN2902 and CN2903 on the CN board No Yes One of the following is defective FFC between SY board and CN board Q1505 or the peripheral circuit on the SY board Check above in order from the top to identify the defective part Check the FFC between the SY board and CN board a 10 BRBK 301 failure Go to e 1 BRBK 302 failure Go to f 1 BRBK 304 failure Go to h 1 4 2 4 Tro...

Page 124: ...nnected Yes No Connect an AC adapter to the unit to supply AC power BRBK 303 failure Go to g 1 Does 12 V exist in pins 6 to 10 of CN2905 on the CN board No Yes Are image data and sync signals output normally from CN2902 and CN2903 on the CN board No Yes One of the following is defective FFC between SY board and CN board Q1505 or the peripheral circuit on the SY board Check above in order from the ...

Page 125: ...l on the DD board Yes No No Are the VIDEO AMP outputs normal at the _ side of C182 and at pin 22 of IC153 on the DD board Yes Video lens failure Replace the video lens VC board failure Replace the VC board Are lens iris operations normal Yes VC board failure Replace the VC board No Are outputs normal at pins 23 25 of CN001 on the DD board Yes No No Is VIDEO output resistor R160 normal on the DD bo...

Page 126: ...o scratches exist b 4 Video lens failure Replace the video lens Restart the camera block Is the problem resolved Yes No End b 3 IF 110 board failure IC403 or the peripheral circuit Replace IC403 or the IF 110 board b 2 b 2 The VISCA control software does not start b 3 Focus is abnormal b 4 The CCD is defective or has black white spots or scratches ...

Page 127: ...arness between the AC inlet and the switching power unit Harness between the switching power unit and the MC board Switching power unit Check above in order from the top to identify the defective part c Be careful Checking while applying power may result in electrical shock Are the fuses F4001 to F4003 normal on the MC board Yes No No Is the pin 92 level of IC3518 set to H on the MC board No Yes M...

Page 128: ... dust MC board failure X3001 or the peripheral circuit Replace the defective parts or the MC board Connect the laser unit SAS 101A and CCFC M100 securely Connect the AC adaptor to the BRC 300 P and supply AC power Does 3 3 V exist in pins 15 16 of CN 4401 on the MC board No Yes One of the following is defective L4403 to L4405 or the peripheral circuit 3 3 V line Check above in order from the top t...

Page 129: ...in 46 of IC3018 on the MC board Yes No MC board failure L3001 L3002 L3004 and the peripheral circuit Replace the defective parts or the MC board MC board failure IC4404 to IC4406 R3002 R3014 R4440 or the peripheral circuit Replace the defective parts or the MC board MC board failure IC3008 or the peripheral circuit Replace the defective parts or the MC board c 3 4 4 2 Image System Trouble c 3 The ...

Page 130: ...tive parts or the MC board External sync Internal sync No Is the input sync signal according to the system of this unit NTSC PAL Yes Input the sync signal according to the system of this unit NTSC PAL Remove the noise from the EXT SYNC IN connector or connect nothing to it Then check again If normal check the input system again c 4 c 4 The power indicator lights but the video output sync is abnorm...

Page 131: ...estart the system Is the cable between the RM BR300 and this unit correctly connected Yes No Connect the cable between the RM BR300 and this unit correctly Connect the FFC between the MC and SW boards correctly No Is the FFC between the MC and SW boards correctly connected Yes RM BR300 failure Go to d 2 FFC Flexible flat cable c 5 4 4 3 Communication Trouble c 5 No operation is available with RS 2...

Page 132: ...fy the defective part No Does 12 V exist in L4302 on the MC board Yes No Is the FFC between the MC and CN boards correctly connected Yes Connect the FFC between the MC and CN boards correctly No Is the FFC between the MC and CN boards correctly connected Yes MC board failure Q4002 Q4003 or the peripheral circuit Replace the defective parts or the MC board Connect the FFC between the MC and CN boar...

Page 133: ...board Yes Set correctly the mode switch according to the camera Is the FFC between the MD and SW boards correctly connected Yes FFC Flexible flat cable Replace the fuse F5001 on the MD board No No Are the power supply voltages of the SW board 5 V 3 3 V normal SW board failure 5 V or 3 3 V line or the peripheral circuit Replace the defective parts or the SW board No Is the LED control signal output...

Page 134: ...The pan tilt operations are not available while the menu is being displayed No No Does the CAMERA button corresponding to the camera address of the BRC 300 P light up Yes Press the CAMERA button corresponding to the camera address of the BRC 300 P to light it up and perform operation checks No Go to 3 Next page Is the cable between the camera and this unit correctly connected Yes No Connect correc...

Page 135: ...t No Yes No No MD board failure IC5004 or the peripheral circuit Replace the defective parts or the MD board MD board failure 5 V or 3 3 V line or the peripheral circuit Replace the defective parts or the MD board Are the 5 V and 3 3 V lines on the MD SW boards normal Yes Is the signal input to IC5004 on the MD board after the button is pressed Yes MD or SW board failure 5 V or 3 3 V line or the p...

Page 136: ...peripheral circuit Replace the defective parts or this unit No Yes No Is the pin A13 voltage of CN7001 on the AN board 0 V Yes AN board failure R7001 or the peripheral circuit Replace the defective parts or this unit No Go to 4 Next page AN board failure Replace this unit Does the unit correctly function when connected to a normal BRC 300 P Yes BRBK 301 connection failure Connect this unit to the ...

Page 137: ... No When the BRC 300 P or the BRU 300 P is normal replace this unit No Yes AN board failure Pattern disconnection of 6 75 or 13 5 MHz clock Replace this unit Are the 6 75 and 13 5 MHz clock input to the necessary ICs on the AN board No Yes Yes Is the clock input to pin C25 of CN7001 on the AN board When the BRC 300 P or the BRU 300 P is normal replace this unit No Yes Is the clock input to pin 46 ...

Page 138: ...curely No AN board failure L7015 or the peripheral circuit Replace the defective parts or this unit Replace IC7014 on the AN board Is the signal output from pin 17 of IC7015 on the AN board Yes No AN board failure Check the signals output from pins 4 to 12 of IC7015 to identify the defective part Is 3 3 V input to pin 13 of IC7015 on the AN board Yes No AN board failure L7016 or the peripheral cir...

Page 139: ... this unit AN board failure IC7019 IC7020 IC7027 to IC7031 or the peripheral circuit Replace the defective parts or this unit No AN board failure Pattern disconnection between pin A17 of CN7001and pin 1 of IC7019 and IC7020 Replace this unit Set SYNC of the ANALOG OUT menu to G or RGB according to the monitor n When the sync and video signals need to be input separately set SYNC in the ANALOG OUT ...

Page 140: ...nection failure Connect this unit securely to the BRC 300 P or the BRU 300 P No Check the model connected to this unit BRU 300 P Does the monitor support SDI input Yes Use the monitor supporting SDI input No Is only one BRBK 302 connected Yes No Turn off the power of the BRU 300 P and remove one of the cards Set the switch S8001 on the SD board correctly f 1 BRC 300 P failure Go to a 10 BRU 300 P ...

Page 141: ...D board Yes No Is the problem resolved after the adjustment in Section 3 6 Yes No When the BRC 300 P or the BRU 300 P is normal replace this unit Do the video signals exist in CL8085 to CL8094 on the SD board Yes No SD board failure IC8003 or the peripheral circuit Replace the defective parts or this unit Do the output signals exist in pins 41 43 of IC8006 on the SD board Yes No SD board failure I...

Page 142: ...p while the POWER switch on the BRU 300 P is OFF Yes No Turn on the POWER switch of the BRU 300 P and check the symptom Does 3 3 V exist in pins C4 D4 E4 of CN9001 and in pins 15 16 of CN9002 on the MX board No MX board failure L9006 to L9008 or the peripheral circuit Replace the defective parts or this unit Yes Are the pin A6 level of CN9001 on the MX board and the R004 level on the EX board set ...

Page 143: ...n the EX board No Yes Yes Is the 54 MHz clock input to pin 2 of IC9001 and to pin 8 of IC9010 on the MX board No Yes One of the following is defective IC9001 R9052 or the peripheral circuit on the MX board CN9001 on the MX board Replace the defective part or this unit Is the pin 20 level of IC9010 set to H on the MX board Yes No Is the signal input to pin 9 of IC9009 and are the pins 2 3 levels se...

Page 144: ...oes this unit correctly function when connected to a normal BRC 300 P Yes BRBK 304 connection failure Connect this unit to the BRC 300 P or the BRU 300 P securely No BRC 300 P failure Go to a 10 BRU 300 P failure Go to c 6 Match the format NTSC PAL of the DV device connected to this unit to the camera side Does this unit correctly function when the IEEE1394 cable connected between this unit and th...

Page 145: ...eral circuit Replace the defective parts or this unit Are signals output from R404 to R413 on the DV board Yes DV board failure Pattern disconnection between R228 to R237 or R084 to R094 and IC401 Replace the defective parts or this unit No 7 Yes DV board failure IC007 IC008 or the peripheral circuit Replace the defective parts or this unit No Yes DV board failure IC006 or the peripheral circuit R...

Page 146: ...is unit is connected to a DV device No Yes DV board failure IC506 L503 or the peripheral circuit Replace the defective parts or this unit Yes DV board failure IC401 IC506 or the peripheral circuit Replace the defective parts or this unit No 8 DV board failure IC502 IC503 X501 or the peripheral circuit Replace the defective parts or this unit DV board failure X301 or the peripheral circuit Replace ...

Page 147: ...l Processor IF 110 Board The VISCA microcomputer IC403 sends receives control signals and status signals to from the microcomputer on the SY 314 board with the VISCA protocol The EEPROM IC404 saves VISCA microcomputer data that must be retained even during power OFF Motors for zooming focusing and iris are controlled by the camera microcomputer on the VC 343 board The control ler IC304 and the dri...

Page 148: ...l and C signal using the 27 MHz clock and H SYNC V SYNC signals The encoder then converts the encoded signals to an analog composite signal and analog S video signals Y C Characters generated in the SY 314 board for menu display are superimposed with video data in the digital encoder Synchronization and Clock The operation of the synchronization circuit during operation of BRC 300 300P only differ...

Page 149: ...l signal emitted from the right and left sides on the front panel of BRC 300 300P is received by the SIRCS remote control receivers IC1006 and IC1007 The signal from the rear side is received by the SIRCS remote control receiver IC2201 on the SW 1204 board These signals are then input into the micro computer The menu displaying character generator IC1013 is controlled by the microcomputer Characte...

Page 150: ...CO X3001 The 54 MHz VCO output is used as the clock of the gigabit transceiver IC4401 The BRBK 303 in BRC 300 300P restores 54 MHz clock as the reference signal of BRC 300 300P from the signal that is input through an optical fiber cable The NTSC PAL mode setting switch S3001 2 is set for BRU 300 or BRU 300P The NTSC PAL switching signal is sent to the digital encoder microcomputer BRBK 301 BRBK 3...

Page 151: ...the VISCA protocol IC5009 is provided for the RS 232C interface and IC5011 for the RS 422 inter face Selection of RS 232C or RS 422 and selection of baud rate 9600 or 38400 bps are set by the DIP switch S5003 and are input to the microcomputer These selections are also provided for BRC 300 300P and BRU 300 300P Both selections shall be the same in all these three units The microcomputer makes the ...

Page 152: ...and CbCr data to the composite signal and Y C signals using the 27 MHz clock and H SYNC V SYNC signals and then converts the digital signals to analog composite signals and Y C signals Either one of the analog composite signal or analog Y C signals is selected by the selectors IC7032 and IC7033 and then output to the D sub connector Output Signal Selection and Level Adjustment The serial data CSO ...

Page 153: ... format and then outputs the video signal on the i LINK IEEE1394 interface to external device Video Audio Signal Processing The 8 bit video data Y and CbCr sent from BRC 300 300P or BRU 300 300P are multiplexed by IC008 and are converted to SMPTE125M compliant video signal SAV Start of Active Video and EAV End of Active Video codes are added to the video signal based on the FLD VD and HD signals T...

Page 154: ...such as time code to the i LINK packet generator IC401 2 2 Further it controls the DV output WIDE_ID flag using the S1_WIDE signal sent from BRC 300 300P or BRU 300 300P The DV CPU IC606 controls the IEEE1394 controller IC506 provides transaction service and handles AV C commands received Power Supply Circuit The DC DC converter IC005 generates 3 2 V from the 12 V supplied by BRC 300 300P or BRU 3...

Page 155: ... Sony differ from those used for the unit These are because of parts common ality and improvement Parts list has the present standardized repair parts 3 Stock of Parts Parts marked with o at SP Supply Code column of the spare parts list may not be stocked Therefore the delivery date will be delayed 4 Harness Harnesses with no part number are not registered as spare parts In need of repair get comp...

Page 156: ...6 PSW2 6 x 6 PSW2 6 x 6 1 2 1 1 3 1 2 BRC 300 300P Cabinets 6 2 Exploded Views No Part No SP Description 1 4 043 045 01 s FOOT RBR 2 4 382 854 01 s SCREW PSW M3X8 EP FE ZN CM2 3 4 644 493 11 s ACE M2 6 LOCK 7 621 759 40 s SCREW PSW 2 6X6 EP FE ZNBK CM ...

Page 157: ...526 103 A 8279 974 A s ASSY CAMERA CABINET UPPER 104 X 3608 843 2 s ASSY WORM GEAR 105 1 787 172 12 s MOTOR STEPPING 106 1 829 262 11 s CABLE FLEXIBLE FLAT 107 3 703 358 05 s PIN PARALLEL 2X16 STEEL 108 3 746 217 01 s SCREW TAPPING SPECIAL HEAD ST 109 3 854 288 01 s HOLDER W3 110 3 854 323 01 s FRONT CAMERA CABINET No Part No SP Description 111 3 854 324 01 s LOWER CAMERA CABINET 112 3 863 269 01 ...

Page 158: ...164 R153 C154 R151 R152 C156 IC152 C183 R161 R162 R160 DD 208 Board Side A PSW2 x 6 B2 x 3 B2 x 3 B2 x 3 B2 x 3 B2 x 3 B2 x 3 B2 x 3 B2 x 3 B2 x 3 B2 x 3 219 209 211 216 215 204 206 208 218 218 218 218 214 215 215 217 217 213 212 202 207 210 203 216 205 201 218 218 218 218 BRC 300 300P Camera Block ...

Page 159: ... 217 3 713 791 61 s SCREW P M1 7X7 TAPPING ZN CM2 218 3 746 217 01 s SCREW TAPPING SPECIAL HEAD ST 219 3 854 318 01 s RING FILTER 7 621 772 08 s SCREW B2X3 7 628 000 05 s PSW 2X6 DD 208 BOARD C154 1 137 859 11 s CAPACITOR TANTALUM 220MF 3528 C156 1 137 859 11 s CAPACITOR TANTALUM 220MF 3528 C164 1 137 859 11 s CAPACITOR TANTALUM 220MF 3528 C182 1 137 859 11 s CAPACITOR TANTALUM 220MF 3528 C183 1 1...

Page 160: ...T BOARD CC 91 303 A 1058 057 A s MOUNTED CIRCUIT BOARD DC 130 304 A 1059 742 A s CHASSIS ASSY CN 305 A 1059 743 A s SY 314 ASSY WITH MOUNT 306 X 3608 843 2 s ASSY WORM GEAR 307 1 400 795 11 s CORE FERRITE 308 1 566 850 41 s CONNECTOR S TERMINAL 4P 309 1 774 806 11 s CONNECTOR ROUND TYPE 310 1 787 172 12 s MOTOR STEPPING No Part No SP Description 311 1 793 002 21 s CONNECTOR COAXIAL BNC TYPE 312 3 ...

Page 161: ...RCUIT BOARD LE 281 404 A 1058 063 A s MOUNTED CIRCUIT BOARD SW 1207 405 1 468 857 11 s POWER SWITCHING 406 3 655 214 00 o CLIP CABLE 407 3 681 054 01 o POWER SW GUARD 408 3 688 814 01 s CAP SWITCH 409 3 790 099 01 s SHIELD S VIDEO 410 3 854 892 01 s CAP No Part No SP Description 411 3 941 343 01 s TAPE A 412 4 043 045 01 s FOOT RBR 413 4 382 854 01 s SCREW PSW M3X8 EP FE ZN CM2 414 4 682 750 01 s ...

Page 162: ...BR300 Overall No Part No SP Description 501 A 1058 064 A s MOUNTED CIRCUIT BOARD MD 131 502 A 1058 065 A s MOUNTED CIRCUIT BOARD SW 1205 503 1 478 762 11 s CONTROLLER JOYSTICK 504 1 818 103 11 s PLUG CONNECTOR 9P 505 3 826 969 01 s KNOB SLIDE 7 682 546 09 s SCREW B3X5 7 682 548 09 s SCREW B 3X8 7 682 549 09 s SCREW B 3X10 ...

Page 163: ...PSW2 x 6 E 2 3 E 2 3 BRBK 302 BRBK 303 BRBK Series No Part No SP Description 601 3 854 892 01 s CAP 602 4 382 854 01 s SCREW PSW M3X8 EP FE ZN CM2 603 8 713 105 37 s SAS 101A 7 621 759 40 s SCREW PSW 2 6X6 EP FE ZNBK CM 7 621 772 20 s SCREW B 2X5 7 621 775 10 s SCREW B2 6X4 7 624 105 04 s STOP RING 2 3 TYPE E 7 628 000 05 s PSW 2X6 7 682 947 01 s SCREW PSW 3X6 ...

Page 164: ...s CAPACITOR CERAMIC 10MF 2012 CC 91 BOARD Ref No or Q ty Part No SP Description C055 1 165 989 11 s CAPACITOR CERAMIC 10MF 2012 C056 1 165 989 11 s CAPACITOR CERAMIC 10MF 2012 C057 1 164 943 11 s CAPACITOR CHIP CERAMIC 0 01MF C058 1 164 943 11 s CAPACITOR CHIP CERAMIC 0 01MF C059 1 164 943 11 s CAPACITOR CHIP CERAMIC 0 01MF C060 1 165 989 11 s CAPACITOR CERAMIC 10MF 2012 C061 1 164 943 11 s CAPACI...

Page 165: ...NNECTOR FFC FPC ZIF 30P CN807 1 766 360 21 s CONNECTOR FFC FPC LIF 30P D601 8 719 421 27 s DIODE MA728 D602 8 719 059 53 s DIODE MA3J14700LSO FB001 1 414 445 11 s FERRITE EMI SMD CC 91 BOARD Ref No or Q ty Part No SP Description FB801 1 414 864 11 s INDUCTOR MICRO CHIP TYPE FB802 1 414 864 11 s INDUCTOR MICRO CHIP TYPE FB803 1 414 864 11 s INDUCTOR MICRO CHIP TYPE FB804 1 414 864 11 s INDUCTOR MIC...

Page 166: ...905 35 s TRANSISTOR 2SC4081 R R019 1 218 990 11 s RESISTOR CHIP 0 1 16W 1005 R020 1 218 990 11 s RESISTOR CHIP 0 1 16W 1005 R021 1 218 990 11 s RESISTOR CHIP 0 1 16W 1005 R022 1 218 990 11 s RESISTOR CHIP 0 1 16W 1005 R023 1 218 990 11 s RESISTOR CHIP 0 1 16W 1005 R024 1 218 990 11 s RESISTOR CHIP 0 1 16W 1005 R025 1 218 990 11 s RESISTOR CHIP 0 1 16W 1005 R026 1 218 990 11 s RESISTOR CHIP 0 1 16W...

Page 167: ...SISTOR CHIP 3 3K R177 1 218 965 11 s RESISTOR CHIP 10K 1 16W R178 1 218 966 11 s RESISTOR CHIP 12K CC 91 BOARD Ref No or Q ty Part No SP Description R179 1 218 953 11 s RESISTOR CHIP 1K 1 16W R180 1 218 965 11 s RESISTOR CHIP 10K 1 16W R181 1 218 941 81 s RESISTOR CHIP 100 1 16W 1005 R182 1 218 827 11 s RESISTOR CHIP 150 1 10W 1608 R183 1 218 827 11 s RESISTOR CHIP 150 1 10W 1608 R184 1 218 827 11...

Page 168: ...16W 1005 R311 1 208 635 11 s RESISTOR CHIP 10 1 16W 1005 R312 1 208 635 11 s RESISTOR CHIP 10 1 16W 1005 R313 1 208 635 11 s RESISTOR CHIP 10 1 16W 1005 R314 1 208 635 11 s RESISTOR CHIP 10 1 16W 1005 R315 1 208 635 11 s RESISTOR CHIP 10 1 16W 1005 R316 1 208 635 11 s RESISTOR CHIP 10 1 16W 1005 R317 1 208 635 11 s RESISTOR CHIP 10 1 16W 1005 R318 1 208 635 11 s RESISTOR CHIP 10 1 16W 1005 R319 1 ...

Page 169: ...AMIC 0 01MF 25V B C2510 1 125 777 11 s CAPACITOR CERAMIC 0 1MF 10V C2511 1 137 894 21 s CAPACITOR ELECT CIHP TYPE 470 C2512 1 164 937 11 s CAPACITOR CHIP CERAMIC 1000PF C2513 1 164 937 11 s CAPACITOR CHIP CERAMIC 1000PF C2514 1 164 937 11 s CAPACITOR CHIP CERAMIC 1000PF C2515 1 164 937 11 s CAPACITOR CHIP CERAMIC 1000PF C2516 1 164 937 11 s CAPACITOR CHIP CERAMIC 1000PF C2517 1 164 937 11 s CAPACI...

Page 170: ...OJF IC2002 6 700 763 01 s IC DS90CR287MTDX IC2003 8 759 669 75 s IC TLC2932IPWR IC2004 6 706 487 01 s IC TC7SH08FU T5RSOYJF IC2005 8 759 447 77 s IC TC7WH74FU TE12R IC2006 8 759 642 22 s IC UPC29M05T E2 IC2007 8 759 559 82 s IC UPC29M33T E1 IC2008 8 759 656 54 s IC TC7WH14FK TE85R L2001 1 414 754 11 s INDUCTOR 10 0UH L2002 1 414 754 11 s INDUCTOR 10 0UH L2003 1 456 165 11 s COIL CHOKE SMD L2004 1 ...

Page 171: ...IODE MA3130WA TX D2213 8 719 421 59 s DIODE MA3130WA TX D2214 8 719 421 59 s DIODE MA3130WA TX D2215 8 719 421 59 s DIODE MA3130WA TX D2216 8 719 421 59 s DIODE MA3130WA TX D2217 8 719 421 59 s DIODE MA3130WA TX D2218 8 719 421 59 s DIODE MA3130WA TX D2219 8 719 421 59 s DIODE MA3130WA TX D2220 8 719 421 59 s DIODE MA3130WA TX D2221 8 719 421 59 s DIODE MA3130WA TX FB2201 1 500 282 11 s INDUCTOR F...

Page 172: ...C 0 1MF 10V C1065 1 125 777 11 s CAPACITOR CERAMIC 0 1MF 10V SY 314 BOARD Ref No or Q ty Part No SP Description C1066 1 125 777 11 s CAPACITOR CERAMIC 0 1MF 10V C1068 1 164 941 11 s CAPACITOR CHIP CERAMIC 4700 16 C1069 1 164 941 11 s CAPACITOR CHIP CERAMIC 4700 16 C1077 1 125 777 11 s CAPACITOR CERAMIC 0 1MF 10V C1078 1 125 777 11 s CAPACITOR CERAMIC 0 1MF 10V C1079 1 164 943 11 s CAPACITOR CHIP C...

Page 173: ...C1018 8 759 656 54 s IC TC7WH14FK TE85R IC1019 6 702 624 01 s IC HD64F2377VFQ33V IC1501 8 759 490 69 s IC LM2596SX 3 3 SY 314 BOARD Ref No or Q ty Part No SP Description IC1502 8 759 060 93 s IC MB3785APFV IC1503 8 759 642 22 s IC UPC29M05T E2 IC1504 8 759 446 74 s IC TA79L05F TE12L L1001 1 414 754 11 s INDUCTOR 10 0UH L1002 1 414 754 11 s INDUCTOR 10 0UH L1003 1 414 754 11 s INDUCTOR 10 0UH L1004...

Page 174: ... RESISTOR CHIP 10K 1 16W R1100 1 218 941 81 s RESISTOR CHIP 100 1 16W 1005 R1101 1 218 965 11 s RESISTOR CHIP 10K 1 16W SY 314 BOARD Ref No or Q ty Part No SP Description R1102 1 218 965 11 s RESISTOR CHIP 10K 1 16W R1103 1 218 990 11 s RESISTOR CHIP 0 1 16W 1005 R1104 1 218 965 11 s RESISTOR CHIP 10K 1 16W R1105 1 218 990 11 s RESISTOR CHIP 0 1 16W 1005 R1106 1 218 965 11 s RESISTOR CHIP 10K 1 16...

Page 175: ...15K 1 16W 1005 R1519 1 218 979 11 s RESISTOR CHIP 150K R1520 1 218 977 11 s RESISTOR CHIP 100K 1 16W 1005 R1521 1 208 709 11 s RESISTOR CHIP 12K 1 16W 1005 R1522 1 208 711 11 s RESISTOR CHIP 15K 1 16W 1005 R1523 1 208 701 11 s RESISTOR CHIP 5 6K 1 16W 1005 R1524 1 208 909 11 s RESISTOR CHIP 8 2K 1 16W 1005 R1525 1 208 721 11 s RESISTOR CHIP 39K 1 16W 1005 R1526 1 208 922 11 s RESISTOR CHIP CHIP 30...

Page 176: ... BOARD FROM CN1002 SY 314 BOARD TO CN2501 DR 526 BOARD HN006 HARNESS SUB DC SY TO CN1501 SY 314 BOARD 1pc 1 764 196 11 o HOUSING CONNECTOR 8P 8pcs 1 695 215 11 o TERMINAL SOLDERLESS TO CN2451 DC 130 BOARD 1pc 1 764 196 11 o HOUSING CONNECTOR 8P 8pcs 1 695 215 11 o TERMINAL SOLDERLESS 6 3 2 BRU 300 300P CN 2548 BOARD Ref No or Q ty Part No SP Description 1pc A 1058 061 A s MOUNTED CIRCUIT BOARD CN ...

Page 177: ... 0 01MF C3078 1 100 159 91 s CAP CERAMIC 22MF B SMD 3216 C3079 1 165 989 11 s CAPACITOR CERAMIC 10MF 2012 MC 66 BOARD Ref No or Q ty Part No SP Description C3080 1 125 777 11 s CAPACITOR CERAMIC 0 1MF 10V C3081 1 125 777 11 s CAPACITOR CERAMIC 0 1MF 10V C3082 1 164 858 11 s CAPACITOR CERAMIC 22PF 50V C3084 1 164 858 11 s CAPACITOR CERAMIC 22PF 50V C3086 1 164 858 11 s CAPACITOR CERAMIC 22PF 50V C3...

Page 178: ... 135 960 91 s CAP CHIP CERAMIC 10MF B 3225 C4039 1 127 692 11 s CAP CHIP CERAMIC 10MF B 3216 C4040 1 127 692 11 s CAP CHIP CERAMIC 10MF B 3216 C4041 1 135 342 11 s CAPACITOR SOLID ELECT 56MF MC 66 BOARD Ref No or Q ty Part No SP Description C4042 1 135 342 11 s CAPACITOR SOLID ELECT 56MF C4043 1 165 811 11 s CAPACITOR CHIP CERAMIC 22MF B C4044 1 135 342 11 s CAPACITOR SOLID ELECT 56MF C4045 1 135 ...

Page 179: ...U TE12R IC3006 6 706 489 01 s IC TC7SH32FU T5RSOYJF IC3007 6 706 478 01 s IC TC7SET08FU T5RSOJF MC 66 BOARD Ref No or Q ty Part No SP Description IC3008 8 759 672 76 s IC AK9813BF E2 IC3009 8 752 335 47 s IC CXD1216M IC3010 6 706 478 01 s IC TC7SET08FU T5RSOJF IC3011 6 706 489 01 s IC TC7SH32FU T5RSOYJF IC3012 6 706 492 01 s IC TC7SHU04FU T5RSOJF IC3013 6 706 478 01 s IC TC7SET08FU T5RSOJF IC3014 ...

Page 180: ...7 R3001 1 218 990 11 s RESISTOR CHIP 0 1 16W 1005 R3002 1 218 990 11 s RESISTOR CHIP 0 1 16W 1005 R3003 1 218 989 11 s RESISTOR CHIP 1M 1 16W 1005 R3004 1 218 990 11 s RESISTOR CHIP 0 1 16W 1005 R3006 1 218 990 11 s RESISTOR CHIP 0 1 16W 1005 R3009 1 218 990 11 s RESISTOR CHIP 0 1 16W 1005 R3012 1 218 990 11 s RESISTOR CHIP 0 1 16W 1005 R3014 1 218 990 11 s RESISTOR CHIP 0 1 16W 1005 R3016 1 218 9...

Page 181: ...965 11 s RESISTOR CHIP 10K 1 16W R3548 1 218 965 11 s RESISTOR CHIP 10K 1 16W R3549 1 218 965 11 s RESISTOR CHIP 10K 1 16W MC 66 BOARD Ref No or Q ty Part No SP Description R3550 1 218 965 11 s RESISTOR CHIP 10K 1 16W R3551 1 218 965 11 s RESISTOR CHIP 10K 1 16W R3552 1 218 965 11 s RESISTOR CHIP 10K 1 16W R3562 1 218 990 11 s RESISTOR CHIP 0 1 16W 1005 R3563 1 218 990 11 s RESISTOR CHIP 0 1 16W 1...

Page 182: ...16W 1608 R4009 1 218 974 11 s RESISTOR CHIP 56K 1 16W 1005 MC 66 BOARD Ref No or Q ty Part No SP Description R4010 1 208 927 11 s RESISTOR CHIP 47K 1 16W 1005 R4011 1 218 953 11 s RESISTOR CHIP 1K 1 16W R4012 1 218 965 11 s RESISTOR CHIP 10K 1 16W R4013 1 208 927 11 s RESISTOR CHIP 47K 1 16W 1005 R4014 1 218 957 11 s RESISTOR CHIP 2 2K 1 16W 1608 R4016 1 218 973 11 s RESISTOR CHIP 47K 1 16W 1005 R...

Page 183: ...IP 0 1 16W 1005 R4439 1 218 990 11 s RESISTOR CHIP 0 1 16W 1005 R4440 1 218 940 11 s RESISTOR CHIP 82 R4441 1 218 940 11 s RESISTOR CHIP 82 R4442 1 218 940 11 s RESISTOR CHIP 82 R4443 1 218 940 11 s RESISTOR CHIP 82 R4444 1 218 940 11 s RESISTOR CHIP 82 R4445 1 218 940 11 s RESISTOR CHIP 82 R4446 1 218 940 11 s RESISTOR CHIP 82 R4447 1 218 940 11 s RESISTOR CHIP 82 R4448 1 218 940 11 s RESISTOR CH...

Page 184: ...165 989 11 s CAPACITOR CERAMIC 10MF 2012 C5016 1 127 692 11 s CAP CHIP CERAMIC 10MF B 3216 C5017 1 125 777 11 s CAPACITOR CERAMIC 0 1MF 10V C5018 1 165 989 11 s CAPACITOR CERAMIC 10MF 2012 C5019 1 125 777 11 s CAPACITOR CERAMIC 0 1MF 10V C5020 1 125 777 11 s CAPACITOR CERAMIC 0 1MF 10V C5021 1 125 777 11 s CAPACITOR CERAMIC 0 1MF 10V C5022 1 165 989 11 s CAPACITOR CERAMIC 10MF 2012 C5023 1 125 777...

Page 185: ... 414 226 21 s INDUCTOR FERRITE BEAD FB5018 1 414 226 21 s INDUCTOR FERRITE BEAD MD 131 BOARD Ref No or Q ty Part No SP Description FB5019 1 414 226 21 s INDUCTOR FERRITE BEAD FB5020 1 414 226 21 s INDUCTOR FERRITE BEAD FB5021 1 414 226 21 s INDUCTOR FERRITE BEAD FB5022 1 414 226 21 s INDUCTOR FERRITE BEAD FB5023 1 414 226 21 s INDUCTOR FERRITE BEAD FB5024 1 414 226 21 s INDUCTOR FERRITE BEAD FB502...

Page 186: ...SISTOR CHIP 0 1 16W 1005 R5078 1 218 990 11 s RESISTOR CHIP 0 1 16W 1005 R5079 1 218 990 11 s RESISTOR CHIP 0 1 16W 1005 MD 131 BOARD Ref No or Q ty Part No SP Description R5080 1 218 990 11 s RESISTOR CHIP 0 1 16W 1005 R5081 1 218 990 11 s RESISTOR CHIP 0 1 16W 1005 R5082 1 218 990 11 s RESISTOR CHIP 0 1 16W 1005 R5083 1 218 990 11 s RESISTOR CHIP 0 1 16W 1005 R5084 1 218 990 11 s RESISTOR CHIP 0...

Page 187: ... 777 11 s CAPACITOR CERAMIC 0 1MF 10V C6005 1 125 777 11 s CAPACITOR CERAMIC 0 1MF 10V C6006 1 125 777 11 s CAPACITOR CERAMIC 0 1MF 10V C6007 1 125 777 11 s CAPACITOR CERAMIC 0 1MF 10V C6008 1 125 777 11 s CAPACITOR CERAMIC 0 1MF 10V C6009 1 125 777 11 s CAPACITOR CERAMIC 0 1MF 10V C6010 1 125 777 11 s CAPACITOR CERAMIC 0 1MF 10V C6011 1 125 777 11 s CAPACITOR CERAMIC 0 1MF 10V C6012 1 125 777 11 ...

Page 188: ...Ref No or Q ty Part No SP Description Q6005 8 729 928 81 s TRANSISTOR DTC144EE Q6006 8 729 928 81 s TRANSISTOR DTC144EE Q6007 8 729 928 81 s TRANSISTOR DTC144EE Q6008 8 729 928 81 s TRANSISTOR DTC144EE Q6009 8 729 928 81 s TRANSISTOR DTC144EE Q6010 8 729 928 81 s TRANSISTOR DTC144EE Q6011 8 729 928 81 s TRANSISTOR DTC144EE Q6012 8 729 928 81 s TRANSISTOR DTC144EE Q6013 8 729 928 81 s TRANSISTOR DT...

Page 189: ...005 R6084 1 218 941 81 s RESISTOR CHIP 100 1 16W 1005 R6085 1 216 819 11 s RESISTOR CHIP 680 1 10W 1608 R6086 1 216 813 11 s RESISTOR CHIP 220 1 10W 1608 SW 1205 BOARD Ref No or Q ty Part No SP Description R6087 1 216 819 11 s RESISTOR CHIP 680 1 10W 1608 R6088 1 218 965 11 s RESISTOR CHIP 10K 1 16W R6089 1 218 965 11 s RESISTOR CHIP 10K 1 16W R6090 1 216 819 11 s RESISTOR CHIP 680 1 10W 1608 R609...

Page 190: ... CHIP CERAMIC 470PF C7017 1 164 935 11 s CAPACITOR CHIP CERAMIC 470PF C7018 1 125 777 11 s CAPACITOR CERAMIC 0 1MF 10V C7019 1 125 777 11 s CAPACITOR CERAMIC 0 1MF 10V C7020 1 125 777 11 s CAPACITOR CERAMIC 0 1MF 10V C7021 1 135 960 91 s CAP CHIP CERAMIC 10MF B 3225 C7022 1 135 960 91 s CAP CHIP CERAMIC 10MF B 3225 C7023 1 135 960 91 s CAP CHIP CERAMIC 10MF B 3225 C7024 1 135 960 91 s CAP CHIP CER...

Page 191: ... 777 11 s CAPACITOR CERAMIC 0 1MF 10V C7120 1 164 872 11 s CAPACITOR CHIP CERAMIC 82PF 50 C7121 1 164 872 11 s CAPACITOR CHIP CERAMIC 82PF 50 C7122 1 164 872 11 s CAPACITOR CHIP CERAMIC 82PF 50 C7123 1 127 760 11 s CAPACITOR CERAMIC 4 7MF 6 3V AN 22 BOARD BRBK 301 Ref No or Q ty Part No SP Description C7124 1 127 760 11 s CAPACITOR CERAMIC 4 7MF 6 3V C7125 1 127 760 11 s CAPACITOR CERAMIC 4 7MF 6 ...

Page 192: ...0 1 16W 1005 R7004 1 218 990 11 s RESISTOR CHIP 0 1 16W 1005 R7005 1 218 990 11 s RESISTOR CHIP 0 1 16W 1005 R7006 1 218 970 11 s RESISTOR CHIP 27K 1 16W 1005 R7007 1 218 970 11 s RESISTOR CHIP 27K 1 16W 1005 R7008 1 208 683 11 s RESISTOR CHIP 1K 1 16W 1005 R7009 1 208 683 11 s RESISTOR CHIP 1K 1 16W 1005 R7010 1 218 990 11 s RESISTOR CHIP 0 1 16W 1005 R7011 1 208 699 11 s RESISTOR CHIP 4 7K 1 16W...

Page 193: ...ESISTOR CHIP 470 1 16W 1005 R7114 1 208 719 11 s RESISTOR CHIP 33K 1 16W 1005 R7115 1 208 707 11 s RESISTOR CHIP 10K 1 16W 1005 R7116 1 208 715 11 s RESISTOR CHIP 22K 1 16W 1005 AN 22 BOARD BRBK 301 Ref No or Q ty Part No SP Description R7117 1 208 719 11 s RESISTOR CHIP 33K 1 16W 1005 R7118 1 218 990 11 s RESISTOR CHIP 0 1 16W 1005 R7119 1 218 990 11 s RESISTOR CHIP 0 1 16W 1005 R7120 1 218 990 1...

Page 194: ...53 1 125 777 11 s CAPACITOR CERAMIC 0 1MF 10V C8054 1 125 777 11 s CAPACITOR CERAMIC 0 1MF 10V C8055 1 125 777 11 s CAPACITOR CERAMIC 0 1MF 10V SD 50 BOARD BRBK 302 Ref No or Q ty Part No SP Description C8056 1 100 159 91 s CAP CERAMIC 22MF B SMD 3216 C8057 1 100 159 91 s CAP CERAMIC 22MF B SMD 3216 C8058 1 125 777 11 s CAPACITOR CERAMIC 0 1MF 10V C8059 1 100 159 91 s CAP CERAMIC 22MF B SMD 3216 C...

Page 195: ...P 0 1 16W 1005 SD 50 BOARD BRBK 302 Ref No or Q ty Part No SP Description R8039 1 218 990 11 s RESISTOR CHIP 0 1 16W 1005 R8040 1 218 990 11 s RESISTOR CHIP 0 1 16W 1005 R8041 1 218 990 11 s RESISTOR CHIP 0 1 16W 1005 R8042 1 218 990 11 s RESISTOR CHIP 0 1 16W 1005 R8043 1 218 990 11 s RESISTOR CHIP 0 1 16W 1005 R8044 1 218 965 11 s RESISTOR CHIP 10K 1 16W R8045 1 218 965 11 s RESISTOR CHIP 10K 1 ...

Page 196: ...8 1 125 777 11 s CAPACITOR CERAMIC 0 1MF 10V C9039 1 125 777 11 s CAPACITOR CERAMIC 0 1MF 10V C9040 1 165 884 91 s CAPACITOR CERAMIC 2 2MF 1608 C9041 1 164 943 11 s CAPACITOR CHIP CERAMIC 0 01MF C9042 1 164 943 11 s CAPACITOR CHIP CERAMIC 0 01MF C9043 1 165 884 91 s CAPACITOR CERAMIC 2 2MF 1608 C9044 1 165 884 91 s CAPACITOR CERAMIC 2 2MF 1608 C9045 1 125 777 11 s CAPACITOR CERAMIC 0 1MF 10V C9046...

Page 197: ... 699 11 s RESISTOR CHIP 4 7K 1 16W 1005 R9008 1 218 967 11 s RESISTOR CHIP 15K 1 16W 1608 R9009 1 218 967 11 s RESISTOR CHIP 15K 1 16W 1608 R9010 1 218 965 11 s RESISTOR CHIP 10K 1 16W R9011 1 218 965 11 s RESISTOR CHIP 10K 1 16W R9012 1 208 701 11 s RESISTOR CHIP 5 6K 1 16W 1005 R9013 1 208 701 11 s RESISTOR CHIP 5 6K 1 16W 1005 R9014 1 208 691 11 s RESISTOR CHIP 2 2K 1 16W 1005 R9015 1 208 691 1...

Page 198: ...ITOR CERAMIC 0 1MF 10V C213 1 125 777 11 s CAPACITOR CERAMIC 0 1MF 10V C214 1 125 777 11 s CAPACITOR CERAMIC 0 1MF 10V DV 33 BOARD BRBK 304 Ref No or Q ty Part No SP Description C215 1 125 777 11 s CAPACITOR CERAMIC 0 1MF 10V C216 1 125 777 11 s CAPACITOR CERAMIC 0 1MF 10V C217 1 125 777 11 s CAPACITOR CERAMIC 0 1MF 10V C218 1 125 777 11 s CAPACITOR CERAMIC 0 1MF 10V C219 1 125 777 11 s CAPACITOR ...

Page 199: ...MF 10V C612 1 107 826 11 s CAPACITOR CHIP CERAMIC 0 1MF C613 1 107 826 11 s CAPACITOR CHIP CERAMIC 0 1MF C614 1 125 777 11 s CAPACITOR CERAMIC 0 1MF 10V C615 1 125 777 11 s CAPACITOR CERAMIC 0 1MF 10V C616 1 100 159 91 s CAP CERAMIC 22MF B SMD 3216 C617 1 125 777 11 s CAPACITOR CERAMIC 0 1MF 10V C618 1 125 777 11 s CAPACITOR CERAMIC 0 1MF 10V C619 1 125 777 11 s CAPACITOR CERAMIC 0 1MF 10V DV 33 B...

Page 200: ...8 965 11 s RESISTOR CHIP 10K 1 16W R074 1 218 990 11 s RESISTOR CHIP 0 1 16W 1005 DV 33 BOARD BRBK 304 Ref No or Q ty Part No SP Description R075 1 218 965 11 s RESISTOR CHIP 10K 1 16W R076 1 218 990 11 s RESISTOR CHIP 0 1 16W 1005 R077 1 218 965 11 s RESISTOR CHIP 10K 1 16W R078 1 218 990 11 s RESISTOR CHIP 0 1 16W 1005 R079 1 218 965 11 s RESISTOR CHIP 10K 1 16W R080 1 218 953 11 s RESISTOR CHIP...

Page 201: ...R601 1 218 941 11 s RESISTOR CHIP 100 1 16W 1005 R602 1 218 941 81 s RESISTOR CHIP 100 1 16W 1005 R603 1 208 709 11 s RESISTOR CHIP 12K 1 16W 1005 R604 1 218 990 11 s RESISTOR CHIP 0 1 16W 1005 R605 1 218 941 11 s RESISTOR CHIP 100 1 16W 1005 R606 1 218 941 11 s RESISTOR CHIP 100 1 16W 1005 R607 1 218 941 11 s RESISTOR CHIP 100 1 16W 1005 R608 1 218 941 11 s RESISTOR CHIP 100 1 16W 1005 R609 1 218...

Page 202: ...ied Accessories for BRU 300 300P A BRU 300 J B BRU 300 UC C BRU 300P CE Ref No or Q ty Part No SP Description 1pc A 1 791 041 11 s CORD SET POWER 3P B 1 556 813 22 s CORD POWER C 1 551 631 00 s POWER SUPPLY CORD IEC 1pc A 1 793 461 12 s PLUG CONVERSION 3P 2P 1pc 1 590 879 31 s CORD CONNECTION DIN 8P 1pc 1 818 103 11 s PLUG CONNECTOR 9P 1pc 3 854 214 02 s OPERATING INSTRUCTIONS Supplied Accessories...

Page 203: ... 02 HSM88WK DC001 03 HSM88WK TL DC001 03 KV1471ETR DC008 05 M1FS4 4063 DC008 02 MA111 K8 S0 DC008 01 MA111 TX DC008 01 MA3130WA TX DC001 18 MA3J14700LSO DC001 01 MA728 K8 S0 DC008 01 MBRS340T3 DC013 01 NSAD500H T1 A DC014 04 SB05 05CP DC001 06 SB05 05CP TB DC001 06 SML 020MLTT86 LC009 02 SML 510MWT86 LC004 01 LED Page or ID No CL 190UB2 X T LC004 01 CL 196YG CD T LC001 01 CL 200D C TU LC008 01 CL ...

Page 204: ...6AE TC74LCX00FT EL TC74HC00P TC74LCX02FT EL TC74HC02P TC74LCX04FT EL TC74HC04P TC74LCX08FT EL TC74HC08P TC74LCX245FT EL TC74HC245P TC74LCX541FT EL MC74HC541N TC74LCX574FT EL TC74HC574P IC Page or ID No TC74LCX74FT EL TC74HC74P TC74VHC125FT EL MC74HC125N TC74VHCT08AFT EL TC74HC08P TC7SET08FU T5RSOJF TC7S08F TC7SET08FU TE85R TC7S08F TC7SH00FU T5RSOYJF TC7S00F TC7SH00FU TE85R TC7S00F TC7SH02FU TC4S01...

Page 205: ... NC NC NC A GND I I I O I O I I SDAEN SCL SDA GND RESET NC VCC ORDY RRST RCK GND I I O O O O O O O O OE RE DO7 DO6 DO5 DO4 VCC DO3 DO2 DO1 DO0 I I I I I I I I I I I I O I I 12 13 14 15 16 17 18 19 20 21 22 23 24 25 26 27 28 29 30 31 32 33 34 35 36 37 38 39 40 41 42 43 44 1 2 3 4 5 6 7 8 9 10 11 INPUTS DI0 DI7 IE OE PLRTY RCK RE RESET RRST SCL SDAEN TEST WCK WE WRST OUTPUTS DO0 DO7 IRDY ORDY INPUT ...

Page 206: ...19 _ 1 RXOUT26 RXOUT25 RXOUT24 RXOUT22 RXOUT21 RXOUT20 RXOUT19 RXOUT9 _ 1 RXIN1 RXOUT8 _ 1 RXOUT18 RXOUT15 RXOUT14 RXOUT13 RXOUT12 RXOUT9 RXOUT8 RXOUT1 _ 1 RXIN0 RXOUT0 _ 1 RXOUT7 RXOUT6 RXOUT4 RXOUT3 RXOUT2 RXOUT1 RXOUT0 PIN NO I O SIGNAL PIN NO I O SIGNAL PIN NO I O SIGNAL PIN NO I O SIGNAL IO IO IO IO IO IO IO VCCIO GND IO IO IO DATA0 CONFIG A VCC PLL CLK0 CLK1 A GND PLL GND PLL CEO CE MSEL0 MS...

Page 207: ...A CHIP SELECT CLOCK DATA SERIAL CONFIGURATION EEPROM TOP VIEW CONTOL LOGIC I O SHIFT REGISTER DATA BUFFER MEMORY ARRAY DECODE LOGIC STATUS REGISTER ADDRESS COUNTER CS DCLK 1 6 DATA ASDI 2 5 IC MAX3243CDBR TI EPCS1SI8N ALTERA x 1 1 0 0 0 0 0 1 1 1 1 1 1 POWER OFF NORMAL OPERATION AUTO POWER DOWN DISABLE NORMAL OPERATION AUTO POWER DOWN ENABLE POWER OFF BY AUTO POWER DOWN x 0 1 0 1 0 1 FORCEON FORCE...

Page 208: ...D0 IRQ10 2 PF0 WAIT PF1 IRQ14 2 UCAS PF2 IRQ15 2 LCAS PF3 LWR PF4 HWR PF5 RD PF6 AS PLLVCC RES PLLPLLGND PF7 SCLK GND XTAL EXTAL VCC VCC NC NC GND STBY P63 TMCI1 TEND1 IRQ11 2 P64 TMO0 DACK0 IRQ12 2 P65 TMO1 DACK1 IRQ13 2 PG0 CS0 PG1 CS1 109 110 111 112 113 114 115 116 117 118 119 120 121 122 123 124 125 126 127 128 129 130 131 132 133 134 135 136 137 138 139 140 141 142 143 144 I O I O I I I I I ...

Page 209: ...TE A GND A GND PD 0 0 1 0 1 x LOW LEVEL HIGH LEVEL DON T CARE LAST STATE PRIOR TO STANDBY MODE D0 D1 D2 D3 D4 D5 D6 D7 D8 D9 CLK 8 9 10 11 12 13 14 15 16 17 6 REN 7 REFO REFR 21 20 DAC SWITCHES MSB DECODE MSB DECODE INPUT LATCHES OUTPUT LATCHES INPUT LATCHES OUTPUT LATCHES _ CURRENT SOURCE ARRAY OUTP OUTN 23 24 CREF 22 1 2 V REF MAX5184ETG TG069 MAXIM IC INPUTS OUTPUTS D0 D15 P10 P17 P20 P27 P30 P...

Page 210: ...L OTHER XVREF BLUE SIGNAL RGB MODE COMPOSITE BLANKING SIGNAL CHROMINANCE SIGNAL CLOCK DAC PHASE COMPENSATION DAC FULL SCALE ADJUSTMENT GREEN SIGNAL RGB MODE MODE SELECT CONTROLLER CONTROLLED SELECT OVERLAY COLOR BLUE TRANSPARENT CONTROL OVERLAY COLOR GREEN OVERLAY COLOR RED OUTPUT SIGNAL SELECT RED SIGNAL RGB MODE SYSTEM RESET INPUT SIGNAL SELECT I 2 C INTERFACE CLOCK TEST LUMINANCE SIGNAL ANALOG ...

Page 211: ... TMP3 LPS TM0 TM1 VCC GND ENEC VCC PLLFLT GND VCC GND XI XO PIN NO I O SIGNAL PIN NO I O SIGNAL PIN NO I O SIGNAL PIN NO I O SIGNAL 61 62 63 64 65 66 67 68 69 70 71 72 73 74 75 76 77 78 79 80 40 39 38 37 36 35 34 33 32 31 30 29 28 27 26 25 24 23 22 21 60 59 58 57 56 55 54 53 52 51 50 49 48 47 46 45 44 43 42 41 1 2 3 4 5 6 7 8 9 10 11 12 13 14 15 16 17 18 19 20 INPUTS ALE CS ENEC FR OFR ICLK IDIR I...

Page 212: ......

Page 213: ...AMERA MICRO COMPUTER EEPROM IC901 AD IC505 IC506 AD IC504 AD TIMING GENERATOR EVR IC503 VC 343 LENS BLOCK CDS CCD R CCD G CDS CCD B CDS LENS M ZOOM FOCUS M IRIS M 402 1 402 4 402 5 402 8 ADJUSTMENT USE KEY AD0 KEY AD7 401 3 401 7 401 12 NC VISCA MICRO COMPUTER KEY VISCA IC404 EEPROM IC403 CLOCK IC402 MOTOR CONTROLLER MOTOR DRIVER IC304 IC303 IF 110 BOARD BOARD BOARD 2 2 2 2 Y C PIX CLK HD OUT VD O...

Page 214: ...DET PH001 M PAN MOTOR PH2151 TILT REV DET PH2153 TILT L DET TILT U DET PH2152 BOARD SE 758 2151 2 2151 4 2502 3 2502 5 BOARD DR 526 TILT MOTOR M 2503 5 2503 1 IC2503 DRIVER MOTOR 5V 3 3V IC2501 POWER GREEN STANDBY ORANGE D1007 D1009 D1008 D1010 MICROCOMPUTER IC1019 TILT DET U L REV ECO RESET CW CCW AW OFF F H MOTOR VM 12V IC1007 RECEIVER REMOTE CTRL REMOTE CTRL RECEIVER IC1006 SIRCS 0 SIRCS 1 SIRC...

Page 215: ...130 BOARD PW CONT B OPT B SDI B ANALOG TEST SIG1 TX RX OPE ADJ WRSW XCE AN EVR CSI 12V CPU3 3V CN 2547 BOARD MICOM PWRC CARD PWRC MOTOR PWRC RCB CAM PWRC DC DC CAM12V 3 3V REG IC1501 CARD 12V MOTOR VM 12V CPU3 3V Q1502 Q1503 Q1560 Q1507 Q1504 Q1505 12V UNREG 5DV 5AV 5AV 1 5V 3 3V 5V REG IC1503 IC1504 5V REG IC1502 Q1508 Q1512 DC DC CONV CN2452 DC IN 12V FOR UPDATE BRBK 303 304 BRBK 301 302 303 304...

Page 216: ... 301 302 304 BRBK 301 304 BRBK 301 304 BRBK 301 304 BRBK 301 304 BRBK 301 BRBK 302 304 BRBK 301 302 304 BRBK 301 304 BRBK 301 304 BRBK 301 304 BRBK 301 304 BRBK 301 BRBK 302 304 S4802 S4803 S4804 S4801 FOR UPDATE BRBK 301 302 304 BRBK 301 302 304 FOR UPDATE AC DC CONV 12VDV POWER Q3505 Q3506 TXD3 RXD3 MICOM IC3508 IC3509 IC3510 IC3511 Q3504 Q3503 IC3507 IC3516 IC3517 IC3515 IC3512 RS 232C TRANSCEI...

Page 217: ... T RESET KEY B LIGHT KEY F1 KEY CAMERA 1 LED C1 LED PANEL C1 LED PANEL P1 PANEL LED IC5004 MICROCOMPUTER 6 CH 1A B CH 2A B CH 3A B ENTER SW CH 3A B CH 2A B CH 1A B IC5001 JOY STICK 5V REG IC5003 5V 3 3V IC5002 3 3V REG S5001 ON OFF CN5001 DC IN 12V EEPROM 2 2 IC5010 IC5005 IC5006 IC5007 S5006 3 3V EMLE AN0 AN1 MD2 3 3V S5003 MODE SELECT DIP 1 DIP 2 DIP 4 DIP 8 S5005 TRANSCEIVER RS 232C IC5009 3 5 ...

Page 218: ...REF Y DAV REF CB DAV REF CR DSUB SEL0 DSUB SEL1 SYNC LEVEL G SYNC R B SYNC ENC Y LEVEL C SYNC IC7027 IC7019 IC7020 SYNC LEVEL G SYNC R B SYNC 3 3V AMP IC7031 SYNC C SYNC IC7032 IC7033 VBS Y IC7034 AMP C IC7034 AMP C VBS Y NTSC PAL ENC LPF D A CLKX2 RESET L MODE3 VSYNC HSYNC XVREF CD YD YA CVBSO CA V SYNC H SYNC NTSC PAL 27M CLKO RESET B ANALOG 12V DIGITAL VIDEO ENC IC7022 DC DC CONV IC7009 Q7001 3...

Page 219: ...002 4 9002 15 9002 5 9002 6 9002 8 LASER TRANSCEIVER UNIT Q9005 CPU3 3V 2 5V CPU3 3V LOS TD TD RD RD DEF0 MODE DEF1 DEF2 VCCR TX DISABLE VCCT P S TRANSCEIVER GIGABIT IC9010 16 GTXCLK TX EN LATCH IC9005 IC9007 8 TXD0 7 TXD8 11 TXD12 TXD13 TXD14 TXD15 4 OE 4 8 3 3V CBCR0 7 Y0 7 8 8 KEY DATA KEY BLK TX IC9006 IC9008 LATCH 8 OE TXD15 TXD14 TXD13 TXD12 TXD11 TXD0 7 8 TXD10 TXD8 TXD9 H REF C SYNC V SYNC...

Page 220: ... SI SP SO XCLR C1 SP CS C1 MOD CS A1 F CS A1 T CS V2 CS F1 CS SADS CS DV CS IC303 TIMING GEN SP SCK SP SI SP SO XCLR L302 D301 303 27MHz X301 TRCK DA0 7 XWR ALE XCS LPS XRESETL XRESETP PWD CNA XRD 8 8 DV CPU IC606 XRD CNA PWD XRESETP XRESETL LPS XCS ALE XWR DA0 7 8M CLK IC302 SEL FD ASDT ZIZEDFLTA ASTART FLTT AI OSC 18MHz PACKET i LINK GEN IC401 2 2 SP SI SP SO XCLR SADS CS BUF BCK BUF LRCK DCK TR...

Page 221: ...ic Diagrams Schematic Diagrams Index BRC 300 300P Page C CC 91 9 4 CN 2547 9 8 CN 2680 9 38 D DC 130 9 39 DD 208 9 38 DR 526 9 10 F Frame Wiring 9 38 I IF 110 9 38 IF 944 9 17 L LED 418 9 38 S SE 758 9 39 SW 1204 9 31 SY 314 9 34 V VC 343 9 38 BRU 300 300P Page C CN 2548 9 9 F Frame Wiring 9 40 L LE 281 9 40 M MC 66 9 19 S SW 1207 9 40 RM BR300 Page F Frame Wiring 9 41 M MD 131 9 26 S SW 1205 9 32...

Page 222: ...R IC7009 IN 4 DTC 6 SCP 5 GND 8 RT 7 FB 3 OUT 1 VCC 2 5 6k R7016 2 2k R7019 560 RN C R7030 2 2k R7018 47uH L7004 47uH L7002 0 1uF C7025 560 RN C R7027 1uF 2012 C7008 6 3V 100uF C7033 2SD2216J QR TX SO Q7001 FP101 TL E Q7003 3 7 5 6 1 3225 10uF C7002 3225 10uF C7022 TL5001CDR IC7010 IN 4 DTC 6 SCP 5 GND 8 RT 7 FB 3 OUT 1 VCC 2 1uF 2012 C7007 27k RN C R7007 15k R7015 560 RN C R7026 4 7k R7011 15k R7...

Page 223: ... 9 D1 8 D0 7 REN 6 CLK 5 CS 4 PD 3 DACEN 2 AVDD 1 AGND IC7013 MAX5184ETG TG069 18 DVDD 17 D9 19 DGND 20 REFR 21 REFO 25 AGND EP 24 OUTN 23 OUTP 22 CREF 16 D8 15 D7 14 D6 13 D5 12 D4 11 D3 10 D2 9 D1 8 D0 7 REN 6 CLK 5 CS 4 PD 3 DACEN 2 AVDD 1 AGND IC7012 MAX5184ETG TG069 18 DVDD 17 D9 19 DGND 20 REFR 21 REFO 25 AGND EP 24 OUTN 23 OUTP 22 CREF 16 D8 15 D7 14 D6 13 D5 12 D4 11 D3 10 D2 9 D1 8 D0 7 R...

Page 224: ...O90 LVDS8p 131 IO91 132 IO92 VREF2B2 133 IO93 DPCLK2 134 VCCINT4 135 GND11 136 VCCIO2_2 137 GND12 138 IO94 LVDS7n DQ0T4 139 IO95 LVDS7p DQ0T5 140 IO96 LVDS6n DQ0T6 141 IO97 LVDS6p DQ0T7 142 IO98 LVDS5n DEV_OE 143 IO99 LVDS5p DEV_CLRn 144 EPCS1SI8N MEMCON V1 01 IC006 ASDI 5 VCC2 7 DATA 2 DCLK 6 CS 1 GND 4 VCC1 3 VCC3 8 10uH L006 0 R050 0 R051 0 R052 0 R053 0 R048 10uH L009 10uF C014 10uF C021 0 01u...

Page 225: ... 3 5 4 1 2 IC016 TC7SH32FU 3 5 4 1 2 IC021 TC7SH32FU L020 10uH R232 10k 3 5 4 2 IC017 TC7SHU04FU R237 10k Q006 2SA1611 T1M6 R231 10k R234 10k X003 14 31818MHz L019 10uH 3 5 4 2 IC022 TC7SHU04FU Q005 2SA1611 T1M6 5 VCC 4 Y 3 GND 1 B 2 A IC023 TC7SET08FU C136 0 01uF R194 0 R240 0 R190 10k R241 120 003 54M_CLK_O R131 0 R130 0 R142 0 R160 10k 003 NTSC_PAL C099 10uF NM C114 NM C098 NM C113 NM C097 NM C...

Page 226: ...U TE12R IC604 7 6 1 5 8 2 4 3 SN74LV04APWR 4 7 IC607 9 8 SN74LV04APWR 7 7 IC607 7 GND 14 VCC 33k R611 INH GND VEE VCC TC7W53FU TE12R IC602 7 6 1 5 8 2 4 3 0 1uF C615 47k R602 DTC144EE TL Q601 0 1uF C610 1k R606 SN75C1168NSR 1 3 IC608 B 1 A 2 R 3 Y 14 Z 13 DE 4 D 15 0 1uF C609 10k R610 003 DC ON_OUT 003 003 003 003 003 003 003 003 003 003 003 003 DSR_OUT 003 TXD_OUT 003 RXD_OUT 003 DTR_IN 003 TXD_I...

Page 227: ...01 MEMCON_TITLE 001 SCK2 001 DATAOUT 001 NCE 001 SDA0 001 003 NCONFIG 001 SYS_RESET 001 003 CS_MEM_CON 001 VCC FPGA 001 CONF_DONE 001 PROM_LOAD 001 CS_CC_EVR 001 TxD2 001 DCLK_WRITER 001 SCL0 001 003 SIRCS_SIG2 003 SIRCS_SIG2 003 ENC_TITLE_BACK 001 003 ENC_TITLE 001 003 0 R809 0 R810 SIRCS_TH_OUT 003 SIRCS_TH_OUT 003 SCL0 001 003 SDA0 001 003 R807 NM R808 NM CL806 0 R802 0 R803 HSYNCO 001 003 HD_O...

Page 228: ...ND GND GND GND GND GND GND B_ANALOG GND GND GND 12V GND TEST_Sig1 PW_CONT NTSC_PAL 13 5M_CLK_O GND NC1 Y0 Y5 CBCR0 CBCR5 H_SYNC C_SYNC GND SCL nCONFIG VCC GND XCE_AN_EVR TMS RESET TEST_Sig2 B_SDI GND 12V XCE_DV TDI TCK 27M_CLK_O GND GND 27M_CLK_IN NC2 GND Y2 Y1 Y7 Y6 CBCR2 CBCR1 CBCR7 CBCR6 HD_O V_SYNC VD_IN H_REF GND GND TX SDA nCE CONF_DONE nCS ASD GND GND CSO _RESI _TRST KeyData CPU3 3V B_DV GN...

Page 229: ... 9 Z 4 A 5 D E F CN4802 1 2 3 4 5 6 7 8 9 10 11 12 13 14 15 16 17 18 19 20 21 22 23 24 25 26 27 28 29 30 31 32 33 34 35 36 37 38 39 40 41 42 43 44 45 46 47 48 49 50 51 52 53 54 55 56 57 58 59 60 61 62 63 64 65 66 67 68 69 70 71 72 73 74 75 76 77 99 100 101 102 103 104 105 106 107 108 109 110 111 112 113 114 115 116 117 118 119 120 121 122 123 124 125 126 127 128 129 130 131 132 133 134 135 136 137...

Page 230: ...5 3A 9 3B 10 4A 12 4B 13 TC74VHCT08AFT EL IC2502 1A 1 1B 2 GND 7 4Y 11 3Y 8 2Y 6 1Y 3 VCC 14 2A 4 2B 5 3A 9 3B 10 4A 12 4B 13 25V 470uF C2511 47k R2502 176452921 D4479 CN2501 1 GND 2 GND 3 MOTOR_VM12V 4 MOTOR_VM12V 5 MOTOR_VM12V 6 GND 23 7 GND 24 8 5AV 9 5AV 10 D3 3V 11 D3 3V 12 CW 13 CCW 14 F H 15 RESET 16 ECO 17 A W OFF 18 TILT_REV_DET 19 TILT_U_DET 20 TILT_L_DET 21 GND 22 GND 100uH L2501 10uF C...

Page 231: ...0 94 TDI 95 IO61 VREF1B3 96 IO62 DQ1R3 97 IO63 LVDS18n DQ1R2 98 IO64 LVDS18p DQ1R1 99 IO65 DPCLK4 100 GND8 101 VCCIO3_2 102 IO66 DQ1R0 103 IO67 VREF0B3 104 IO68 LVDS17n 105 IO69 LVDS17p 106 IO70 LVDS16n 107 IO71 LVDS16p 108 IO72 LVDS15n 109 IO73 LVDS15p 110 IO74 LVDS14n DQ0T0 111 IO75 LVDS14p DQ0T1 112 IO76 LVDS13n DQ0T2 113 IO77 LVDS13p DQ0T3 114 VCCIO2_1 115 GND9 116 VCCINT3 117 GND10 118 IO78 D...

Page 232: ...Y6 221 AY5 222 AY4 223 AY3 224 AY2 225 AY1 226 AY0 227 VDD8 228 GND17 229 AXY9 230 AXY8 231 AXY7 232 AXY6 233 AXY5 234 AXY4 235 AXY3 236 AXY2 237 AXY1 238 AXY0 239 VDD16 240 0 1uF C223 0 1uF C214 3 15V 3 15V 0 1uF C205 0 1uF C206 10uH L202 10uH L201 GND DCK 004 006 22uF C208 22uF C207 22uF C231 C1_BUS 003 004 006 5Tup Sads 004 D_VIDEO 004 SP_SIO 003 004 006 BB_CN 001 003 004 006 EAVSAV_Sync 004 00...

Page 233: ... XPS 65 XSCK 70 XMUT 73 XDSP 74 XATT 75 XACF 77 XACT 78 TDI 21 TCK 19 TENA3 20 TENA1 22 TDO 23 TRST 24 VST 25 XWE 43 XCE 44 XOE 33 MDPL 45 TSTM 86 TSAD 87 TSRM 89 D07 2 D06 3 D05 4 D04 5 D03 29 D02 30 D01 31 D00 32 DATO 12 ERRF 6 LRCO 9 BCKO 10 DSPO 16 XATC 17 ATLT 18 XERS 34 PRST 35 PCEZ 36 VEN 37 XHEN 39 SLXM 40 SLVX 41 DV32 42 XREF 46 XVAR 47 XINT 48 OTEN 57 SFDR 58 SPSI 72 PBON 79 DIIN 80 FSE2...

Page 234: ...05 nCE 106 DCLK 107 DATA0 108 IO69 DATA1 109 IO70 DATA2 110 IO71 DATA3 111 IO72 DATA4 112 IO73 DATA5 113 IO74 DATA6 114 VCCIO7 115 IO75 DATA7 116 IO76 117 IO77 118 IO78 119 IO79 120 IO80 121 IO81 DEV_CLRn 122 GNDINT11 123 INPUT3 124 CLK2 125 INPUT4 126 VCCINT6 127 IO82 DEV_OE 128 GNDINT12 129 IO83 130 IO84 131 IO85 132 IO86 133 VCCIO8 134 IO87 135 IO88 136 IO89 137 IO90 138 GNDINT13 139 IO91 140 I...

Page 235: ...V 0 1uF C521 10uH L502 22uF C507 22uF C509 GND CXD3200_UCOM 006 CXD3200_SFD 004 CXD3200_UCOM_XINT 006 0 1uF C513 0 1uF C512 0 1uF C518 0 1uF C524 0 1uF C523 0 1uF C520 0 1uF C519 0 1uF C528 0 1uF C529 0 1uF C525 0 1uF C526 0 1uF C527 0 1uF C515 GND 0 1uF C506 24 576MHz X502 15pF C516 15pF C517 RN C 1M R511 RN C 1M R507 18MHz X501 0 1uF C511 0 1uF C514 0 1uF C522 GND GND RN C 300 R508 10uH L501 RN ...

Page 236: ...0AM E2 IC605 DI 3 GND 5 RDY BSY 7 DO 4 VCC 8 CS 1 RESET 6 SK 2 GND 0 1uF C611 10uH L601 10uH L602 0 8 CL601 3 15V 3 15V 47k RB601 1 2 3 4 5 6 7 8 47k RB602 1 2 3 4 5 6 7 8 47k RB603 1 2 3 4 5 6 7 8 47k RB604 1 2 3 4 5 6 7 8 47k RB605 1 2 3 4 5 6 7 8 47k RB606 1 2 3 4 5 6 7 8 47k RB607 1 2 3 4 5 6 7 8 47k RB608 1 2 3 4 5 6 7 8 47k RB610 1 2 3 4 5 6 7 8 47k RB611 1 2 3 4 5 6 7 8 47k RB612 1 2 3 4 5 ...

Page 237: ...7 176635021 J2835 CN2002 1 GND 2 HD_O 3 GND 4 VD_O 5 GND 6 FLD_O 7 GND 8 GND 9 GND 10 RESET 21 12 RX FCB 13 TX FCB 14 GND 15 UNREG 16 UNREG 17 UNREG 18 UNREG 19 GND 20 GND 22 11 GND 176635221 J2835 CN2001 1 GND 2 GND 3 Y0 4 Y1 5 Y2 6 Y3 23 7 Y4 24 8 Y5 9 Y6 10 Y7 11 C0 12 C1 13 C2 14 C3 15 C4 16 C5 17 C6 18 C7 19 GND 20 PIX_CLK 21 GND 22 GND 0 R2001 12pF C2001 NM CL2004 CL2010 CL2005 CL2006 CL2008...

Page 238: ......

Page 239: ...2k R3098 10uH L3012 22uF C3078 33k R3097 NM NJM319V TE2 IC3001 1 2 9 10 8 7 0 01uF C3045 2 2k R3096 0 1uF C3080 100 R3053 NJM319V TE2 IC3001 2 2 4 5 6 3 12 11 100pF C3069 2SA1611 T1M6 Q3006 10k R3052 0 1uH L3011 22pF C3076 14 1875MHz X3002 X3001 54MHz VC 1 GND 2 OUT 3 VDD 4 3 3k R3065 2 2k R3061 82pF C3046 1608 RN C NM R3063 C3066 NM 3 3uH L3006 1608 RN C R3091 NM C3032 NM 0 R3075 C3033 NM 0 R3055...

Page 240: ... R3675 MA3130WA TX D3511 3 2 1 MA3130WA TX D3517 3 2 1 MA3130WA TX D3515 3 2 1 MA3130WA TX D3507 3 2 1 SN74LV04APWR IC3513 2 7 3 4 SN75C1168NSR IC3514 1 3 B 1 A 2 R 3 Y 14 Z 13 DE 4 D 15 10uF C3560 0 1uF C3559 CN3507 1 2 3 4 5 6 7 8 9 10k R3662 10k R3659 10k R3657 10k R3658 10k R3508 0 1uF C3501 10k R3520 0 1uF C3505 10k R3507 100 R3518 0 1uF C3507 100 R3510 10k R3519 100 R3522 0 1uF C3506 10k R35...

Page 241: ...A16 22 PB7 A15 21 PB6 A14 20 PB5 A13 19 PB4 A12 18 VSS3 17 PB3 A11 16 PB2 A10 15 PB1 A9 14 PB0 A8 13 PC7 A7 12 PC6 A6 11 PC5 A5 10 VSS2 9 PC4 A4 8 PC3 A3 7 PC2 A2 6 PC1 A1 5 PC0 A0 4 VCC1 3 P80 IRQ0_1 EDREQ2 2 VSS1 1 MD2 IC3518 HD64F2377VFQ33V NM C3567 R3686 10k C3566 0 01uF 004 FACTORY_RESET 004 OPE ADJ 004 WRSW NM R3685 NM R3684 004 RxD4_MYCOM 004 TxD4 R3682 0 R3683 0 C3562 22pF C3561 22pF GND 1...

Page 242: ...15k R4038 680pF C4031 100k R4048 2 2uH L4010 TA79L05F TE12L IC4003 IN 1 GND 3 OUT 2 100k R4047 2SB1122 T TD E Q4009 CL4007 22uH L4002 B 0 1uF C4011 UPC29M05T E2 IC4002 IN 1 G FIN 3 OUT 2 10uH L4001 B 0 1uF C4014 100k R4019 RN C 15k R4021 CL4003 CL4006 5AV 001 10uF C4039 22uF C4046 820 R4042 RN C RN C 30k R4025 220pF C4030 3 9k R4052 RN C RN C 39k R4032 B 0 1uF C4018 0 0015uF C4023 2 5V 005 22k R40...

Page 243: ...g2_1 10 TEST_Sig2_0 11 GND 12 TxD4 13 RxD4 14 GND 15 NC 16 B_SDI_0 17 B_OPT_0 18 B_ANALOG_0 19 B_DV_0 20 B_SDI_1 21 B_OPT_1 22 B_ANALOG_1 23 B_DV_1 24 GND 25 XCE_AN_EVR 26 XCE_DV 27 CSO 28 CSI 29 CSCK 30 GND CN4302 1 GND 2 NC 3 S1_WIDE 4 VD_IN 5 H_REF 6 C_SYNC 7 VD_O 8 HD_O 9 FLD_O 10 V_SYNC 11 H_SYNC 12 GND 13 Y7 14 Y6 15 Y5 16 Y4 17 Y3 18 Y2 19 Y1 20 Y0 21 GND 22 CBCR7 23 CBCR6 24 CBCR5 25 CBCR4...

Page 244: ......

Page 245: ...IC4402 2 4 5 3 R4437 NM 0 001uF C4408 CL4419 CL4404 CL4403 CL4402 CL4401 Y0 001 004 Y1 001 004 Y2 001 004 Y3 001 004 Y4 001 004 Y5 001 004 Y6 001 004 Y7 001 004 CBCR0 001 004 CBCR1 001 004 CBCR2 001 004 CBCR3 001 004 CBCR4 001 004 CBCR5 001 004 CBCR6 001 004 CBCR7 001 004 KEY_BLK 001 004 KEY_DATA 001 004 Rx_MIU 002 H_REF 001 004 C_SYNC 001 004 V_SYNC 001 002 004 H_SYNC 001 002 004 FLD_O 004 VD_O 0...

Page 246: ...IRQ7_1 31 EMLE 32 P81 IRQ1_1 TXD3 EDREQ3 33 P82 IRQ2_1 ETEND2 34 PH0 CS4 RAS4 35 PH1 CS5 RAS5 36 PH2 CS6 IRQ6_2 37 PH3 CS7 IRQ7_2 OE_1 38 WDTOVF 39 NMI 40 VCC2 41 P10 PO8 TIOCA0 42 P11 PO9 TIOCB0 43 P12 PO10 TIOCC0 TCLKA 44 P13 PO11 TIOCD0 TCLKB 45 P14 PO12 TIOCA1 46 P15 PO13 TIOCB1 TCLKC 47 P16 PO14 TIOCA2 EDRAK2 48 P17 PO15 TIOCB2 TCLKD EDRAK3 49 VSS5 50 P20 PO0 TIOCA3 IRQ8_1 51 P21 PO1 TIOCB3 I...

Page 247: ... VCC 16 GND 8 3 3 IC5011 SN75C1168NSR 9 D 12 DE 11 Z 10 Y 5 R 6 A 7 B 2 3 IC5011 SN75C1168NSR 15 D 4 DE 13 Z 14 Y 3 R 2 A 1 B 1 3 IC5011 SN75C1168NSR R5154 10k R5155 10k R5156 10k R5161 10k R5157 10k R5160 10k R5159 10k R5158 10k 1 2 3 D5018 MA3130WA TX 1 2 3 D5023 MA3130WA TX 1 2 3 D5022 MA3130WA TX 1 2 3 D5015 MA3130WA TX 1 2 3 D5016 MA3130WA TX 1 2 3 D5021 MA3130WA TX 1 2 3 D5012 MA3130WA TX FB...

Page 248: ...D5 7 D6 8 OE 1 CK 11 D7 9 GND 10 Q7 12 Q6 13 Q5 14 Q4 15 Q3 16 Q2 17 Q1 18 Q0 19 VCC 20 TC74LCX574FT EL IC9006 D0 2 D1 3 D2 4 D3 5 D4 6 D5 7 D6 8 OE 1 CK 11 D7 9 GND 10 Q7 12 Q6 13 Q5 14 Q4 15 Q3 16 Q2 17 Q1 18 Q0 19 VCC 20 TC74LCX574FT EL IC9008 D0 2 D1 3 D2 4 D3 5 D4 6 D5 7 D6 8 OE 1 CK 11 D7 9 GND 10 Q7 12 Q6 13 Q5 14 Q4 15 Q3 16 Q2 17 Q1 18 Q0 19 VCC 20 TC74LCX574FT EL IC9007 D0 2 D1 3 D2 4 D3...

Page 249: ...CONF_DONE 86 nSTATUS 87 TCK 88 TMS 89 TDO 90 IO59 91 CLK3 LVDSCLK2n 92 CLK2 LVDSCLK2p 93 IO60 94 TDI 95 IO61 VREF1B3 96 IO62 DQ1R3 97 IO63 LVDS18n DQ1R2 98 IO64 LVDS18p DQ1R1 99 IO65 DPCLK4 100 GND8 101 VCCIO3_2 102 IO66 DQ1R0 103 IO67 VREF0B3 104 IO68 LVDS17n 105 IO69 LVDS17p 106 IO70 LVDS16n 107 IO71 LVDS16p 108 IO72 LVDS15n 109 IO73 LVDS15p 110 IO74 LVDS14n DQ0T0 111 IO75 LVDS14p DQ0T1 112 IO76...

Page 250: ......

Page 251: ...3 2 1 FB2214 FB2202 MA3130WA TX D2202 3 2 1 MA3130WA TX D2205 3 2 1 FB2201 MA3130WA TX D2206 3 2 1 FB2203 EMI FL2201 1 IN1 2 OUT1 3 IN2 4 OUT2 5 IN3 6 OUT3 7 IN4 8 OUT4 9 G1 10 G2 0 R2202 0 R2203 0 R2201 MA3130WA TX D2221 3 2 1 22uF C2203 22uF C2205 22pF C2206 C2207 NM C2208 NM C2209 NM 22pF C2210 22pF C2211 22pF C2212 22pF C2213 22pF C2214 22pF C2215 22pF C2216 22pF C2217 22pF C2218 22pF C2219 22...

Page 252: ...44EE TL Q6011 1608 220 R6013 DTC144EE TL Q6013 DTC144EE TL Q6012 1608 220 R6012 DTC144EE TL Q6014 1608 220 R6014 1608 220 R6015 DTC144EE TL Q6015 S6022 1 2 3 4 S6023 1 2 3 4 S6024 1 2 3 4 S6025 1 2 3 4 S6026 1 2 3 4 S6027 1 2 3 4 S6028 1 2 3 4 S6029 1 2 3 4 S6009 1 2 3 4 CL 196YG CD T D6042 CL 196YG CD T D6043 1608 220 R6114 1608 220 R6115 CL 196YG CD T D6045 S6010 1 2 3 4 CL 196YG CD T D6044 CL 1...

Page 253: ... 330 1608 R6102 220 1608 R6101 330 1608 R6100 220 1608 4 3 2 1 S6002 4 3 2 1 S6001 R6075 100 4 3 2 1 S6021 C6027 0 1uF R6062 10k C6026 0 1uF R6061 10k 4 3 2 1 S6020 R6074 100 R6073 100 C6025 0 1uF R6060 10k 4 3 2 1 S6019 4 3 2 1 S6018 4 3 2 1 S6017 Q6035 DTC144EE TL R6099 680 1608 D6013 CL 190UB2 X T Q6034 DTC144EE TL R6094 680 1608 R6098 680 1608 Q6032 DTC144EE TL D6012 CL 190UB2 X T R6096 680 16...

Page 254: ...T SW 20 RIGHT SW 21 NC 22 NC 23 GND 10k R1009 10k R1002 0 1uF C1006 10k R1001 100 R1011 0 1uF C1007 100 R1004 0 1uF C1002 10k R1010 10k R1006 100 R1012 0 1uF C1009 100 R1008 100 R1003 0 1uF C1003 100uH L1004 3225 25V 10uF C1001 176635221 J2835 CN1002 1 GND 2 GND 3 MOTOR_VM12V 4 MOTOR_VM12V 5 MOTOR_VM12V 6 GND 23 7 GND 24 8 5AV 9 5AV 10 D3 3V 11 D3 3V 12 CW 13 CCW 14 F H 15 RESET 16 ECO 17 A W OFF ...

Page 255: ...PO14 TIOCA2 EDRAK2 47 P15 PO13 TIOCB1 TCLKC 46 P14 PO12 TIOCA1 45 P13 PO11 TIOCD0 TCLKB 44 P12 PO10 TIOCC0 TCLKA 43 P11 PO9 TIOCB0 42 P10 PO8 TIOCA0 41 VCC2 40 NMI 39 WDTOVF 38 PH3 CS7 IRQ7_2 OE_1 37 PH2 CS6 IRQ6_2 36 PH1 CS5 RAS5 35 PH0 CS4 RAS4 34 P82 IRQ2_1 ETEND2 33 P81 IRQ1_1 TXD3 EDREQ3 32 EMLE 31 PA7 A23 IRQ7_1 30 PA6 A22 IRQ6_1 29 PA5 A21 IRQ5_1 28 PA4 A20 IRQ4_1 27 PA3 A19 26 PA2 A18 25 V...

Page 256: ...06 TA79L05F TE12L IC1504 IN 1 GND 3 OUT 2 47k R1556 47k R1538 CAM_12V 003 B 0 1uF C1512 RN C 30k R1526 0 0033uF C1519 8 2k R1524 RN C FP102 TL E Q1503 3 7 5 6 1 2SB1122 T TD E Q1509 22k R1512 1 6A F1503 0 0015uF C1520 0 001uF C1522 PWRC_MOTOR 001 5AV 001 003 2 2uH L1512 2 2k R1549 0 0015uF C1523 CL1503 3 9k R1557 RN C 2SC4177 T1L5L6 Q1504 10k R1548 22uH L1505 UN9113J TX SO Q1512 3 3V 001 003 10uH ...

Page 257: ...FACTORY_RESET 24 CPU3 3V 25 SIRCS_SIG2 26 GND 27 PAN_L_DET 28 PAN_R_DET 29 PAN_REV_DET 30 GND 176634021 J2835 CN1803 1 GND 2 GND 3 GND 4 5AV 5 5AV 6 CAM_12V 11 12 7 CAM_12V 8 CAM_12V 9 CAM_12V 10 CAM_12V 10uH L1803 176634021 J2835 CN1805 1 CARD_12V 2 CARD_12V 3 CARD_12V 4 CARD_12V 5 CARD_12V 6 GND P 11 12 7 GND P 8 GND P 9 GND P 10 GND P 176636021 J2835 CN1804 1 GND 2 _RESI 3 TDI 4 TMS 5 _RES0 6 T...

Page 258: ..._MR_A F_MR_VCC F_MR_B F_MR_A F_MR_GND NC FOCUS FICUS NC NC IG_HALL IG_BIAS IG_BIAS IG_HALL NC NC IG_DRIVE IG_DRIVE ND_DRIVE NC NC ND_BIAS ND_HALL ND_BIAS ND_HALL NC NC ND_DRIVE Y_OUT GND Y_DRIV_B Y_DRIV_A GND P_OUT A_4 6V P_DRIV_A P_DRIV_B NC GND GND KEY_AD0 KEY_AD1 KEY_AD2 KEY_AD3 KEY_AD4 KEY_AD5 KEY_AD6 Key_AD7 NC STROBE GND TXD RXD RESET VCC FWE MD GND D3 0V MD2 PG7 XINIT SI3 SD3 SCK3 GND GND U...

Page 259: ...D P 8 GND P 9 GND P 10 GND P CN1804 1 GND 2 _RESI 3 TDI 4 TMS 5 _RES0 6 TDO 7 _TRST 8 TCK 9 OPE ADJ 10 TEST_Sig1 11 GND 12 TX 13 RX 14 GND 15 WRSW 16 B_SDI 17 B_OPT 18 B_ANALOG 19 B_DV 20 PW_CONT 21 CPU3 3V 22 CPU3 3V 23 CPU3 3V 24 GND 25 XCE_AN_EVR 26 XCE_DV 27 CSO 28 CSI 29 CSCK 30 GND CN1001 1 BLUE 2 RED 3 ORANGE 4 GREEN 5 BLACK CN1002 1 GND 2 GND 3 MOTOR_VM12V 4 MOTOR_VM12V 5 MOTOR_VM12V 6 GND...

Page 260: ...GND C_SYNC HD_O GND TEST_Sig2_0 GND GND GND GND SDA CBCR4 NTSC_PAL GND _TRST Y6 27M_CLK_O GND VD_O CPU3 3V Y0 SCL GND VD_IN GND GND GND NC2 CSCK Y3 GND WRSW TDO CONF_DONE GND GND CPU3 3V GND CBCR1 GND CBCR0 GND NC12 RX GND GND GND XCE_CARD0 GND GND GND GND Y2 NC5 GND GND VCC GND GND GND NC14 NC6 GND GND B_OPT_0 GND ASD GND H_SYNC 12V_0 CBCR6 GND CARD0_RESET 175 174 173 172 171 170 169 168 167 166 ...

Page 261: ...KEY_OP_AWB 27 KEY_B_LIGHT 26 KEY_RESET 25 KEY_PRESET 24 KEY_P_T_RESET 23 KEY_DIRECTION 22 KEY_SHIFT 21 LED_PANEL_P2 20 KEY_F8 19 KEY_F7 18 KEY_F6 17 KEY_F5 16 KEY_F4 15 KEY_F3 14 KEY_F2 13 KEY_F1 12 LED_PANEL_P1 11 KEY_CAMERA7 10 KEY_CAMERA6 9 KEY_CAMERA5 8 KEY_CAMERA4 7 KEY_CAMERA3 6 KEY_CAMERA2 5 KEY_CAMERA1 4 KEY_POWER 3 GND 2 GND 1 CN5002 GND 40 GND 39 5V 38 5V 37 3 3V 36 3 3V 35 LED_PANEL_P8 ...

Page 262: ......

Page 263: ...of this board is not described in this Section Index Index Section 10 Board Layouts Board Layouts Index BRC 300 300P Page C CC 91 10 2 CN 2547 10 4 CN 2680 D DC 130 10 4 DD 208 DR 526 10 5 I IF 110 IF 944 10 5 L LED 418 10 4 S SE 758 10 4 SW 1204 10 8 SY 314 10 6 V VC 343 BRU 300 300P Page C CN 2548 10 12 L LE 281 10 13 M MC 66 10 9 S SW 1207 10 13 RM BR300 Page M MD 131 10 14 S SW 1205 10 16 ...

Page 264: ...C129 C2 C130 E2 C131 E2 C132 E2 C133 F2 C134 E2 C135 E2 C136 E2 C137 E2 C138 E2 C139 E2 C140 D2 C141 E2 C142 E2 C143 E2 C144 D1 C145 C1 C146 G2 C147 G2 C148 G2 C149 G2 C150 G3 C151 G2 C152 E2 C153 E2 C154 C1 C155 F2 C156 F2 C157 F2 C158 F2 C159 F2 C160 E2 C161 E2 C601 B2 C602 B3 C603 B2 C604 B2 C605 B2 C606 B2 C607 B2 C608 B2 C609 B2 C610 B2 C611 B2 C612 C2 C613 C2 C614 C2 C615 C2 C616 B3 C617 B3 ...

Page 265: ...R300 R301 R302 R303 R304 R305 R306 R307 R308 R309 R310 R311 R312 R313 R314 R315 R316 R317 R318 R319 R320 R321 R322 R326 R327 R331 R332 R333 R601 R602 R802 R803 R804 R805 R806 R807 R808 R809 R810 R811 R812 R813 R814 R815 R816 R817 TP001TP002 TP003 TP004 TP005 TP006 TP007TP008 TP009 X002 X003 1 2 3 4 5 6 A B C D E F G H R144 E2 R145 E3 R146 C2 R147 C2 R148 E2 R149 D2 R150 D2 R151 D2 R152 D2 R153 F2 ...

Page 266: ...52 C2453 C2454 CL2451 CL2452 CN2451 CN2452 FB2451 FB2452 FL2451 CN2452 DC 130 A SIDE SUFFIX 11 BRC 300 300P LED 418 B SIDE SUFFIX 11 BRC 300 300P LED 418 A SIDE SUFFIX 11 BRC 300 300P C2101 CN2101 D2101 SE 758 B SIDE SUFFIX 11 BRC 300 300P SE 758 A SIDE SUFFIX 11 BRC 300 300P C2151 C2152 L2151 PH2151 PH 21 52 PH 21 53 R2151 R2152 R2153 R2154 R2155 R2156 R2157 R2158 R2159 A B 1 2 CN2151 A B 1 2 SE ...

Page 267: ...01 L2002 Q2001 R2002 R2005 R2006 R2010 R2011 R2012 R2013 1 2 3 4 A B C D IF 944 B SIDE SUFFIX 11 BRC 300 300P IF 944 A SIDE SUFFIX 11 BRC 300 300P IF 944 1 862 828 11 C2001 C3 C2002 D3 C2003 C3 C2004 C3 C2005 C3 C2006 D2 C2007 B3 C2008 C2 C2009 C2 C2010 D2 C2011 D2 C2012 D2 C2013 D2 C2014 D2 C2015 C2 C2016 C2 C2017 C2 C2018 D3 C2019 C2 C2020 A3 C2021 A3 C2022 B3 C2023 B3 C2024 B3 C2025 C2 C2026 D3...

Page 268: ...C1024 B4 C1025 G6 C1026 B4 C1027 B4 C1028 B3 C1029 B3 C1030 B6 C1031 C3 C1032 B6 C1033 B4 C1034 B4 C1035 A3 C1036 A3 C1037 A4 C1038 A4 C1039 A3 C1040 A3 C1041 B4 C1042 B4 C1043 B4 C1044 B4 C1045 B4 C1046 B4 C1047 A3 C1048 A3 C1049 A3 C1050 B4 C1051 A3 C1052 A3 C1053 A3 C1054 A2 C1055 A4 C1056 A2 C1057 A2 C1058 A4 C1059 A4 C1060 A4 C1061 A4 C1062 A4 C1063 A4 C1064 C4 C1065 C4 C1066 C4 C1067 A4 C106...

Page 269: ... G1 R1029 G1 R1030 G1 R1033 C4 R1034 C4 R1035 G6 R1036 C3 R1037 B4 R1038 C3 R1039 B4 R1040 C3 R1041 B4 R1042 B6 R1043 C3 R1044 B4 R1045 C3 R1046 C3 R1047 C3 R1048 C3 R1049 C4 R1050 C4 R1051 C4 R1052 C4 R1053 C4 R1054 C4 R1055 C4 R1056 B4 R1057 B4 R1058 A4 R1059 B4 R1060 B4 R1061 B4 R1062 B3 R1063 B4 R1064 B3 R1065 B4 R1066 B3 R1067 B4 R1068 B3 R1069 B3 R1070 B3 R1071 B4 R1072 B3 R1073 B4 R1074 B3 ...

Page 270: ...3 R2204 R2205 R2206 R2207 R2208 A B C D E 1 2 SW 1204 1 862 825 11 C2201 C1 C2202 C1 C2203 C1 C2204 A2 C2205 C1 C2206 A2 C2207 B2 C2208 C2 C2209 C2 C2210 D1 C2211 D1 C2212 D1 C2213 D1 C2214 E1 C2215 E1 C2216 E1 C2217 E1 C2218 E2 C2219 E2 C2220 E2 C2221 D2 C2222 D2 C2223 D2 C2224 D2 C2225 C2 C2226 D2 CN2201 D2 CN2202 B2 CN2203 C2 CN2204 D1 CN2205 E2 CN2206 D2 CN2207 A2 D2201 E1 D2202 C2 D2203 C1 D2...

Page 271: ...411 A4 IC4412 A4 IC4413 A4 IC4414 A4 IC4415 B3 L3001 E2 L3002 E3 L3003 D3 L3004 E3 L3005 C2 L3006 E2 L3007 E2 L3008 E2 L3009 C2 L3010 C3 L3011 G1 L3012 G1 L3013 E1 L3014 E1 L3015 G1 L3016 E1 L3017 E1 L3018 E1 L3501 F4 L3502 F4 L3503 C2 L3504 F4 L4001 G4 L4002 G3 L4003 G3 L4004 G3 L4005 G3 L4006 G3 L4007 G3 L4008 F3 L4009 F3 L4010 F3 L4011 F3 L4301 F4 L4302 F4 L4401 B2 L4402 A2 L4403 A2 L4404 A2 L4...

Page 272: ...3021 IC3022 IC3023 IC3501 IC3502 IC3503 IC3504 IC3505 IC3506 IC3507 IC3508 IC3509 IC3510 IC3511 IC3512 IC3513 IC3514 IC3515 IC3516 IC3517 IC4001 IC4401 IC4402 IC4403 IC4404 IC4405 IC4406 IC4407 IC4408 IC4409 IC4410 IC4411 IC4412 IC4413 IC4414 IC4415 L3002 L3003 L3004 L3005 L3006 L3007 L3008 L3009 L3010 L3011 L3012 L3013 L3014 L3015 L3016 L3017 L3018 L3503 L4001 L4002 L4003 L4004 L4005 L4006 L4007 ...

Page 273: ...4003 L3001 L3501 L3502 L3504 L4010 L4011 L4403 L4404 L4405 L4406 L4407 Q4010 R3019 R3026 R3029 R3030 R3033 R3104 R3110 R3511 R3513 R3514 R3527 R3528 R3535 R3536 R3537 R3539 R3541 R3542 R3543 R3544 R3547 R3548 R3551 R3552 R3553 R3562 R3563 R3564 R3565 R3567 R3569 R3570 R3571 R3572 R3573 R3574 R3575 R3576 R3577 R3578 R3579 R3580 R3581 R3583 R3584 R3585 R3589 R3590 R3591 R3592 R3593 R3594 R3595 R3596...

Page 274: ...CL4816 B2 CL4817 B2 CL4818 B4 CL4820 B3 CL4821 B3 CL4822 B4 CL4823 B4 CL4826 B3 CL4827 B3 CL4828 B3 CL4829 B2 CL4830 B4 CL4831 B1 CL4832 B1 CL4833 B1 CL4840 A2 CL4841 B2 CL4843 B2 CL4844 B2 CN4801 C4 CN4802 B4 CN4803 C4 CN4804 C1 CN4805 B1 CN4806 A1 S4801 A1 S4802 A2 S4803 A2 S4804 A2 B SIDE CL4801 CL4802 CL4803 CL4805 CL4806 CL4807 CL4808 CL4811 CL4812 CL4813 CL4814 CL4815 CL4816 CL4817 CL4818 CL...

Page 275: ...207 BRU 300 300P BRU 300 300P LE 281 SW 1207 LE 281 B SIDE SUFFIX 11 BRU 300 300P LE 281 A SIDE SUFFIX 11 BRU 300 300P D4951 CL4951 CN4951 R4951 R4952 S4901 C4901 C4902 CN4901 SW 1207 B SIDE SUFFIX 11 BRU 300 300P SW 1207 A SIDE SUFFIX 11 BRU 300 300P ...

Page 276: ... R5087 R5088 R5089 R5090 R5091 R5092 R5093 R5094 R5095 R5096 R5097 R5098 R5099 R5100 R5101 R5102 R5103 R5104 R5105 R5106 R5107 R5108 R5109 R5114 R5115 R5116 R5117 R5118 R5119 R5120 R5121 R5122 R5123 R5124 R5125 R5126 R5127 R5128 R5129 R5130 R5131 R5132 R5133 R5134 R5135 R5136 R5137 R5144 R5149 R5150 R5151 R5152 R5153 R5169 R5171 S5001 S5004 S5005 S5006 VDR001 X5001 A B C D E F G H 1 2 3 C5001 C500...

Page 277: ...C2 IC5013 C2 IC5014 B2 IC5015 B2 IC5016 B1 IC5017 B1 IC5018 B2 IC5019 B2 IC5020 B2 L5001 G2 L5003 G2 L5004 C2 L5005 F3 L5006 E1 Q5001 H2 Q5002 D2 Q5003 D2 R5001 H2 R5002 H2 R5003 A1 R5004 D1 R5005 D1 R5006 D1 R5007 D1 R5008 D1 R5009 D1 R5010 D1 R5011 D1 R5012 D1 R5013 D1 R5014 D1 R5015 D1 R5016 D2 R5017 D2 R5018 D2 R5019 D2 R5020 D2 R5021 D2 R5022 D2 R5023 D2 R5024 D2 R5025 D2 R5026 D2 R5027 D3 R5...

Page 278: ...3 C6041 F3 C6042 C3 CN6001 C3 CN6002 E3 D6001 E2 D6002 D2 D6003 C2 D6004 E2 D6005 C2 D6006 D2 D6007 A3 D6008 A3 D6009 A1 D6010 A2 D6011 A2 D6012 A2 D6013 A1 D6014 C3 D6015 C3 D6016 C3 D6017 C3 D6018 C3 D6019 C3 D6020 C3 D6021 D3 D6022 D3 D6023 D3 D6024 D3 D6025 D3 D6026 D3 D6027 D3 D6028 D3 D6029 D3 D6030 E3 D6031 E3 D6032 E3 D6033 E3 D6034 E3 D6035 E3 D6036 E3 D6037 E3 D6038 F3 D6039 F3 D6040 F3 ...

Page 279: ...096 R6097 R6098 R6099 R6100 R6101 R6102 R6103 R6104 R6105 R6106 R6107 R6108 R6109 R6110 R6111 R6112 R6113 R6114 R6115 R6116 R6117 R6118 R6119 R6120 R6121 R6122 R6123 R6124 R6125 R6126 R6127 R6128 A B C D E F G 1 2 3 R6030 G2 R6031 G2 R6032 C3 R6033 D2 R6034 D3 R6035 D3 R6036 E3 R6037 E3 R6038 F3 R6039 G3 R6040 C2 R6041 D2 R6042 D2 R6043 E2 R6044 F2 R6045 F2 R6046 G2 R6047 G2 R6048 D3 R6049 D3 R605...

Page 280: ... IC7028 IC7029 IC7030 IC7031 IC7032 IC7033 IC7034 L7001 L7002 L7004 L7005 L7006 L7007 L7008 L7016 L7017 L7018 L7019 L7020 L7021 L7022 L7026 L7027 L7028 L7029 L7030 L7031 Q7003 Q7004 R7001 R7002 R7003 R7004 R7005 R7008 R7009 R7010 R7013 R7014 R7015 R7016 R7017 R7018 R7019 R7020 R7021 R7022 R7023 R7024 R7025 R7032 R7033 R7034 R7035 R7037 R7038 R7039 R7040 R7041 R7042 R7043 R7044 R7045 R7046 R7047 R7...

Page 281: ...9 CL7040 CL7041 CL7042 CL7043 CL7044 CL7045 CL7046 CL7047 CL7048 CL7049 CL7050 CL7051 CL7052 CL7053 CL7054 CL7055 L7003 L7009 L7010 L7011 L7012 L7013 L7014 L7015 L7023 L7024 L7025 Q7001 Q7002 R7006 R7007 R7011 R7012 R7026 R7027 R7028 R7029 R7030 R7031 R7036 R7054 R7058 R7059 R7060 R7064 R7065 R7066 R7067 R7068 R7069 R7070 R7071 R7072 R7073 R7074 R7075 R7076 R7077 R7078 R7084 R7085 R7086 R7088 R708...

Page 282: ...27 C2 R8028 C2 R8029 C2 R8030 A3 R8031 A2 R8032 C1 R8033 C1 R8034 C1 R8035 C1 R8036 B2 R8037 B2 R8038 D2 R8039 D2 R8040 D2 R8041 D2 R8042 D2 R8043 D2 R8044 D2 R8045 C2 R8046 A3 R8047 D2 R8048 D2 R8049 D2 R8050 C2 R8051 A3 R8052 D2 R8053 C2 R8054 C2 R8055 C2 R8056 A4 R8057 A3 R8058 C2 R8059 C2 R8060 A3 R8061 A3 R8062 A3 R8063 A3 R8064 C2 R8065 A3 R8066 A4 R8067 A4 R8068 C3 R8069 C3 R8070 C3 R8071 C...

Page 283: ...8006 CL8007 CL8008 CL8009 CL8010 CL8011 CL8012 CL8013 CL8014 CL8015 CL8016 CL8017 CL8018 CL8019 CL8020 CL8021 CL8022 CL8023 CL8024 CL8025 CL8026 CL8027 CL8028 CL8029 CL8030 CL8031 CL8032 CL8033 CL8034 CL8035 CL8036 CL8037 CL8038 CL8039 CL8040 CL8041 CL8042 CL8043 CL8044 CL8045 CL8046 CL8047 CL8048 CL8049 CL8050 CL8051 CL8052 CL8053 CL8054 CL8055 A B C D 1 2 3 4 ...

Page 284: ...C8060 B3 C8061 B3 C8062 C3 C8063 C3 C8064 C3 C8065 C4 C8066 C4 C8067 B4 C8068 B3 C8069 B3 C8070 C3 C8071 C3 C8072 C3 C8073 C3 C8074 C3 C8075 C3 C8076 C3 C8077 B3 C8078 B3 C8079 B3 C8080 B3 C8081 B3 C8082 C4 C8083 C4 C8084 B4 C8085 C4 C8086 C4 C8088 B4 C8089 C4 C8090 C4 C8091 C4 C8092 D3 C8093 D3 C8094 D3 C8095 D3 C8096 D3 C8097 D3 C8098 D3 C8099 D3 C8100 D3 C8101 D3 C8102 B3 CL8001 A2 CL8002 A2 CL...

Page 285: ...CL8018 CL8019 CL8020 CL8021 CL8022 CL8023 CL8024 CL8025 CL8026 CL8027 CL8028 CL8029 CL8030 CL8031 CL8032 CL8033 CL8034 CL8035 CL8036 CL8037 CL8038 CL8039 CL8040 CL8041 CL8042 CL8043 CL8044 CL8045 CL8046 CL8047 CL8048 CL8049 CL8050 CL8051 CL8052 CL8053 CL8054 CL8055 A B C D 1 2 3 4 SD 50 BRBK 302 SUFFIX 11 BRBK 302 SD 50 SUFFIX 11 SD 50 B SIDE SUFFIX 11 BRBK 302 ...

Page 286: ... D2 C9070 D2 C9071 D2 CL9001 C2 CL9002 C2 CL9003 A2 CL9004 B2 CL9005 B2 CL9006 B2 CL9007 B2 CL9009 A2 CL9010 B2 CL9011 B2 CL9012 B2 CL9013 B2 CL9014 B2 CL9015 B2 CL9016 A2 CL9017 A2 CL9018 A2 CL9019 B2 CL9020 B2 CL9021 B2 CL9022 A2 CL9023 A2 CL9024 A2 CL9025 A2 CL9026 B2 CL9027 B2 CL9028 B2 CL9029 A2 CL9030 A2 CL9031 B2 CL9032 B2 CL9033 B2 CL9034 B2 CL9035 A2 CL9036 B2 CL9037 B2 CL9038 A2 CL9039 B...

Page 287: ...9071 CL9001 CL9002 CL9003 CL9004 CL9005 CL9006 CL9007 CL9009 CL9010 CL9011 CL9012 CL9013 CL9014 CL9015 CL9016 CL9017 CL9018 CL9019 CL9020 CL9021 CL9022 CL9023 CL9024 CL9025 CL9026 CL9027 CL9028 CL9029 CL9030 CL9031 CL9032 CL9033 CL9034 CL9035 CL9036 CL9037 CL9038 CL9039 CL9040 L9005 L9006 L9007 L9008 Q9001 Q9002 Q9005 R9001 R9002 R9003 R9006 R9007 R9024 R9025 R9026 R9027 R9028 R9029 R9051 R9054 R9...

Page 288: ... C228 D1 C229 D1 C230 D1 C231 D1 C232 D1 C233 D3 C234 D2 C235 D1 C236 D2 C237 D2 C238 C3 C239 C3 C301 D4 C302 C4 C303 C3 C304 D3 C305 C3 C306 C3 C307 D3 C308 D3 C309 D3 C310 D3 C311 D3 C312 C3 C313 C3 C314 D3 C315 C3 C316 D4 C317 D4 C318 C3 C319 D4 C320 D4 C401 C3 C402 C3 C403 D3 C404 D2 C405 D2 C406 D2 C407 D3 C408 D3 C409 D3 C410 D3 C411 C1 C412 C3 C413 C3 C414 C1 C415 C3 C416 C1 C417 C3 C418 C2...

Page 289: ...04 RB608 RB609 RB610 R B611 R B612 RB613 RB614 S001 A B C D 1 2 3 4 R089 B2 R090 B2 R091 B2 R092 B2 R093 B2 R094 B2 R096 C4 R097 C4 R098 D4 R099 D4 R100 D4 R102 A2 R103 A2 R104 A2 R105 A2 R106 A2 R107 B3 R108 C4 R109 C4 R110 C4 R111 C4 R112 C4 R113 C4 R114 C4 R115 C4 R116 A2 R117 B2 R118 B2 R127 C3 R201 D4 R202 C3 R203 C3 R204 C3 R205 C3 R225 D1 R226 D2 R227 D2 R228 B2 R229 B2 R230 B2 R231 B2 R232...

Page 290: ......

Page 291: ...dication is 5 25 V so analog meters must have an accurate low voltage scale The Simpson 250 and Sanwa SH 63Trd are examples of a passive VOM that is suitable Nearly all battery operated digital multimeters that have a 20 V AC range are suitable See Fig A To Exposed Metal Parts on Set Fig A Using an AC voltmeter to check AC leakage AC voltmeter 5 25V Earth Ground 0 15 µF 1 5 kZ CAUTION The use of o...

Page 292: ...Printed in Japan Sony Corporation 2004 8 08 PSNC BCC Image Sensing Products Div 2004 BRC 300 UC BRC 300P CE BRU 300 UC BRU 300P CE E 9 955 470 02 ...

Reviews: