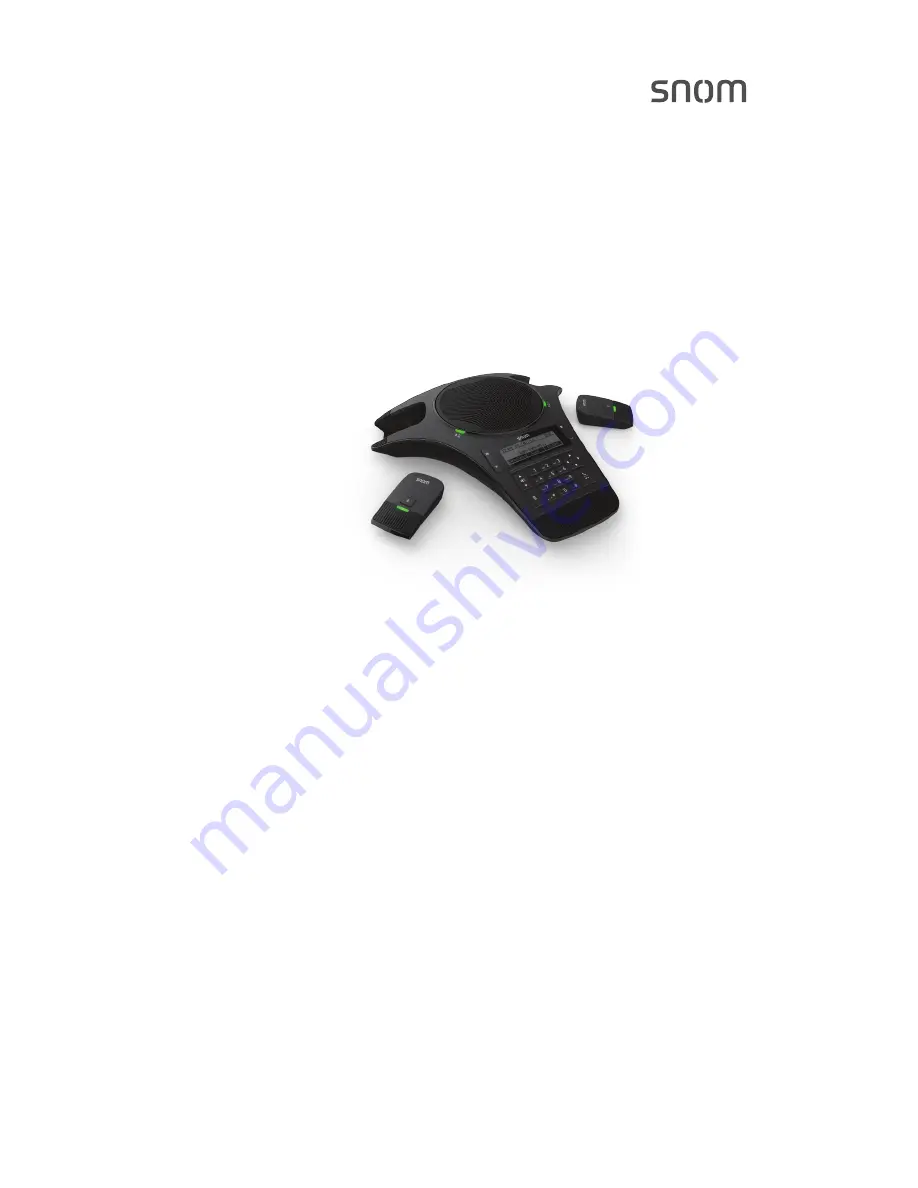
background image

C520-WiMi 

IP Conference Phone 

User Manual

© 2017 Snom Technology GmbH  


Snom Technology GmbH
Wittestr. 30 G
13509 Berlin, Deutschland
Tel.  

+49 30 39 83 3 0

Fax  

+49 30 39 83 31 11

offi

  [email protected]


Snom, Inc.
2603 Camino Ramon, Suite 422
San Ramon, CA  94583, USA
Tel.     +1 339 227 6160 
Fax   +1 339 227 6180
offi

  [email protected]

   
Snom Technology GmbH
The Courtyard, High Street
Ascot
Berkshire SL5 7HP, UK
Tel.    +44 161 348 7500
Fax    +44 169 348 7509
offi

  [email protected]

Snom Technology GmbH
6 Parc des fontenelles
78870 Bailly, France
Tel.   

+33 1 80 87 62 87

Fax    +33 1 80 87 62 88

offi

  [email protected]

Snom Technology GmbH
Via A. Lusardi 10
20122 Milano, Italia
Tel.  

+39 02 00611212

Fax  

+39 02 93661864

offi

  [email protected]                               

                                                                                                                                            
Snom Technology Ltd.
Rm. 828, 5F, No. 285, Sec. 4
Zhongxiao E. Rd., Da‘an Dist.
Taipei City 10692, Taiwan
Tel.  

+886 2 8751 1120

Fax  

+886 2 8751 1130

offi

  [email protected]

Your specialist retailer - Ihr Fachhändler -   
Votre distributeur - Su distribuidor - Il tuo rivenditore:

v1.01

Summary of Contents for C520-WiMi

Page 1: ...C520 WiMi IP Conference Phone User Manual ...

Page 2: ...sult your dealer or local power company 8 Do not allow anything to rest on the power cord Do not install this product where the cord may be walked on 9 Never push objects of any kind into this product through the slots in the base unit or wireless mic because they may touch dangerous voltage points or create a short circuit Never spill liquid of any kind on the product 10 To reduce the risk of ele...

Page 3: ...old the plug in place if it is plugged into a ceiling or cabinet outlet 17 For pluggable equipment the socket outlet shall be installed near the equipment and shall be easily accessible 18 CAUTION Use only the batteries indicated in this manual There may be a risk of explosion if a wrong type of battery is used Use only the supplied rechargeable battery or a replacement battery pack Do not dispose...

Page 4: ... a network conference 21 Retrieving messages 21 Redialing 22 Muting active calls 22 Temporarily silencing the ringer 23 Locating wireless microphones 23 Making and receiving calls on cell phone 24 Transferring Bluetooth calls from the C520 WiMi to your cell phone 25 Conference calls with a Bluetooth connected cell phone 25 Playing audio with a Bluetooth connected call phone 25 Using a Bluetooth he...

Page 5: ... 52 Call Settings 53 User Preferences 55 Program Dial Soft Keys 56 Speed Dial 57 Directory 58 Blacklist Deny List 61 User Password 61 Appendix 62 Battery 62 Troubleshooting 63 Precautions for users of implanted cardiac pacemakers 68 About wireless mics 68 Maintenance 69 Technical specifications 70 ...

Page 6: ...wing accessories or devices can be paired with the C520 WiMi Bluetooth equipped cell phones and or headsets A total of four Bluetooth devices can be paired but not all of them can be connected and active Two cell phones or one cell phone and one headset or one headset can be connected at a time Snom C52 SIP DECT Wireless Speakerphone up to three Wireless DECT headset You can use connected devices ...

Page 7: ...elow Save your sales receipt and original packaging in the event warranty service is necessary AC power cord Power adapter Battery door 2 User s manual Quick start guide x4 x4 Li ion Polymer batteries Phone line cord connector cable Adapter Connection box V C S 75 4 E TH E R N T C A B LE Quick installation guide 0 1 6 MNO 9 WXYZ 3 DEF 5 JKL 8 TUV 2 ABC 4 GHI 7 PQRS a A ...

Page 8: ...er end into a network switch or router 3 Plug the small end of the AC power cord into the power jack of the adapter and plug the large end into a wall outlet not controlled by a switch The supplied power adapter is designed for use with only the Conference phone It is not designed to power other network devices Do not connect the supplied power adapter to any other network devices through the supp...

Page 9: ...E fails the phone will use AC power as a backup Install the wireless mic battery 1 Plug the battery connector securely into the socket inside the battery compartment Insert the battery with the label THIS SIDE UP facing up into the battery compartment 2 Slide the battery door until it clicks into place 3 Place the wireless mic onto the charging cradle Note The status indicator on the wireless mic ...

Page 10: ... accounts or if you suspect a service disruption is at fault Operating range The maximum range between the conference phone and its wireless microphones and any connected speakerphones can vary depending on their locations and the layout of your office When a wireless microphone is out of range it must be returned to the charging cradle to be able to reconnect with the phone If there is an incomin...

Page 11: ...ne Status LED of Bluetooth headset Wireless microphone Status LED system status 0 1 6 MNO 9 WXYZ 3 DEF 5 JKL 8 TUV 2 ABC 4 GHI 7 PQRS a A Increase Decrease Volume Mute unmute Accept terminate calls Navigation key Hold resume call Menu Cancel terminate Select confirm Context sensitive tabs labels for corresponding function keys 0 1 6 MNO 9 WXYZ 3 DEF 5 JKL 8 TUV 2 ABC 4 GHI 7 PQRS a A Context sensi...

Page 12: ...onebook or call log Press left or right edge to move the cursor left or right respectively while entering names or numbers Press left or right edge to view additional function key labels and view multiple active calls 7 Call key Press to make answer or end a call 8 Dial pad keys Press to enter numbers or characters While editing names press 0 to add a space 9 Front microphone 10 Mute key During a ...

Page 13: ...o put the call on hold and to unhold the held call When in a menu press to return to the previous menu 14 Cell 1 Bluetooth status LED Indicates the status of a Bluetooth connected device other than a headset See Status indicators overview on page 10 Base unit overview rear Getting Started a RJ45 jack With PoE To network Without PoE To adapter Base unit overview front continued ...

Page 14: ...crophone of the conference phone during a call 2 Status LED Indicates the system status See Status indicators overview on page 10 3 MUTE ALL During a call press to mute or end mute all microphones in the system 4 Battery door 5 Charging contacts 1 2 3 4 5 Getting Started ...

Page 15: ...e Bluetooth headset is connected Fast flash Incoming call on device 1 Incoming call on device 2 Slow flash Device 1 is on hold Device 2 is on hold LEDs flash alternatingly Phone is in discovery mode Phone is in discovery mode Status LED on the wireless microphone Yellow blinking 3x When phone is starting to power up Red Charging on the cradle phone in idle mode Yellow flashing Battery is low Red g...

Page 16: ... on page 32 Device 2 to start a call using a second connected Bluetooth device which can be a cell phone The soft key will appear only when a second Bluetooth device is connected Instead of Device 2 it will show the name of the device as it appears on the Device list See Using the Bluetooth menu on page 32 Connect to view the Device list and to connect the C520 WiMi to a Bluetooth device Call Log ...

Page 17: ...cons indicate the call s status Icon Status Speakerphone the speakerphone is active Headset audio is being routed to a Bluetooth or DECT headset 1 2 Call counter more than one call is active More than one call is active Press or to view another call Getting Started ...

Page 18: ...n Features is highlighted you can press or 1 to view the Features submenu 4 Press or an appropriate soft key to save changes 5 Press to cancel an operation exit the menu display or return to the idle screen Main menu items 1 Features see page 27 2 Status see page 63 3 User settings see page 42 4 Admin settings available only to your system administrator Conference phone operation ...

Page 19: ...ber In letter mode press a A or to enter symbols For example press a A twice for the symbol a A Press once to enter the dot twice to enter three times to enter an asterisk Press one to 11 times to enter parentheses square brackets curly braces angle brackets the slash the backslash and the pound hash sign Press or and Redial to view a list of previously dialed numbers 3 Press Dial or if the number...

Page 20: ...ctive call screen appears Note that the default active call screen soft keys are shown above Your phone s soft keys are programmable and may differ from what is shown here Using a wireless microphone during a call 1 Take the wireless microphone from the phone s charging cradle and place it on the table near the intended speaker s 2 Speak towards the microphone For best performance the person speak...

Page 21: ...s feature to hold one call while you access another The phone also puts calls on hold automatically when you answer another call by pressing the Answer key transfer a call or create a conference During a call press The On hold screen appears The status LED flashes red slowly From the On hold screen you can press End to end the call New to dial a new call Resume to take the call off hold Transfer t...

Page 22: ...her the third party is available and or picking up the call When a call is ringing on your phone you can transfer it to a third party without answering it first blind transfer only either by entering the number yourself or by selecting a number from the directory or call history the call history stores the numbers for missed calls received calls and dialed calls Transferring ringing calls Using ma...

Page 23: ... scroll to 4 Call History and press to access the call history 5 Select the Call History folder or Directory you want to access 6 Select the number with or 7 If necessary press or until Dial appears and then press Dial The Call Forwarded screen appears Your phone returns to idle mode if you have no other active calls Transferring active calls Attended transfer 1 During a call press Transfer The ca...

Page 24: ...talk to the caller to notify them of the transfer then press Transf to transfer the call The Call transferred screen appears and your phone returns to idle mode Cancel on the transfer setup screen The active call screen reappears End when the second call is active You will hang up on the second call Split when the second call is active You will stay connected to the second call Your first call rem...

Page 25: ...l is automatically put on hold and the conference setup screen appears 2 Dial the number for the other party you want to join your conference You can also use a number from a list such as the Directory or Call History 3 When the second call is established press Conf The conference begins and the conference screen appears Canceling the conference before dialing the second call Press Cancel on the c...

Page 26: ... on hold Bridge to combine the first and second calls and return your phone to idle mode Setting up a network conference A network conference is hosted by your service provider and allows multiple parties to join a conference A Network Conference works in a similar way to the regular conference described above except that the Split and Bridge functions will not be available In addition the soft ke...

Page 27: ... the Message menu highlight the desired line and then press Redialing 1 From the idle screen press Redial The last dialed call is shown on the display with time and date and the name of the party called if available or Unknown if it is not 2 Press q or p on the navigation key to view older dialed calls 3 When the desired call is onscreen press to dial the number Muting active calls The mute functi...

Page 28: ...base unit 1 Press press 2 ABC to open the Status menu directly or highlight STATUS and select by pressing 2 With the Status menu on the display press 4 GHI to open the Wireless microphone menu directly or scroll down and highlight Wireless microphone then press 3 With the Wireless microphone menu on the display press Locate The display of the phone shows the message Wireless microphones will ring ...

Page 29: ...ce as it appears on the Device list 2 Use the keypad to enter the phone number you want to dial 3 Press Dial You can also enter the number first and then press Device 1 or Device 2 to dial it with the cell phone You may need to press or to put the soft keys onscreen Answering calls to the cell phone When a cell phone is connected to the C520 WiMi incoming calls to the cell phone can be answered on...

Page 30: ...unt caller For more information about creating conference calls see Making a conference call on page 20 Playing audio with a Bluetooth connected call phone When a cell phone is connected to the C520 WiMi any audio from the cell phone is routed through the C520 WiMi and connected expansion speakerphone s This enables you to play music podcasts audio from videos and Internet streaming media over the...

Page 31: ...both SIP account calls and cell phone calls To route audio to a BT headset a SIP call must be established first at the C520 WiMi You can then route the SIP call using the Device 2 soft key or using the key on the Bluetooth headset Transferring conference phone audio to a Bluetooth headset 1 During an active SIP account call press or to view the Device 2 soft key 2 Press Device 2 Audio is transferr...

Page 32: ...e Features menu appears The Features menu includes the following items Setting See page Description 1 Call 28 Managing how your phone handles incoming calls 2 Bluetooth 35 Managing Bluetooth connected devices 3 Directory 35 Storing contact information and call contacts 4 Call history 38 Viewing the call lists All calls Missed calls Received calls Dialed calls 5 Message 21 Accessing your voicemail ...

Page 33: ...lls depending on the setting You can enable the following types of call forwarding Call forward always incoming calls are forwarded immediately and the phone does not ring Call forward busy incoming calls are forwarded if all your available lines are busy Call forward no ans incoming calls are forwarded after the no answer delay expires 3 Block anonymous 30 Enables the phone to reject incoming cal...

Page 34: ... Disturb On or Off 5 Press Save When Do Not Disturb is on appears on the idle screen Setting Call forward 1 From the Call menu press to highlight Call forward 2 Press The Call forward menu appears 3 Highlight the line for which you want to configure call forward settings and then press 4 On the next screen press to highlight the desired option Call forward always Call forward busy Call forward no ...

Page 35: ...nymous callers 1 From the Call menu press to highlight Block anonymous 2 Press The Block anonymous menu appears 3 Highlight the desired line and then press t or u to turn anonymous call blocking On or Off for that line 4 Press Save Dialing as an anonymous caller hiding your caller ID 1 From the Call menu press to highlight Dial as anonymous 2 Press The Dial as anonymous menu appears 3 Highlight th...

Page 36: ...alerts 1 From the Call menu press to highlight Call waiting 2 Press The Call waiting menu appears 3 Press or to turn call waiting alerts on Yes or off No 4 Press Save When Show alert is on and you are on a call incoming calls are displayed on the screen When Show alert is off Incoming calls are rejected and no notification appears on the screen Rejected incoming calls are logged as missed calls Se...

Page 37: ...evices are added the C520 WiMi can connect to a device 3 Change PIN 34 Change the PIN that needs to be entered on a cell phone while it is being added to the C520 WiMi device list Using the Bluetooth menu 1 When the phone is idle press 2 If necessary press or to highlight Features and then press 3 Press to highlight Bluetooth and then press The Bluetooth menu appears Connecting a registered device...

Page 38: ...ve device from device list appears Note The device must be disconnected before the Delete soft key appears 3 Press Yes The message Device removed appears If you want to use this device with the C520 WiMi in the future use the Add device menu to add it Renaming a device on the Device list 1 On the Device list highlight the device you want to rename This name will appear on the Device list and on th...

Page 39: ...menu highlight Add device list and then press The Add device menu appears 2 Highlight Add headset and then press 3 Follow the instructions on the C520 WiMi screen The CELL 1 and CELL 2 LEDs flash on the C520 WiMi After the headset connects the CELL 2 HEADSET LED turns on Note Once you have added a device the device stays paired with the C520 WiMi Even when your Bluetooth device is taken away or tu...

Page 40: ...ng all your available directories and the blacklist Any directories other than Local are server based and will vary with your installation You can edit the Local directory and the blacklist 4 With Local highlighted press The Local directory appears showing the first entry sorted alphabetically by first name 5 Press p or q to view other entries The following soft keys are available when viewing a d...

Page 41: ...umbers Press ABC to switch between entering upper case letters lower case letters and numbers Press Backspc to delete incorrect characters After completing a line press to move to the next line 4 When you have entered the desired information and selected the ringtone you want to use for this contact press Save Editing a directory entry 1 When viewing the desired directory entry press or until the ...

Page 42: ...Search The phone searches for the first name or last name beginning with the letter you entered The first entry found appears If more than one entry was found press or to view other entries Deleting a directory entry 1 Press or or Search see Searching directory entries above to select the directory entry 2 Press or until the Delete soft key appears 3 Press Delete 4 When the confirmation screen app...

Page 43: ...scroll with or to highlight Call history and press The Call history screen appears 4 Press the corresponding number key for all missed received or dialed calls or scroll with to highlight the desired call history folder and press View to see call history entries in the respective list The first entry appears If the list is empty the message history is empty preceded by the respective call list app...

Page 44: ...oft key to dial the number You can use this feature when making a call forwarding a call transferring a call and setting up a conference call Adding a call history entry to the directory 1 While viewing the desired entry press or until the Save soft key appears 2 Press Save 3 On the Save to menu select the location to which you want to save the entry To save the entry to your directory highlight L...

Page 45: ... dial menu allows you to enter up to 10 numbers that you dial frequently To dial a speed dial number press and hold the dial pad key that matches the speed dial entry number for entry 10 press and hold 0 You can also enter speed dial numbers using the WebUI See Speed Dial on page 57 Entering speed dial numbers To add a speed dial entry 1 When the phone is idle press 2 With Features highlighted pre...

Page 46: ... Sending a Multicast Page Your phone supports multicast paging You can send a page to a paging zone that has been set up by your system administrator An incoming page may interrupt any active calls you are on depending on how your system administrator has configured the paging function To send a multicast page 1 When the phone is idle press 2 With Features highlighted press 3 Press to highlight Mu...

Page 47: ... scroll with to highlight User settings and press 3 Press the number key 1 6 on the keypad to open each respective submenu Alternatively scroll with to highlight the setting and press The user settings are Setting See page Options 1 Preferences 43 Language Date Time Clock time Clock date Time zone DST NTP server Set manually Restart phone 2 Display 45 Contrast Level 1 7 Backlight ON Off Low Medium...

Page 48: ...n the Language submenu by pressing 1 or The Language menu appears 2 Scroll with or to highlight another language 3 Press Setting date and time preferences From the Preferences menu open the Date Time submenu by pressing 2 ABC Alternatively scroll with or to highlight the setting and press The Date Time menu appears Note If the Network Time Protocol NTP server is enabled you cannot manually set the...

Page 49: ...r 1 From the Date Time menu press to highlight NTP server 2 Press to select Enabled or Disabled 3 Press Save Note If the NTP server is disabled you must manually set the time and date This setting is valid only if the system administrator has already configured the Network Time settings Manually setting the Year Month Day Hour and Minute 1 From the Date Time menu press to highlight Set manually 2 ...

Page 50: ...with to highlight the submenu and press or The Display menu appears Setting the contrast level 1 From the Display menu ensure that Contrast is highlighted 2 Press or to set the contrast level from 1 to 7 4 is the default setting 3 Press Save Setting the backlight level for the active phone 1 From the Display menu press to highlight Backlight ON 2 Press or to select Off Low Medium or High High is t...

Page 51: ...on and off Note To adjust the ringer volume press or while the phone is idle Using the Audio menu From the User settings menu open the Audio submenu by pressing 3 DEF Alternatively scroll with to highlight the setting and press Selecting a ringer tone for each line 1 From the Audio menu open the Ringer tone screen by pressing 1 or 2 Press to highlight the line for which to select a ringer tone and...

Page 52: ...menu open the Ringer tone screen by pressing 2 ABC Alternatively scroll with to highlight the setting and press The Key tone menu appears 2 Press or to turn key tones on or off When off key presses are silent 3 Press Save Configuring the Phone ...

Page 53: ...ress 2 Deregister and confirm by pressing Yes to delete any previous registrations If sucessful the display will say Wireless microphones are deregistered 6 Press 1 Register to register one microphone The display will say Registering If successful you will hear a confirmation tone and the display will say Registration succeeded The status indicator of the registered microphone switches to a steady...

Page 54: ... plug the adapter into the wall outlet The LEDs on the C52 flash orange slowly 2 Press the white registration button underneath the battery compartment for five about seconds until its LEDs are flashing red and green alternatingly 3 On the C520 WiMi Conference Phone press 4 In the Main Menu press 3 DEF or highlight 3 User settings and press 5 In the User settings menu press 6 MNO or highlight 6 Wi...

Page 55: ...wireless microphones The LEDs turn off and the red power LED comes on Mute audio Press The audio is muted on the phone as well as all connected speakerphones and wireless microphones you cannot be heard by the other party The LEDs on all devices show a steady red light Press again to unmute the audio on all devices as indicated by the green LEDs Ringer When a call is ringing on the C520 WiMi it ri...

Page 56: ...essing the WebUI 1 Ensure that your computer is connected to the same network as your phone 2 Find the IP address of your phone a When the phone is idle press b Press 2 ABC or scroll q to highlight Status and press The Status menu appears c In the Status menu press 1 or The Network screen with the IP address appears 3 On your computer open an Internet browser Depending on your browser some of the ...

Page 57: ...our security the WebUI times out after 10 minutes so if it is idle for that time you must log on again The remaining procedures in this section assume that you have already logged on to the WebUI Status The Status page shows General information about your phone including model MAC address and firmware version Account Status information about your SIP account registration Network information regard...

Page 58: ...rward using the phone menu See Using the Call menu on page 28 When you have finished changing settings on this page click Save to save them General Call Settings Setting Description Anonymous Call Reject Select to block incoming calls that have no caller ID Enable Anonymous Call Select to make outgoing calls that remove your own caller ID information Do Not Disturb Settings Setting Description Ran...

Page 59: ...ect to enable call forwarding for calls when you are on another call on that account Target Number Enter a number to which calls will be forwarded when the line is busy Enable Call Forward No Answer Select to enable call forwarding for unanswered calls on that account Target Number Enter a number to which unanswered calls will be forwarded Delay Select the number of rings before unanswered calls a...

Page 60: ...e that appears on the WebUI Any language supported by your phone For example English French Spanish etc English Phone Language Sets the language that appears on your phone Any language supported by your phone For example English French Spanish etc English Backlight Timer Sets how long the screen backlight stays on after the last button press 10 to 60 seconds 30 seconds Ringer Volume Sets the ringe...

Page 61: ...ting On Shows additional incoming calls on the screen n a Select to enable Enabled Enable Call Waiting Tone Enables or disables Call Waiting Tone n a Select to enable Enabled Tone Interval secs Sets the interval for the call waiting tone 10 60 seconds 30 seconds Program Dial Soft Keys The Program Dial feature allows you to dial numbers with a single press of a soft key On the Program Dial pages yo...

Page 62: ... speed dial keys click SYSTEM in the WebUI header and then click Speed Dial in the sidebar On the Speed Dial page you can enter up to 10 numbers that you dial frequently To dial a speed dial number press and hold the dial pad key that matches the speed dial entry number for entry 10 press 0 For each speed dial number you enter you must assign the account on which the number will be dialed out You ...

Page 63: ...cal directory or import a local directory file The export function lets you back up your contacts to your computer Phone numbers appear as links If your service provider s click to dial feature is enabled you can dial a number by clicking its link The Local Directory lists entries across several pages Click Next First Last or a page number to view the desired page of entries Note You can also use ...

Page 64: ...Entry The Create Local Directory Entry page appears 2 Enter the required information At minimum a first and last name are required Setting Description Range Default First Name Enter the appropriate names in these fields n a n a Last Name Ringer Tone Sets a unique ringer tone for calls from this directory entry Auto Tone 1 10 Auto Account Sets the account used when you dial this directory entry Def...

Page 65: ...t or delete entries as desired Note Directory files are xml files containing contacts and contact information For more information about creating or editing a directory file consult your system administrator Importing a local directory file 1 Click Choose File 2 In the file window that opens navigate to the directory file 3 Click the file and then click Open 4 On the WebUI click Import Exporting L...

Page 66: ... Directory on page 58 To view the Blacklist click CONTACTS in the WebUI header and then click Blacklist in the sidebar User Password On the User Password page you can change the password you use to log on to the WebUI By changing your password from the default password user you can prevent others from logging on to the WebUI remotely and changing your settings To view the User Password page click ...

Page 67: ...pen or mutilate the batteries Released electrolyte is corrosive and may cause burns or injury to the eyes or skin The electrolyte may be toxic if swallowed Exercise care in handling batteries in order not to create a short circuit with conductive materials Charge the batteries provided with or identified for use with this product only in accordance with the instructions and limitations specified i...

Page 68: ...age 3 the LCD display will show the display name and account number extension of the base Press to hear the dial tone If any of this does not happen please try the following Make sure the DC power cable is securely plugged into the phone and the power adapter Make sure the AC power cord is securely plugged into the power adapter and a wall outlet not controlled by a wall switch I cannot dial out T...

Page 69: ...ED on the wireless microphone turns green within 2 seconds when a call has been established on the conference phone If the LED remains off and inactive please follow the steps below 1 Remove the battery from battery compartment 2 Insert the battery again close the battery door and return the wireless microphone to the charging cradle 3 Make sure the wireless microphone is placed in the charging cr...

Page 70: ... may be defective Please contact customer service for assistance Note If the wireless microphones are not in the charging cradles when the phone is powered up they may need some time to connect to the phone Please allow at least one minute for the microphones and the phone to synchronize Note If your have more than one conference phone in the office use the locate function 2 ABC Status 4 GHI Wirel...

Page 71: ...phone is placed in the charging cradle correctly when charging Remove and install the battery again and use it until the battery is fully depleted and then charge the wireless microphone in the charging cradle for 8 hours If the above measures do not solve the problem replace the battery The status indicator on the wireless mic does not turn orange when in charging cradle The wireless mic might be...

Page 72: ...e phone It may be out of range Appliances plugged into the same circuit as the base unit can cause interference Try moving the appliance or base unit to another outlet I have accidentally set my language to Spanish or French and I don t know how to change it back to English When the phone is not in use or on a call press 3 User Settings 1 Preferences 1 Language 1 English ...

Page 73: ...he wireless microphone For this reason you should not think of conference phone conversations as being as private as those on corded telephones Electrical power The base unit of this conference phone must be connected to a working electrical outlet The electrical outlet should not be controlled by a wall switch Calls cannot be made from the conference phone if the base unit is unplugged switched o...

Page 74: ...als to protect the conference phone if you ever need to ship it Avoid water The conference phone can be damaged if it gets wet Do not use the wireless mic outdoors in the rain or handle it with wet hands Do not install the base unit near a sink bathtub or shower Electrical storms Electrical storms can sometimes cause power surges harmful to electronic equipment For your own safety take caution whe...

Page 75: ...istances Optimal distance between the base unit wireless mic and the participant 60 cm Minimum distance between each wireless mic 30 cm Power requirements Wireless mic Ni MH Battery Pack 2 4V 400mAH rechargeable battery Base unit adapter Input 100 240V AC 50 60Hz Output 9V DC 1500mA Memory Local directory 200 memory locations up to 28 digits and 15 characters Call log 200 memory locations up to 16...

Page 76: ...161 348 7500 Fax 44 169 348 7509 office uk snom com Snom Technology GmbH 6 Parc des fontenelles 78870 Bailly France Tel 33 1 80 87 62 87 Fax 33 1 80 87 62 88 office fr snom com Snom Technology GmbH Via A Lusardi 10 20122 Milano Italia Tel 39 02 00611212 Fax 39 02 93661864 office it snom com Snom Technology Ltd Rm 828 5F No 285 Sec 4 Zhongxiao E Rd Da an Dist Taipei City 10692 Taiwan Tel 886 2 8751...

Reviews: